
The Zutta Tenma is a small Tabune, or rice field boat, from Toyama prefecture. My model is based on a drawing that I got from Douglas Brooks, which is very similar to one he used when he built one in 2016.
Todate/Transom
The todate or transom on my drawing is in two parts. I could have, made it from a single piece, but I chose to make it in two pieces. Unfortunately, the drawing doesn’t show how these are fastened together. To keep the model simple, I’m assuming that nails of some type were driven down from the top through the short piece of the todate. This is then covered by a board, the name of which I don’t know.
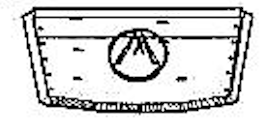
On the face of the todate is a carved symbol of the owner. I don’t know a whole lot about these, but was told it was a yago. That doesn’t make a lot of sense to me, as I thought a yago was a house name. The above is a from the plans I’m using. It shows what appears to be twin mountain peaks inscribed in a circle – clearly not a name. The other plan shows what looks like a Chinese character. It looks similar to this one, 又, but it doesn’t make much sense as it is the word mata, which means “also”.

While I’m still not sure about the name issue, I decided to make up a symbol for this model. I just made something up that I thought looked nice, but I’m not sure if it’s one that is already used by some daimyo. So, my apologies to readers and to any daimyo or farmer that I might be offending. The symbol is actually the character for “person”, which I’ve inscribed in a circle.
I used my computer to create the image using Silhouette Studio software, which I used with my relatively new vinyl cutter. I outlined the design and cut a piece of vinyl, which I could then use as a carving template. Removing the parts of the vinyl that cover the area to be carved, I just started digging at the exposed wood.
The result was pretty decent, I’d say. Anyway, it’s recognizable, and I’m perfectly happy with it.

Again, it’s particularly important on this boat to make the todate overly wide. This is because it sits behind the ends of the tana, or hull planks.
Tana/Hull Planks
For the tana, or hull planks, I started with a card stock template that I test fit to the hull. This gave me the approximate size of the tana, which I simply traced onto the card stock. This usually requires taping the card into place and using a pencil to outline where it contacts the hull bottom, transom, and bow. Afterwards, I cut the template to size and cut a notch near the omote, or bow end, where the extention pieces will fit.

Cardboard template that I test fit to get the correct size and shape of the tana or hull planks.
Using the template, I then cut the tana to approximate size. It’s always necessary to cut these a little oversized, so they can then be trimmed down after fitting into place. In this case, one end has to fit nicely against the todate, so that end has to be cut correctly, the other edges are the ones that will be trimmed down.

The tana with the extension pieces already fit into place.

As you can see from the posted photo above, I cut the plank end for the transom. However, I cut the bottom extension a little on the narrow side. I really should have made the extension a little wider, to give myself more for error. As it was, this worked okay, but it was close. Had they been wider, I would have been able to create a better fit than I did.
With the tana cut to rough shape, I could then simply glue them into place, but it was necessary to cut the funabari, or beam, and hold it into place so as to keep the proper shape of the planking. Without doing this, the run of the hull planking would have been way too narrow at the top edge. I cut the beam overly long, but cut notches in it the proper width. I then used rubber bands wrapped over the ends and under the hull to hold into into place while glueing the planks into place.
When the glue was dry, I could cut away the excess wood from the hull planks and the transom. For the transom, this required a lot of sanding down using a sanding block. For the hull planks, I mostly trimmed away the excess wood using a miniature block plane.
The most difficult part was bending the wood at the tip of the bow. The main problem came about because I had pre-shaped the rounded end of the bow planks. This created some extra curvature that the hull planks needed to be bent to conform to. As I mentioned before, it would have been best if I’d left the rounding of the bow until after the hull planking was all in place.

Model shown with the funabari still not permanently fixed into place. and no nail mortises in the hull planks yet. The figure is to scale for showing the model at a local ship model meeting.
With the hull planks done and the excess wood trimmed away, the only thing left was to attach the board across the top of the transom and to fix and give final shape to the single funabari or beam. This beam is rounded off toward the ends, so that it takes on a bit of an arch-like appearance. I don’t feel I quite got the shape correct, but it’s close.
With that, the structure of the boat is complete. The only remaining task is to cut the mortises for the hull planks and to simulate the wire nails used to fasten the various other parts to the hull.
The mortises are small on this boat, as the heads on the nails weren’t very large on the real boat. The real nail heads are only about 1/2″ wide, that’s about 1.3mm on the model, which is perfect for my smallest chisels, which are 1.5mm wide. I have a second chisel of the same size that I ground down, so it’s only about 1mm wide, which is just right for the sides of the mortise.

One of the smaller nails used in traditional Japanese boatbuilding. It’s about 12cm long and 1.3 cm at its widest.


On my Hozugawa Ayubune model, I simulated the nail heads with black construction paper. I now feel that the appearance is too stark. You can barely see the nail heads in the older boats. In the photos of my model, you can see that the mortises filled with wood dust.
In the photo below of an actual Zutta Tenma, you can’t really see the nail heads very well. So, I think I’m going to leave the mortises as is on my model.

Close up of one of the existing Zutta Tenma in the Himi city museum. Photo courtesy of Douglas Brooks.
Below, you can see some of the wire nail fastenings. For these, I had some tiny copper nails, but the heads were way too big, so I just clipped them off. The shafts were on the small side, as the cross-section would represent the nail heads, but would be useable.
I found that Liver of Sulfur works really well to blacken copper, and the finish seems pretty durable. So, I filed the nail ends flat and treated them with this smelly stuff. I used some clear coat sealer that is left over from an old metal blackening kit I’ve had for a few years. I don’t know what the stuff is, but it’s worked and I still have some, so I used it.


Even with the wire nail details, the completed model is very simple looking. It actually shows most of the complicated detail when upside down.


I don’t know if I like displaying the boat upside down, but it does show the most detail. In any case, I decided it needed a couple accessories, so I made a sao, or pole for pushing the boat along. I also make a covered oke (oh-keh), or bucket, with a wooden handle. Something flat like this might be used to lunch?

It’s not a deep bucket. But, when working fields, it might keep whatever is inside from getting wet, dirty, or muddy. A taller, narrower bucket would be used for drinking water.
The sao is actually a bamboo skewer that I scored at pretty regular segments along its length. To make these stand out, I rubbed a bit of pencil lead into the cuts. I also filed down the wood a little bit in between these cuts to give it a little shape.


Still a little light in detail, I’m considering making some kind of old farming tool to display with the model. But, I’m still looking for details on that. I want a tool used in rice fields, which should be different from tools used in other kinds of farming. Yet another thing to research.
But, the model is done, and I will show it at my next wasen models display. No timeframe set for that yet, but possibly in the early spring.
As I mentioned before, you can read more about Douglas Brooks’s 2016 Zutta Tenma project on his blog here: http://blog.douglasbrooksboatbuilding.com/2016/02/the-rice-field-boat.html
Ω
