
The next stage of the build is the hull planking.
On a traditional Japanese boat, there are basically only 4 planks, 2 on each side, with the upper planks making a nearly vertical surface. The kit refers to the lower planks as カジキ or Kajiki and the upper planks as タナ or Tana. The term Kajiki is the same term used for the lower planking on the Bekabune as described in Brooks’ book and blog. And in fact, the Tosa term for the upper plank, Tana, is related to that of the Bekabune, which is the compound word Uwa-Tana, but run together the “T” becomes a “D” sound and becomes Uwadana.
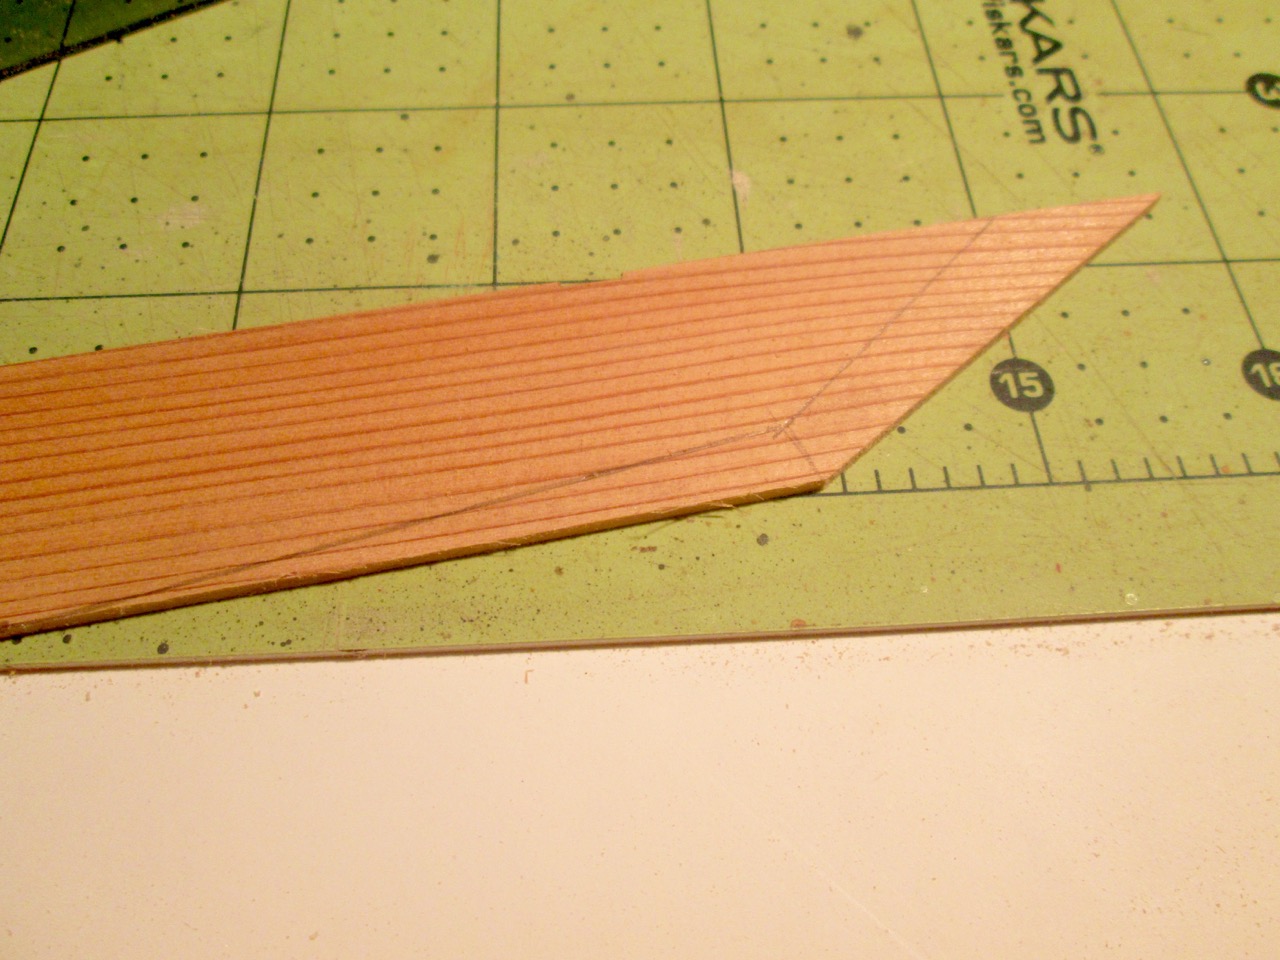
Diagrams in the kit show that the leading edge of the lower planks need to be tapered. There are measurements shown in the instructions, but the exactly shape of the tapered area is not precisely defined. It ended up being a matter of getting something to look like the shape shown in the diagram – a shape that reminds me of the tip of a samurai sword.
After tapering the leading edge of the planks, it’s then a matter of fitting the planks on. The laser-cut planks have square openings that line up with square tabs that protrude from the central beams on the model. These are actually located slightly aft of center, but they are at the widest point of the boat.
I found that mating the planks to those notches was a pretty tight fit, but it was good that the fit was snug, as this helps hold things together while gluing. I glued the planks to these notched frames first and let that dry, which seems to be how the instructions want you to do it. Next, the planks were fit to the transom and glued only at the transom.

From what I could tell, it seemed that the top of the planks should be kept low against the frames, so that the planks ended up sticking up above the frames by only a small amount at the stern. On the forward half of the boat, the planks seemed to mostly line up with the top of the frames.
The planks were then glued to the stem, which is called the Miyoshi (mee-yoh-shee). The planks had to be positioned so that the very forward edges were flush with or just barely past the stem. After the glue dried, the rest of the planking was glued to the bottom and the frames using medium CA and the applicator tips supplied in the kit. Those, by the way, were a perfect fit for ZAP brand glue bottles.

I found it a bit of a struggle to hold the boat while trying to glue the lower planks into place. The strong-back in the center is only glued in at the top and bottom of the transom and the stem, so it’s very flexy. It took a while to learn to hold the whole thing while bending the planks and gluing them into place.

I should also mention that the kit never has you soak any of the planking. It’s long and thin enough that it flexes pretty easily. I suppose it might have made sense, as a ship modeler, to try to pre-bend the planks. But, it certainly wasn’t necessary and I managed without soaking or pre-bending the planks.

I left the whole thing to dry and then came back and sanded the upper edges of the lower planks. When dealing with the upper planks, the will overlap the edges of the lower planks, and to make a good bonding surface, or watertight surface in the case of the real boat, the outer edge at the top of the lower plank has to be sanded roughly vertical.

On the real boat, iron nails would be drive into the bottom edge of the upper plank and into this flat edge of the lower plank. Of course, there’s more to it than that, but that’s the basic idea.
The model is just about ready to receive the upper planks or the Uwadana.
