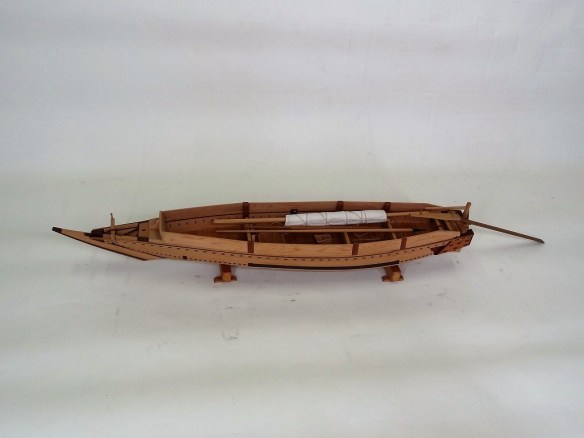
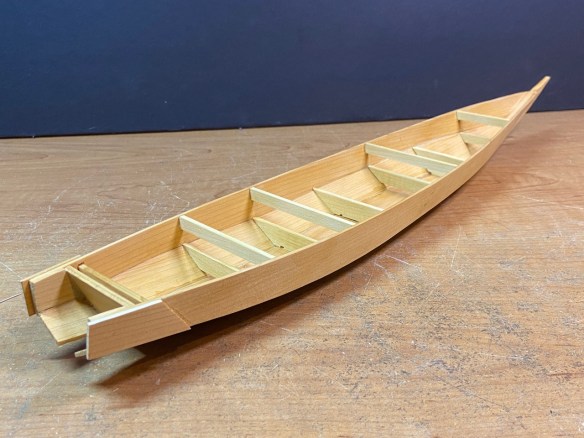
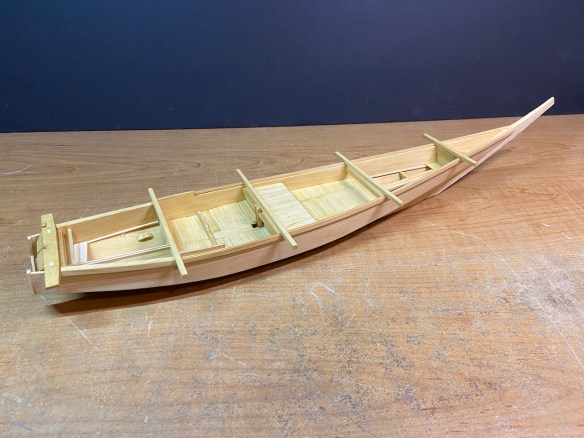
It’s been developing slowly over the years, but The Rope Tokyo, has been updating their website with an increasing amount of material on traditional Japanese ships and boats and their models. Over the years, they’ve added some material from presentations given at their regular meetings. But, more recently, they’ve added a section showing types of ships and boats, based on model built by members, as well as a section showing models of boats preserved at the Ota ward local museum (a collection that I was actually involved in discovering).
Category Archives: Wasen Modeling News
Discontinued Woody Joe Sengokubune (千石船) kit on Ebay
I was recently alerted by Glenn Schuster that there is currently an Ebay auction for an old Woody Joe kit from the days before laser cutting, where all parts were still made from milled wood. The kit is a Edo period Japanese coastal transport similar to their current Higaki kaisen and Kitamaebune offerings and goes by the common name for these ships, Sengokubune or 千石船, as it is written in Japanese.
 The kit is made in 1/60 scale, so the model is slightly larger than the current 1/72 scale offerings at about 22.4″ long and 19.7″ high. I know there’s a sign on it that says it’s 1/30 scale, but I confirmed long ago with Woody Joe that this is an error and it’s actually 1/60.
Bidding starts at $120 plus shipping, and I’m hoping someone out there will bid on this kit. If not, I may end up bidding on it, and I don’t really need to be spending money on this kit, as I already have one. I’ve been hesitant to build the kit I have, as once I start building it, there will be no more Sengokubune kits available.
The model is not as detailed or as accurate as the current Woody Joe kits, but it’s big and makes a nice display model. Plus, it can be detailed up a bit if desired.
If you’re interested, bidding ends on Saturday, 5/6/23 at 6:10pm. As of today, 5/1/23, there have been no bids placed on it. You can find the item on Ebay here: https://www.ebay.com/itm/125910896848
If you win the bidding on this, let me know. Maybe I’ll be encourage to pull mine out of storage and we’ll build them together and share notes. Ω
This Week in Wasen Model Making – October 15, 2022
Last weekend, I had a number of models on display at the Good Sam Showcase of Miniatures, which consisted mostly of my wasen models. This was the first time I’d had any of my Japanese watercraft models on display since January, and it seems to have spurred me to get back to work on some wasen model projects. While I have the two Woody Joe kits to finish up, those being the Kitamaebune and Atakebune kits, I also have two scratch models I stated long ago, the whaleboat-style Senzanmaru, and the small Nitaribune based on the late Fujiwara-san’s boat Kawasemi.
Edo Canal Diorama – Part 2
I spent some time last weekend trying to figure out how to simulate the stone walls of the canal. I have, of course, the examples from the museum scene reconstructions. The two are quite different, and I really don’t know which may be more correct. Perhaps the only thing that might serve as an example, is the wall at the moat of the Imperial Palace in Tokyo. However, I’ve noticed from looking at photos that even this differs from the stone structure surrounding the gate at the palace grounds.
Meanwhile, I didn’t even have any experience in making a wall for a diorama, so I went on the Internet to look at different ways that people having simulated stone walls for dioramas, some very simple, some very complicated.
I considered making a wall from clay, since I was most familiar with using it, but clay is heavy. I also saw how some modelers use hydrocal to cast stone pieces. But, that requires making molds. Finally, I settled on simply carving plastic insulation foam, as I was using the stuff for my diorama anyway.
For this, I simply drew a pattern on the face of the foam, and I used the end of a small steel ruler to score the foam, which gave the wider-looking gaps between the stones.
Edo Canal Diorama
With multiple projects going on, my brain gets a little tangled up. So… I begin another project! Actually, this one has been in my head for more than a year – maybe two? The idea is to create some kind of Edo period scene using one of my wasen models – Ideally, one that already exists, so I don’t have to start yet another project.
This diorama I’ve settled on, is a simple scene based around my tenma-zukuri chabune. It will be pulling up to a small landing at edge of one of the many canals in the built-up part of Edo. I laid out the scene so that it will fit one of the small display cases that I have already have.
I won’t go into a lot of detail here, but basically, the main inspirations for this diorama, are scenes depicted at the Fukagawa Edo Museum, and also the Nakagawa Funabansho Museum.
My diorama is too small to be able to incorporate much “on the ground”, which is probably just as well for this project, as I would otherwise have to get good at replicating 18th or early 19th century building construction, and develop a better understanding of the city streets of old Edo.
One day, I hope I’ll be able to build Edo period buildings and streets. But, I don’t think this particular scene will demand too much of that. It will be enough that I will need to understand how moorings and small docks would have been constructed.
As it is, I’m now having to learn more about diorama construction, and have spent time finding ways to represent people in various scales. This includes getting a better sense of how the boatmen, or sendō, were dressed, and how to model that.
I’ll post more about this later, but I wanted to get something written up first, with some photos of my preliminary planning.
The figure, by the way, is a 3D printed, fully articulated figure kit, that I purchased and assembled. I don’t know if I’ll use him, or the sendō figure that I sculpted from polymer clay some time ago. Ω
Building Woody Joe’s Atakebune Kit – Part 12
After some time away to work on the Oguraike boat and to get some traditional western ship modeling done for the newly restarting ship model meetings here in the San Francisco Bay Area, finally got back to finishing the sanding the sculling oars on my Atakebune model. I guess the model only needs 66 of them, but I’m sure I counted 72 in the kit. Maybe there are spares.
There’s more to do on these, as I’m thinking I’ll probably add the “heads” to them, or at least some of them that might end up visible if I leave any of the doors open in the box structure, or yagura.
Building Woody Joe’s Atakebune Kit – Part 11
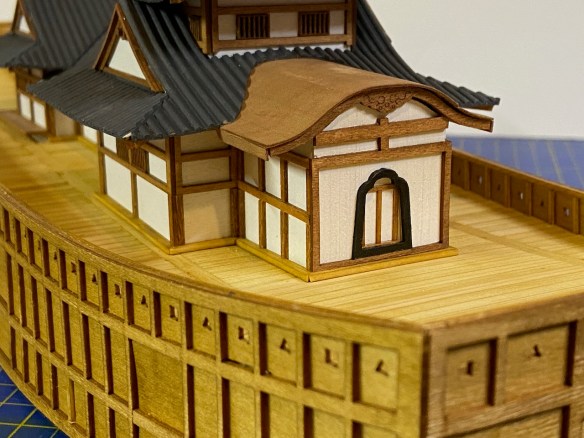
It’s time to finish the Atakebune’s castle structure. Basically, what’s left is to add the pieces that fit under the eaves of the roofs and also to install some edging pieces and then some final decorative details to the rooftops.
Building Woody Joe’s Atakebune Kit – Part 10
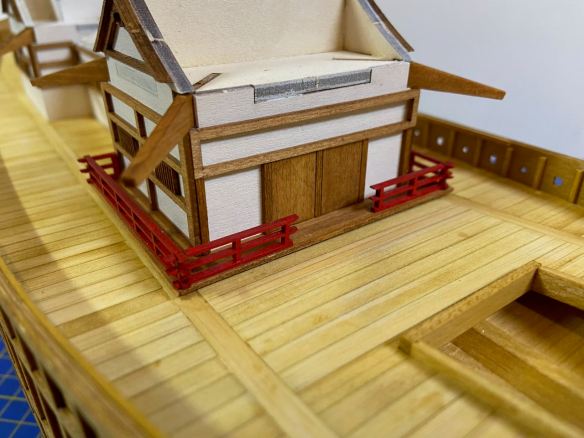
Continuing with the Atakebune’s castle structure, I began looking at the little walkway and decorative railing at the back end of the structure. Considering that I’ve lowered the main deck of the ship, I needed to know how high above the deck this railing would be. So, I assembled the pieces to allow me to test fit the parts in place. While I was at it, I made one small modification here, which was to make the walkway from separate strips of wood, using the kit provided pieces as patterns for the walkways.
The completed walkway was actually all that I needed. It also needed to fit perfectly in place, which took a few minor adjustments.
While I went ahead and glued the walkway into place, I didn’t want to permanently add the railing, as it’s pretty delicate, and I was worried that it would get damaged during the remaining construction on the castle structure.
It was nice to see how this railing will add a splash of color to the final model, pretty much the only parts that aren’t going to be natural wood color, or painted gray or white.
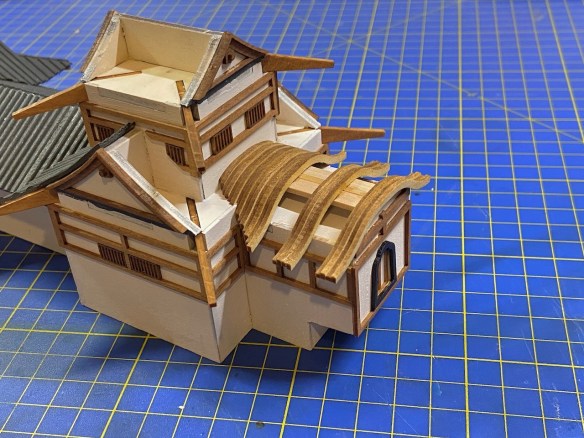
Next up was to begin working on the castle structure roof. most of which is made from milled material that resembles a tiled roof. However, the roof of the forward part of the castle structure, specifically the one I extended, was designed to be made up of individual arch-shaped pieces. Since that section has been lengthened, the provided roof pieces would no longer work. What I did then, was to use the provided pieces as beams, and for the roof itself, I cut a piece of thin pear wood veneer.
I don’t have photos of all the work I did on this roof section, but it took a little work to attach the “beams” together, so that I could mount the thin roof material. I used a couple wood strips under the beams to create a rigid framework, but this required me to cut away some of the wood that would be under the roof to make room for these added wood strips.
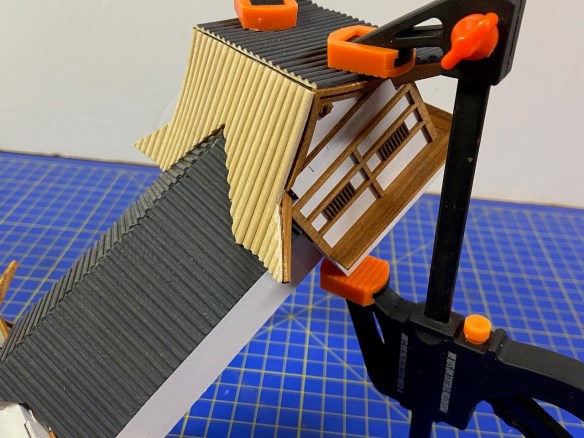
Once the beam assembly was ready, I could simply cut the wood veneer and glue it to the beams. Plastic clamps held the roof in place, causing the veneer to take on the curvature of the beams while the glue set.
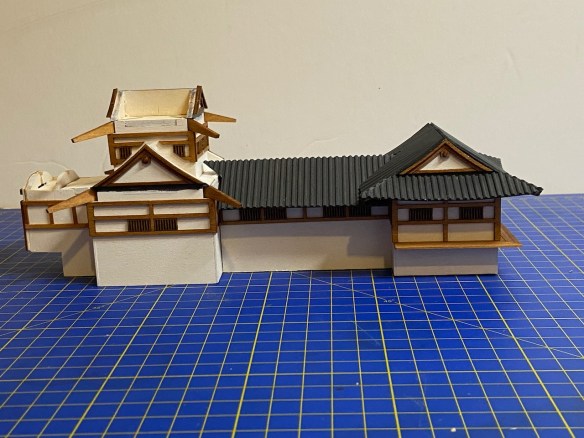
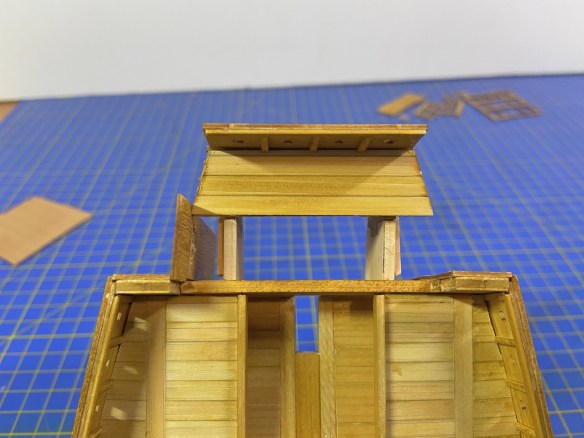
With this particular roof section done, I could complete the rest of the castle structure roofing. This type of construction is quite fun, and it’s very different from any ship modeling work I’ve done before. I’m already familiar with building these castle roofs as I built Woody Joe’s Iwakuni-Jo castle several years ago, one of their smaller castle kits. I won’t go into a lot of detail here and just offer some progress photos.
While working on the castle structure and waiting for glue to dry, I decided it was time to tackle the modification of the stern structure. I was a bit hesitant to do this, but I saw how nicely Kazunori Morikawa’s model looked with the modified section, and I thought it really made the overall shape of the ship nicer. So, I began dismantling the stern section.
Turns out that because I used original formula Titebond wood glue, I could simply use water to soften the glue joints. As a fellow ship modeler pointed out, rubbing alcohol works well, and won’t raise the wood grain or cause the wood to swell or warp.
I was basically able to extend the internal structure of the stern by 15mm. This didn’t change the shape of the rear wall, just the side walls of the extension. So, I was able to use some of the parts I removed. However, I did have to make a new deck section, as the shape had changed due to the new dimensions.
Once the extensions were added to the internal structure, it was all pretty easy to build it all back up again.
Finally, I was able to finish the initial roof placement and add the remaining coaming and lower trim of the castle structure, as well as to add the stanchions and complete the external trim of the stern section today.
Next time, I’ll be adding the simulated beams under the eaves of the tile roofing, and adding the details that remain for the rooftops. After that, I’ll be giving some thought to finishing the lower hull modifications I had been planning.
Building Woody Joe’s Atakebune Kit – Part 9
One of the features of this particular Atakebune that make it so interesting is the castle structure. Most Atakebune were simpler and just had nothing more than a single roofed house for the commander to oversee the battle. But, on this ship, the castle is very prominent. On the model, it makes for a nice project in itself.
Construction starts with the basic foundation structure, which is made to fit inside the opening in the deck. It was somewhat of a tight fit, so the opening had to be adjusted. You’ll notice a little piece of the base sticking out at what is the front of the structure. This is because there is a small structure at the front, which I’ve been considering modifying to more closely match the model at the Saga Prefectural Nagoya Castle Museum of which this model is based. The design of this section is nice in that you can mostly work on this structure separate from the rest of the model. Continue reading
Building Woody Joe’s Atakebune Kit – Part 8
Updates on the progress of the Atakebune model are long overdue. The project has been continuing, and I’ve done quite a bit. But, I’ve been quite slow on writing posts. So, I’ll try to get partially caught up here, but I’ll probably need to write another post soon to finish catching up.

