
You might recall that In the Fall of 2019, boat builder Douglas Brooks had developed a project together with Nina Noah of an organization called The Apprenticeshop, to go to Japan and build two traditional Japanese boats with two different Japanese boat builders.
I wrote about modeling the first of the two boats, the Niigata Honryousen, which he had built with Mr. Nakaichi Nakagawa and Nina Noah. But, it’s the second of the two boats that was the main subject of the project. The second boat was the Himi Tenmasen.

Photo by Ben Meader
The Himi Tenmasen, or Himi Tenma, was built by Douglas Brooks and Nina Noah, under the guidance of Mr. Mitsuaki Bansho, a Japanese boatbuilder who was the only one of five brothers to follow in his father’s trade, who was also a boatbuilder. After his father’s passing, Bansho-san primarily built fiberglass boats, but in the past 20 years, he began building boats in traditional Japanese fashion for museums.
The Himi Tenmasen is a typical small boat that was used in fishing and as a general workboat. Similar types were used to ferry cargo and passengers between larger ships and the shore.
This particular boat is based on a plank drawing passed down to Bansho-san from his father. My own model is based on drawings obtained from the Himi City Museum, a copy of which was provided by Douglas Brooks. I later found the same drawings in a 2015 publication by the Toyama Museum Association on Toyama prefecture boats and boatbuilding.
Being that the Himi Tenma is only about 12 feet long, construction of a model at 1/10 scale will be easy on my wood supply. For this model, I am using Japanese cedar, or sugi, for the planking, and Japanese cypress, or hinoki, for the stem, beams and framing.
I began with my usual method of construction, which is to build a mold, a kind of temporary internal frame, to which the model is clamped during construction. The mold is made from 1/4″ MDF, or Medium Density Fiber board, and consists primarily of the backbone, and usually a pair of station molds. This is all that’s usually needed for the modeling of Japanese traditional boats, or wasen, due to the natural curves followed in their construction.
I printed a copy of the plans at 1/10 scale and cut out the useful profiles to create the shape of the mold parts, rubber cementing the profiles directly to the MDF and then cutting the parts to shape.

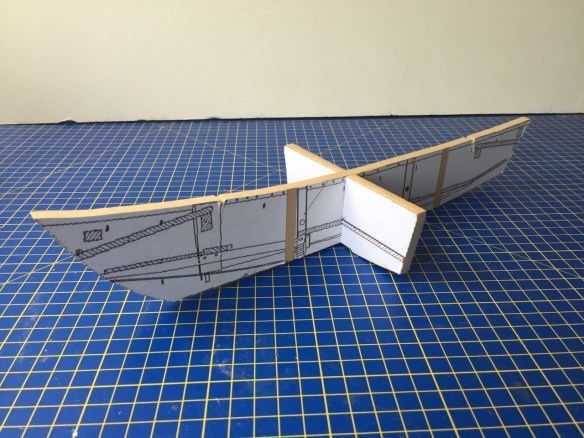
I cut the two main parts with interlocking slots to give the assembly some strength. I’d originally planned on creating my own station profiles so I could have two stations for shaping the hull planking, but the drawings I’m using aren’t builder’s drawings, and it’s hard to get good measurements. So, I settled for the single cross piece, based on the one good profile given in the drawings.
Hopefully, having just the one cross piece will not be too much of a problem. But, it it does become a problem, I’ll improvise by adding to the mold structure as I go.

Himi Tenma drawing from a Himi City Museum publication. Used with permission.
A couple nice things to note when looking at these drawings. First, the bottom board, the chyou, is basically just a single piece. Second, the garboard planks, or kanjiki, form an almost flat bottom, which should make the fitting of the upper planks, or the hata, pretty simple.
The only new feature to deal with are the triangular pieces at the base of the miyoshi. These are called konagashi, and I have no idea how these will complicate or simplify construction. However, email exchanges with Douglas Brooks suggests that these make fitting the kanjiki much easier. So, we’ll see how that works out.
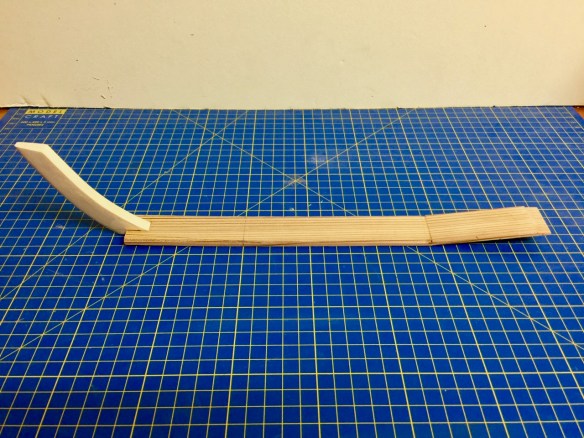
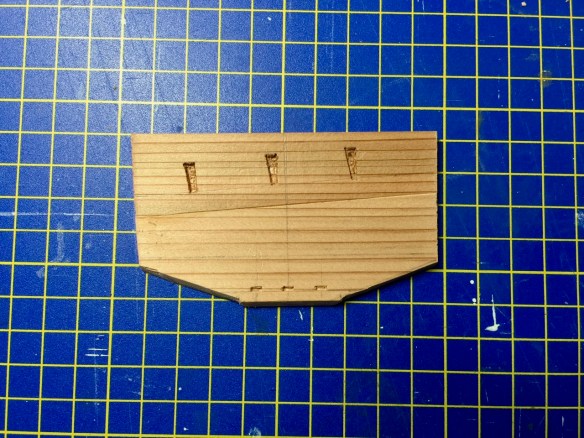
The first hull parts to be made are the miyoshi, or stem, and the chyou, or the bottom board. This bottom board is more familiar to me as the shiki, but I’ll refer to it here by the more regional term of chyou (chyō).
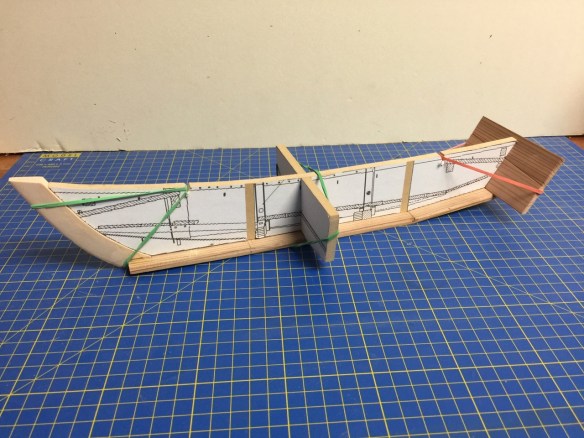
Miyoshi and chyou are fitted together using the mold to set the proper angle between them. The todate is also being test fit here.
Miyoshi and chyou assembly
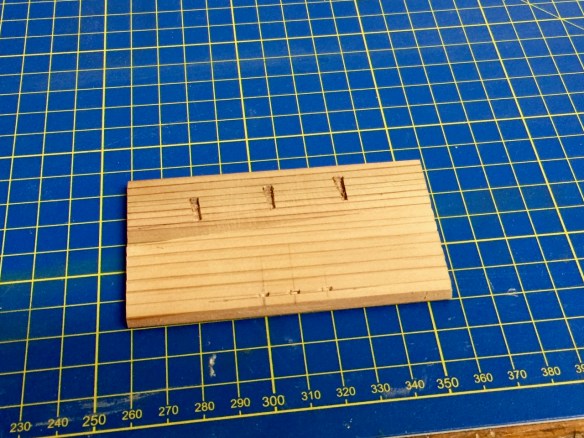
Todate under construction
Todate has been shaped, but the mortises need to be plugged before putting into place.
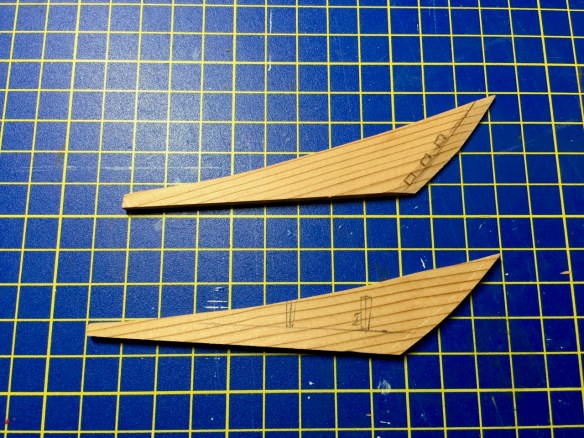
Konagashi shaped and mortises marked and ready to cut
Initial assembly is pretty easy, though it took me a while to analyze the photos I got from Douglas Brooks well enough to know what questions I needed to ask.
