
The next step in construction of the Tosa Wasen kit is the addition of the deck boards.
This part of the build turned out to be a lot tricker than I’d expected. This is an area where you really want to take your time, and it’s easy to want to rush through it. The deck boards serve as a deck to walk (or sit) on and work on, but they are also designed to be removable, allowing the fisherman access to storage space under the deck. This allows the deck to be kept clear and free of clutter, making for a tidy looking boat.
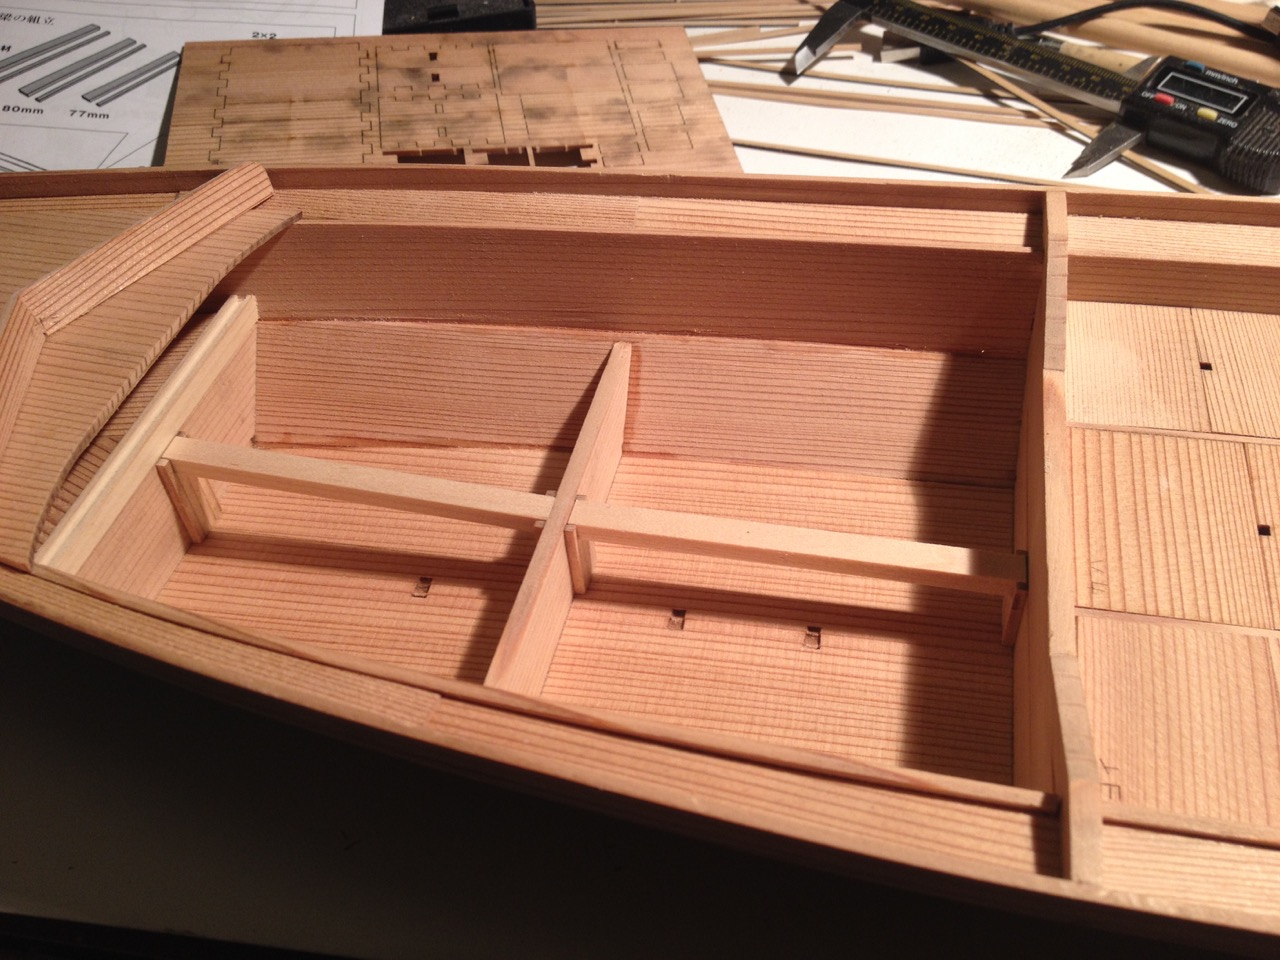
Beam supports glued into place. The beams are sanded to fit, but I left them unglued, so they’ll remain removable. Ledges are then cut to length and glued to the beams for the deck boards to rest upon.
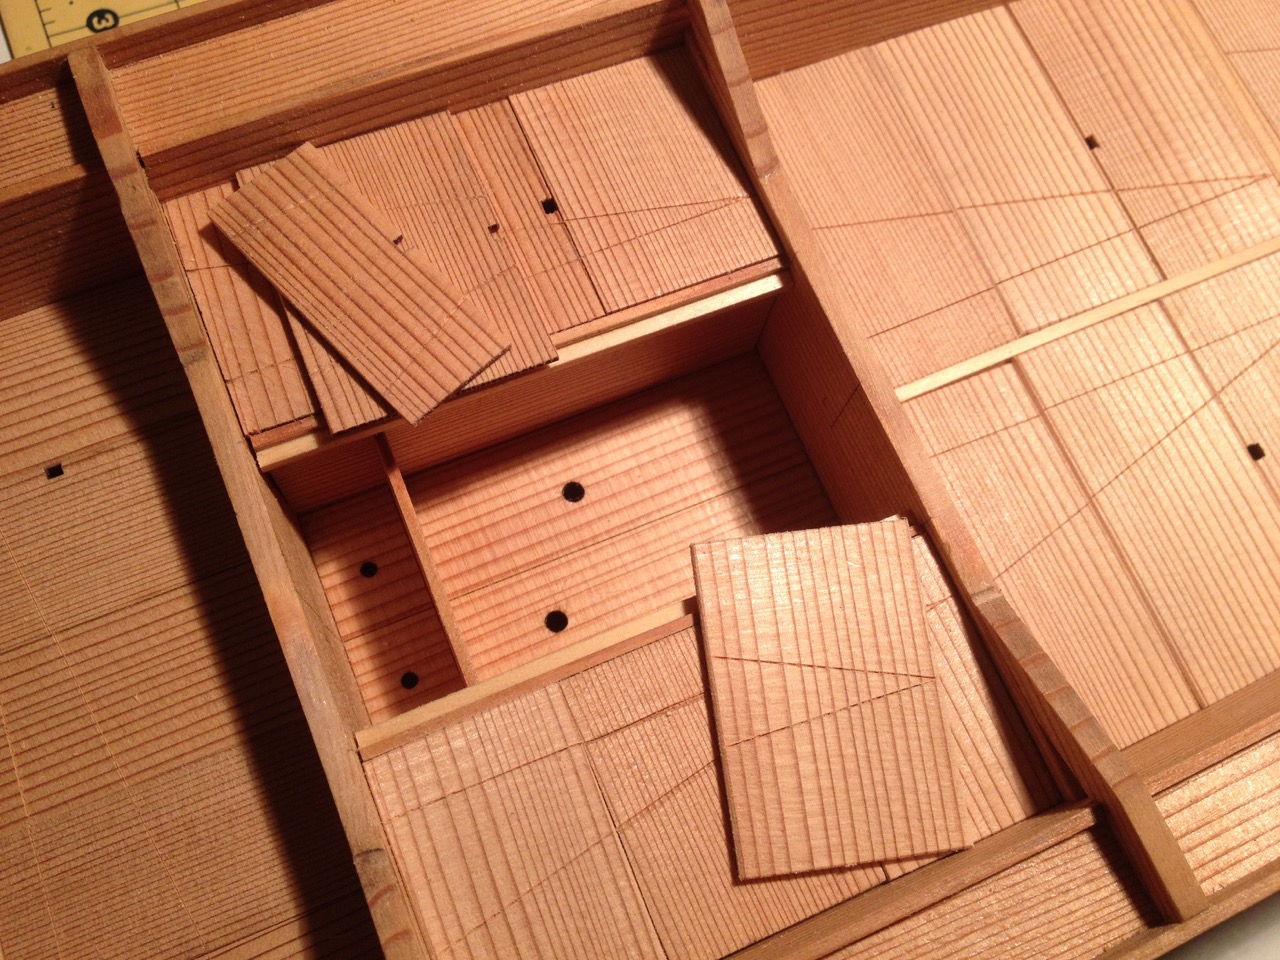
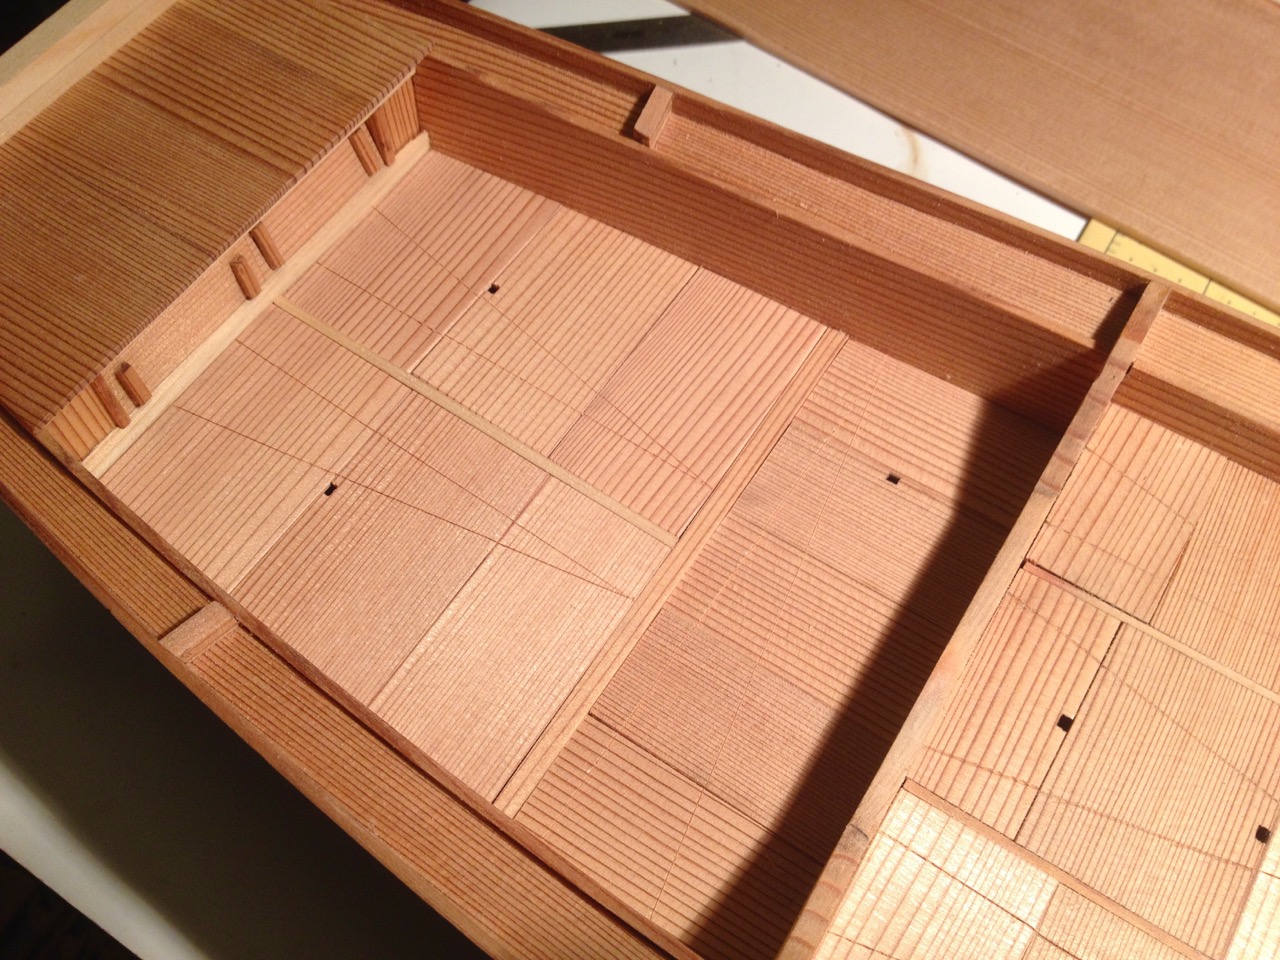
The deck boards themselves are rather interesting in that they are made so that almost no two are alike. Each one can only fit in one location, with the possible exception of the boards that cover the live wells in the center of the boat. But, given that there are many boards, it would seem to be something of a puzzle trying to figure out which one fits where. To make the positioning more obvious, there are two lines scribed into the top of the boards.
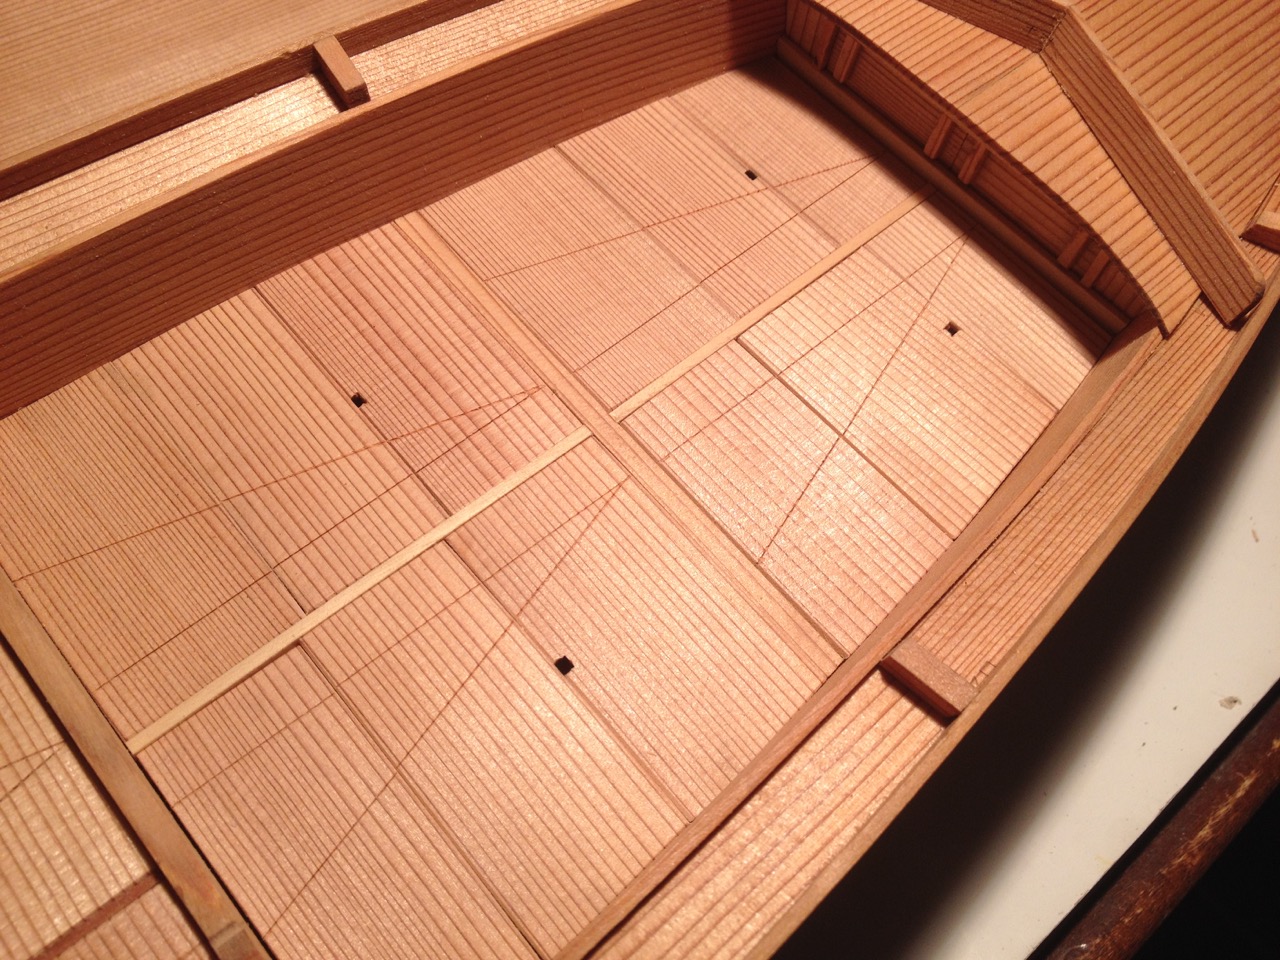
The lines form a sort of an arrowhead with the point at the front of the forward most board, and each compartment has a 3 or more deck boards covering it, with its own arrowhead pattern scribed on it. This makes for a quick recognition of the order of the deck boards and also makes it easier to keep from mixing them up, kind of the way a picture is printed on jigsaw puzzle pieces.
Note that one deck board of each set has a square notch cut into one edge that serves as a finger hole to make it easier to pull up the boards. This also makes it easier to pull up the boards on the model using a paperclip or other small tool.
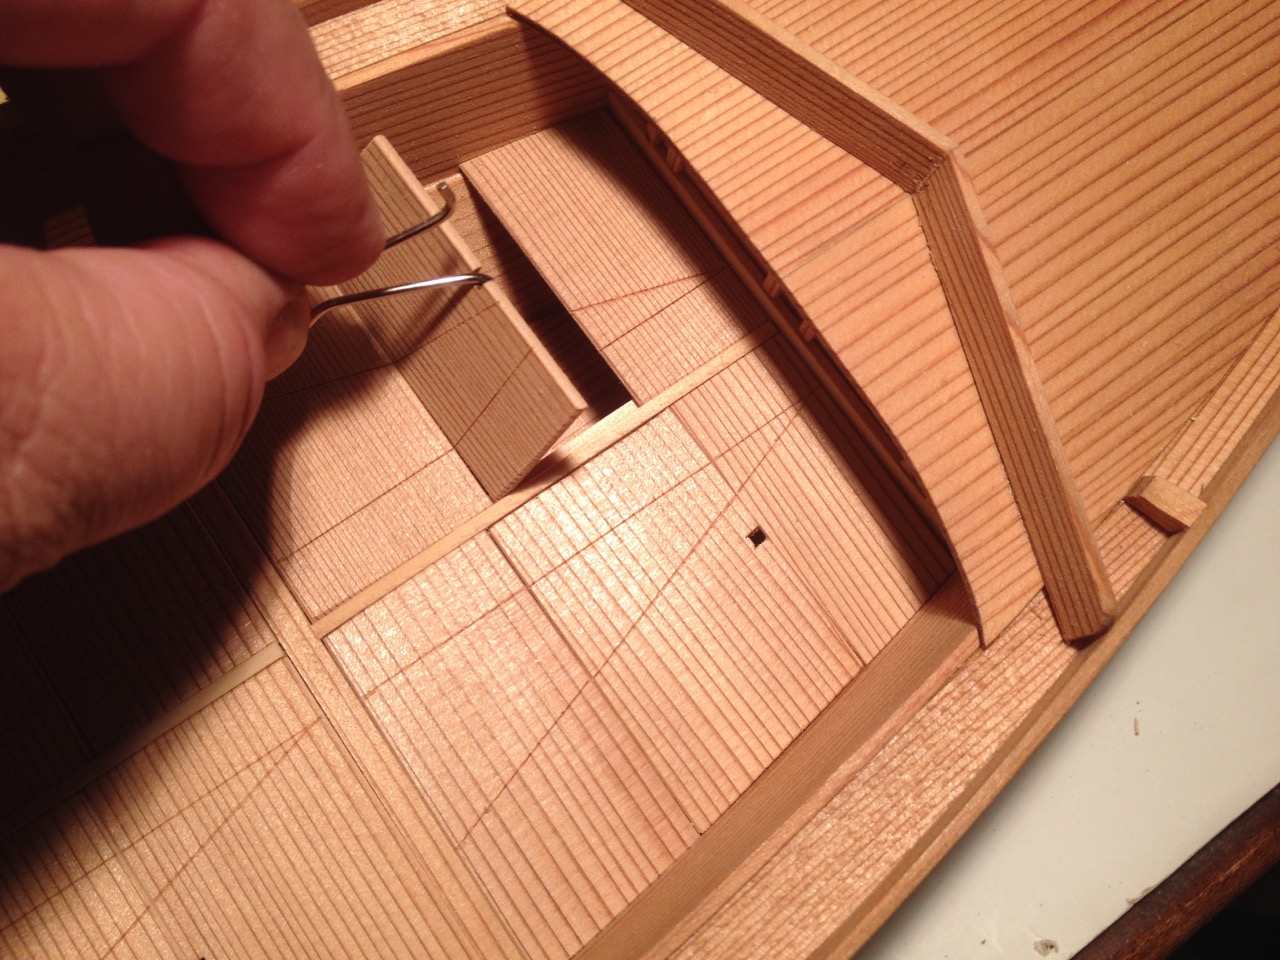
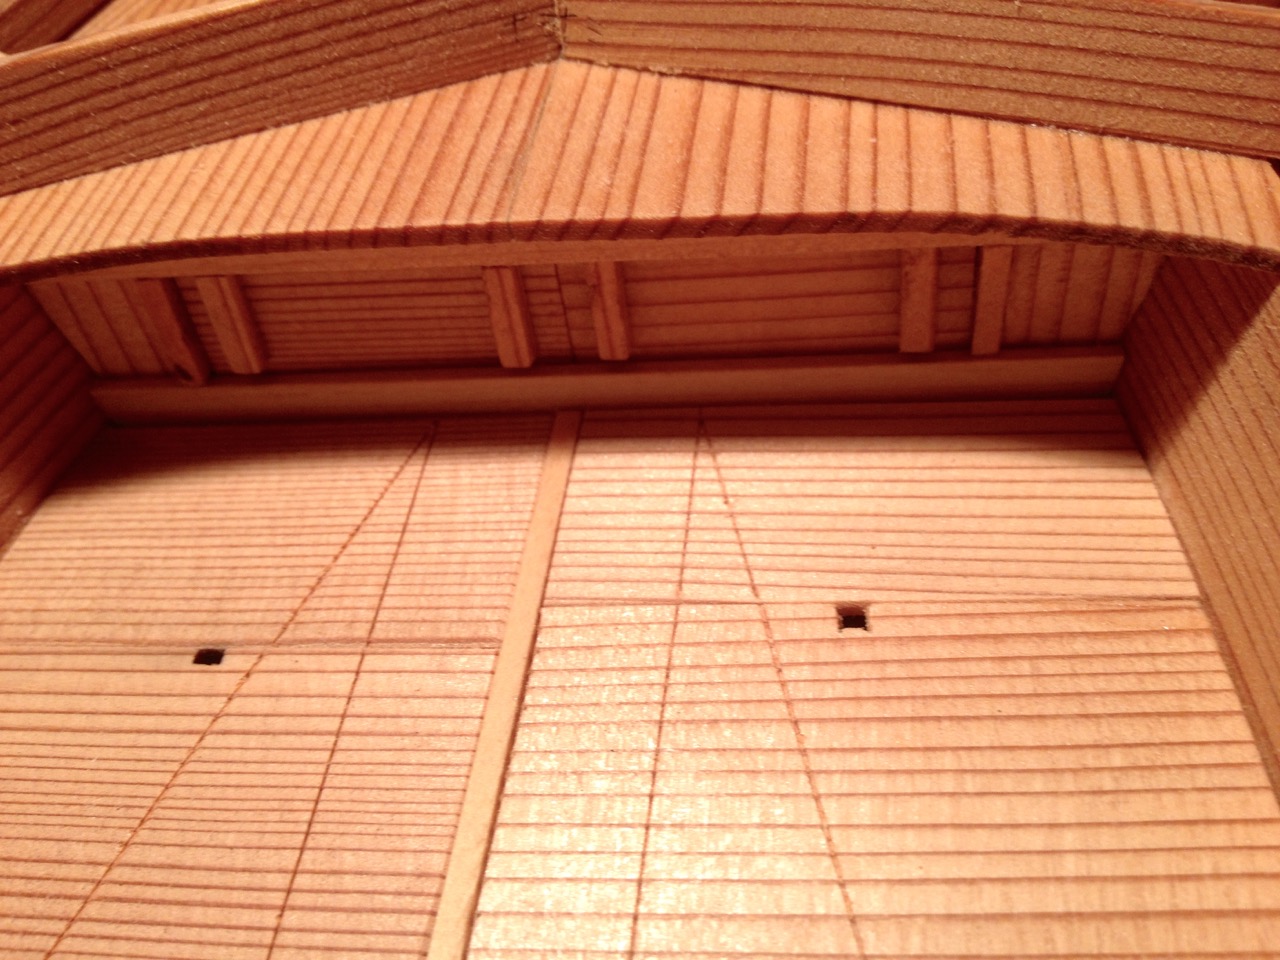
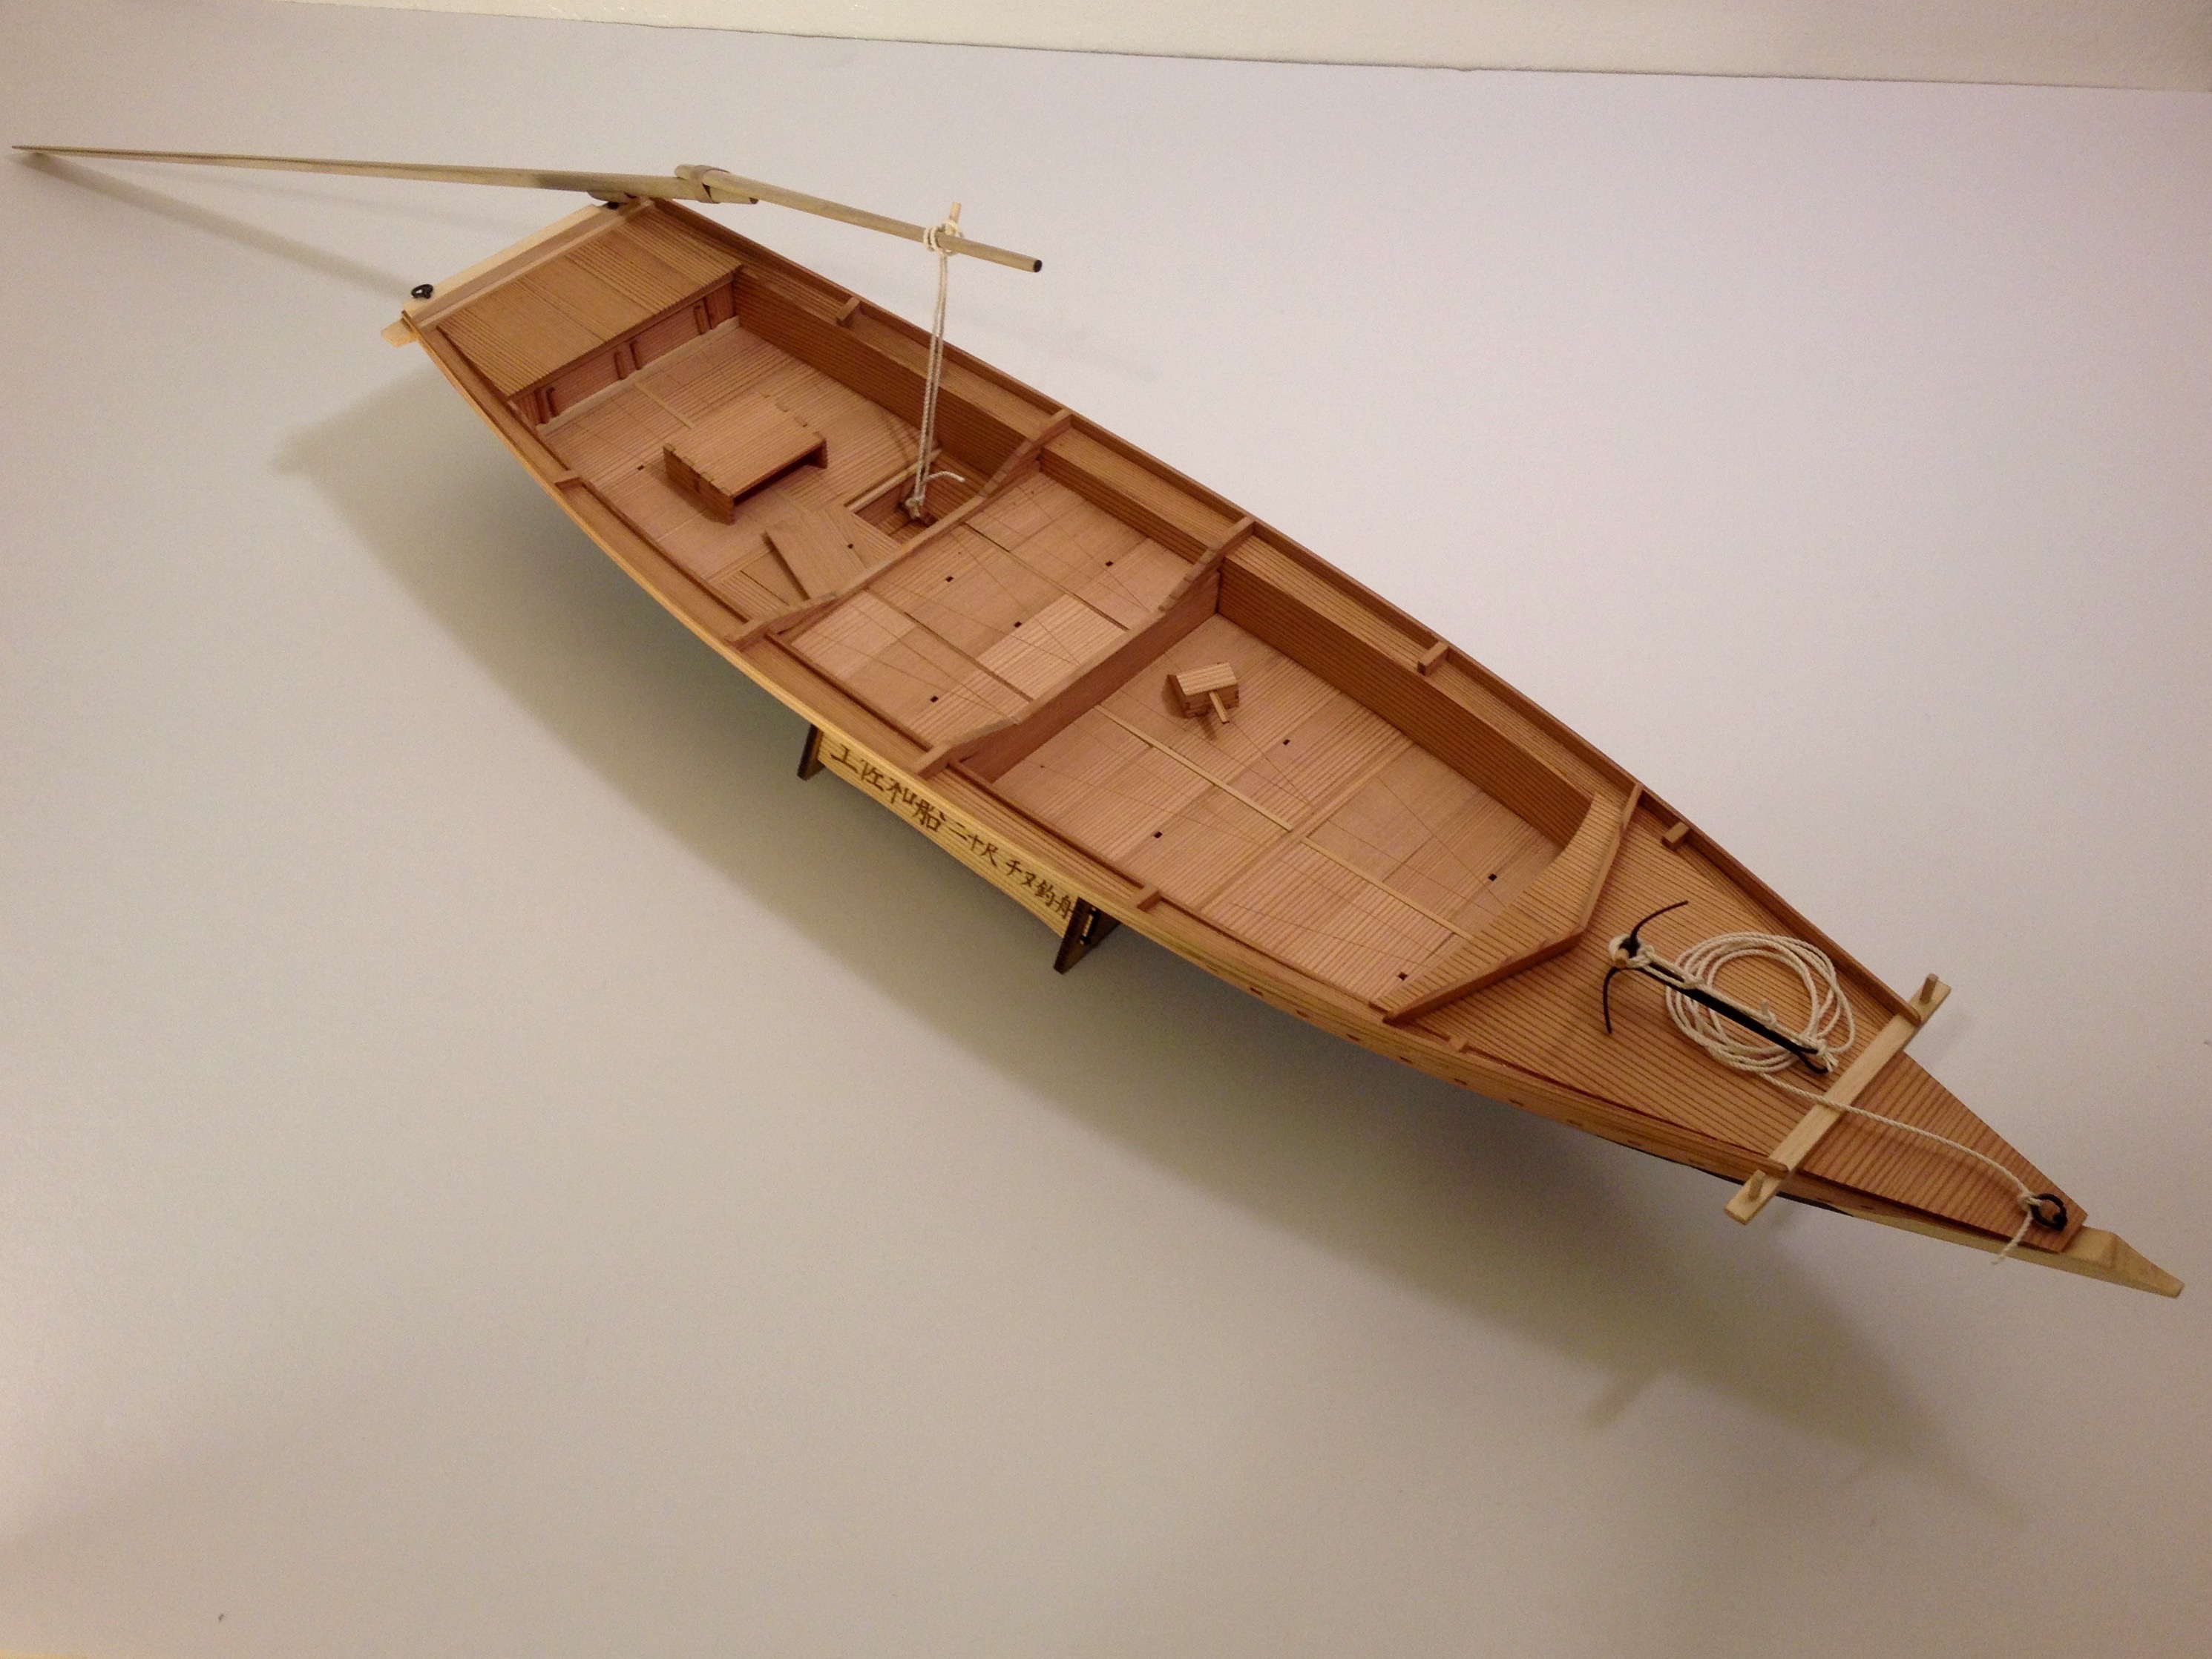
Live wells with holes in the bottom of the boat, open to the sea. The large one is for the catch, the small one is for bait.
The kit supplies the deck boards as laser-cut pieces, which look they’d make it easy to put them into place. However, in order to allow some variation between models, these parts are cut over-sized, so they have to be sanded to fit. This turned out to be a far trickier than I’d expected, as the Japanese cedar is pretty soft, and really wanted to avoid small gaps between boards. In fact, I used every scrap piece of cedar that I could find in the kit in order to finish the deck boards.
If you’re building this kit, Proceed Very Carefully here.
The next step was to scribe the patterns into the deck boards. I found it easiest to take each group of deck boards which are part of the same pattern set and marking the endpoints on the first and last board, then scribing them all together as a group. I lined them up against a straight edge to keep them in alignment (each set of boards has at least one straight side).
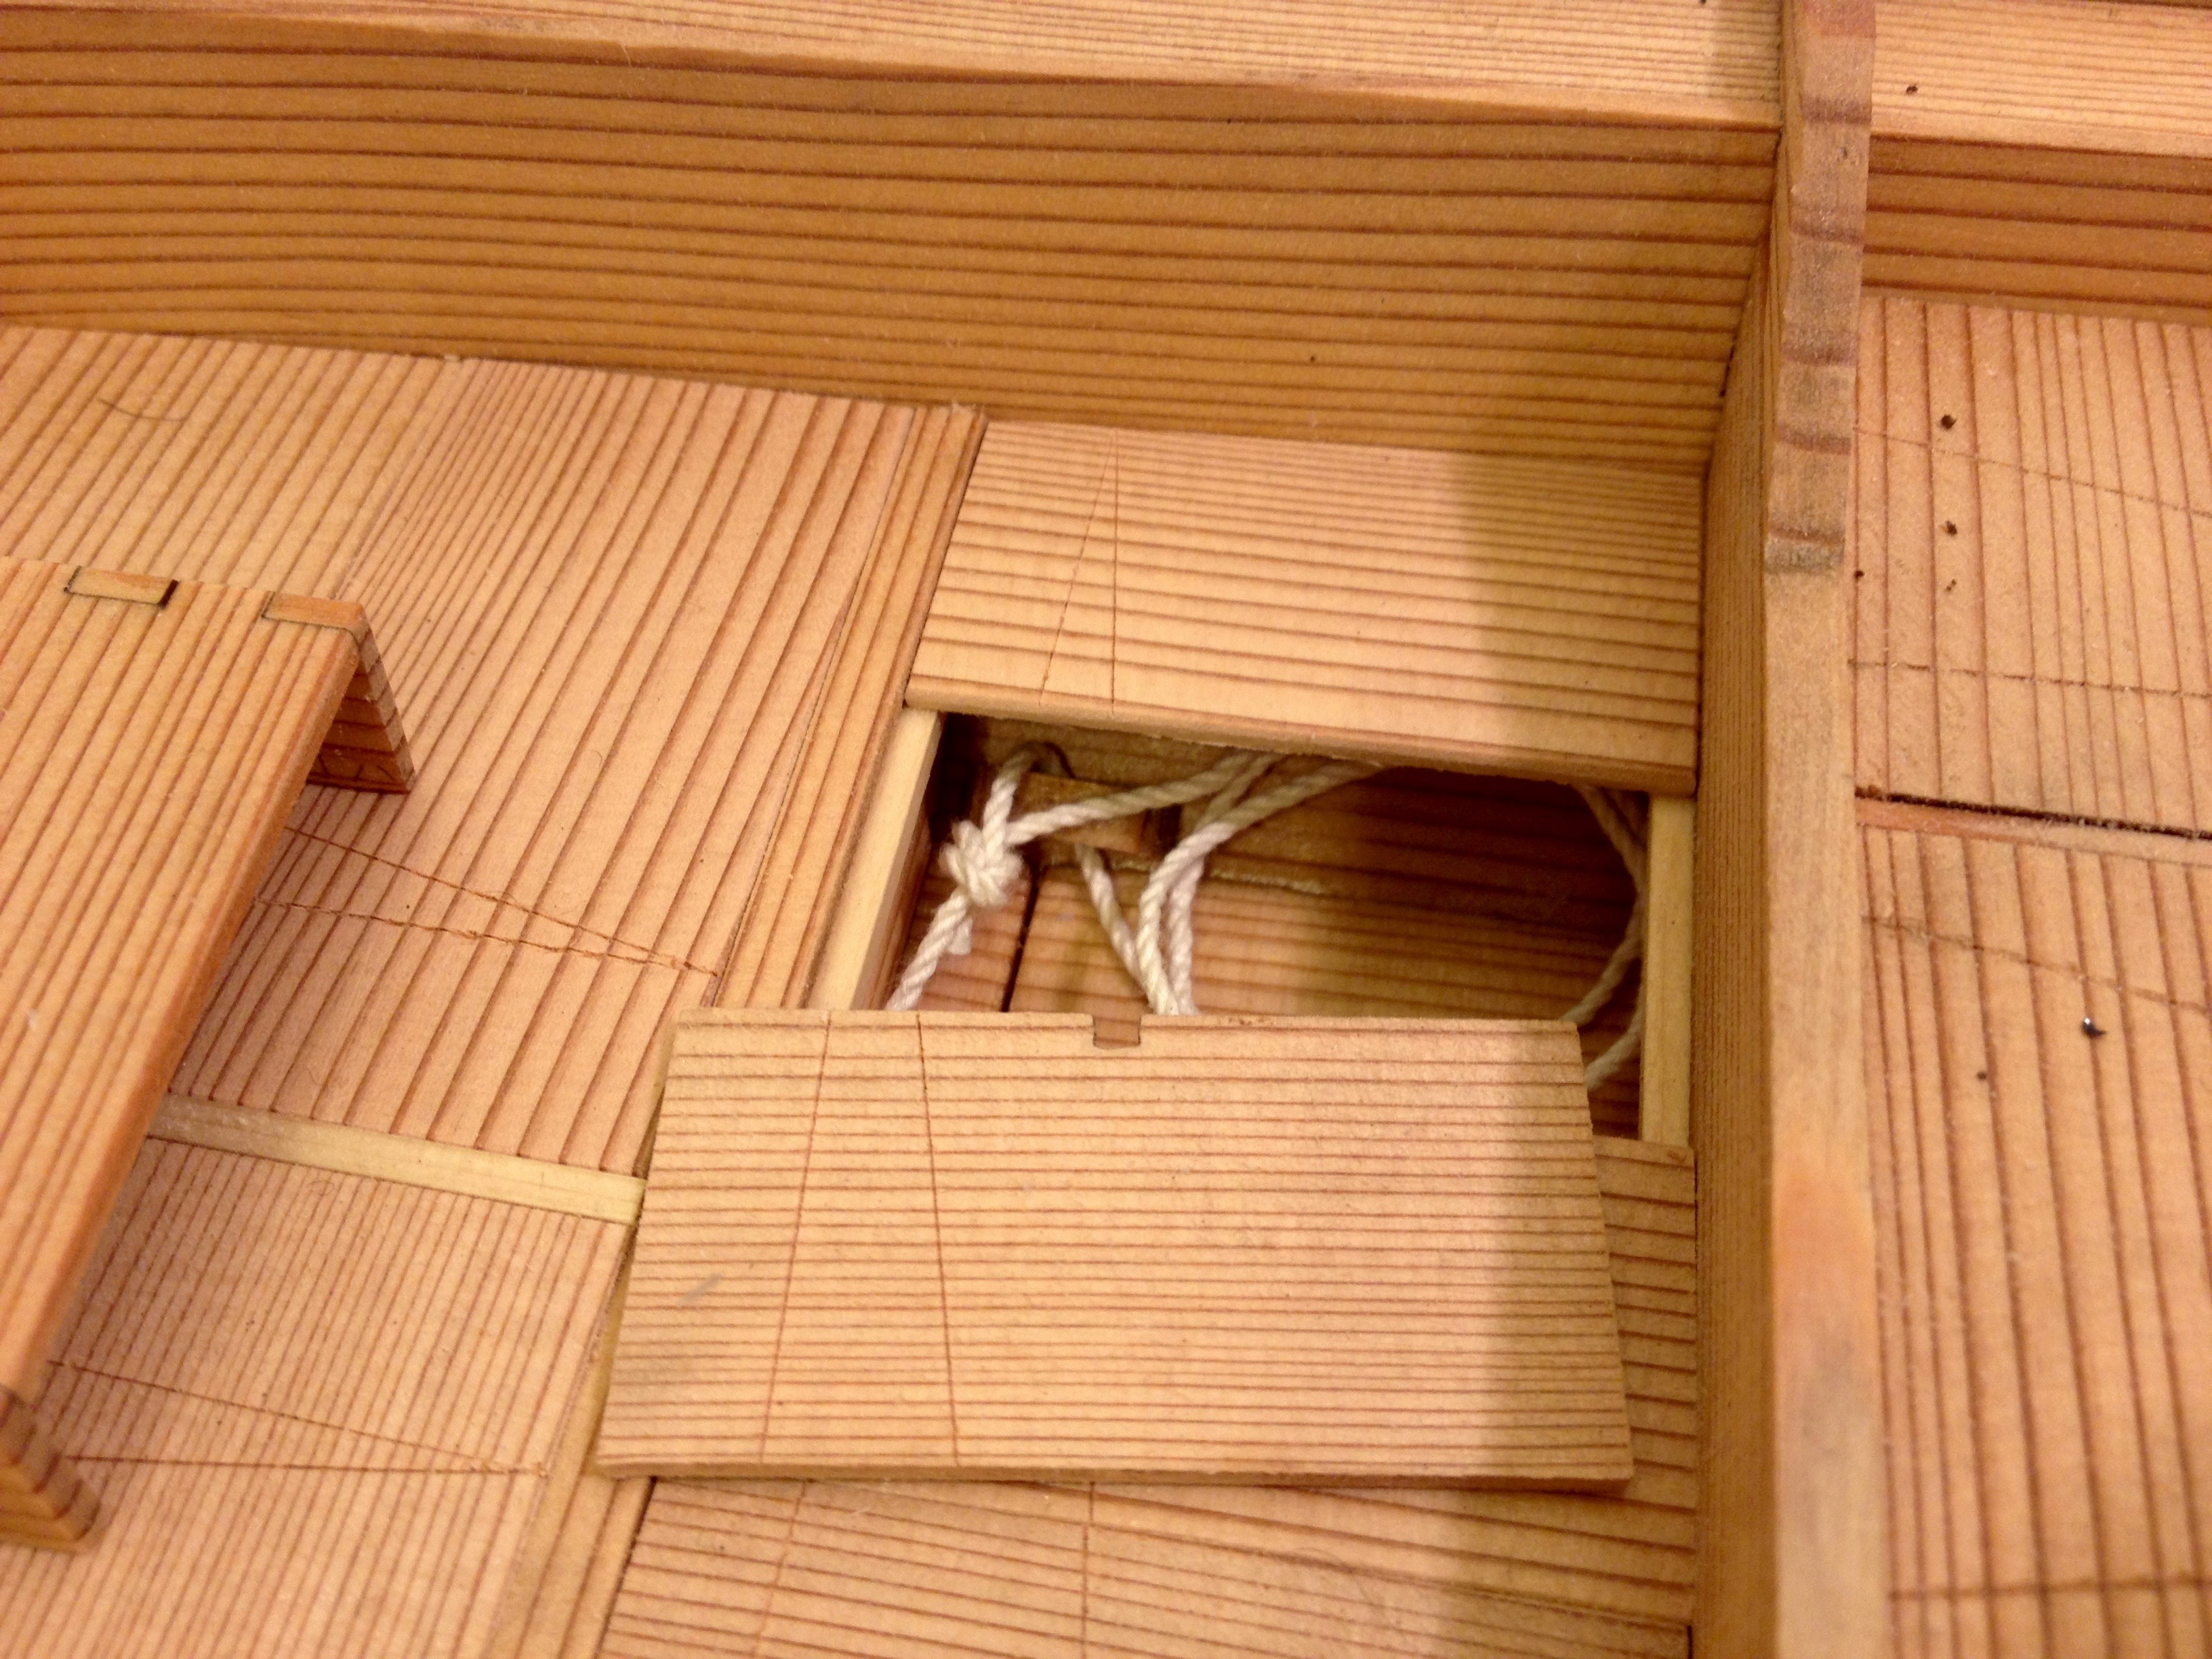
This was pretty much the last of the difficult work. There is one more step that was a little tricky, but in a completely different way, and that was the next step. For those following along with the kit instructions, this is step 33. This involves the construction of the covers for the cargo compartments in the bow and the stern of the boat. If you haven’t built the model kit yet, I would consider doing this work in steps 17 and 18 before the compartments are decked over. It seems it would just be a lot easier.
I’m not positive why the kit has you build the compartment covers at this stage instead of earlier in the build. Possibly, it’s because the real boat might be built in the order shown in the kit. That would be okay, except that trying to reach in with your finger and thumb to get the covers into place without knocking parts into the compartments is pretty difficult.
The kit includes a small pair of wooden tweezers that you’re instructed to build for handling those compartment doors. In the long run, these will be necessary in order to be able to remove or replace these doors without damaging the soft wood.
Completing the Rail
I jumped ahead just a little bit with the compartment covers since I was kind of on a roll with the trickier stuff. So, afterwards, I went back to deal with the rail supports. These are tapered blocks that are added to the rail after it has been constructed. By constructing the rails first, the nice fair curve has already been established and doesn’t need to be engineered into the design. Afterward, the support blocks were added to give the structure more rigidity.
You can see the support blocks of the rail in the photo below, and also in the second photo shown above.
Finishing Details
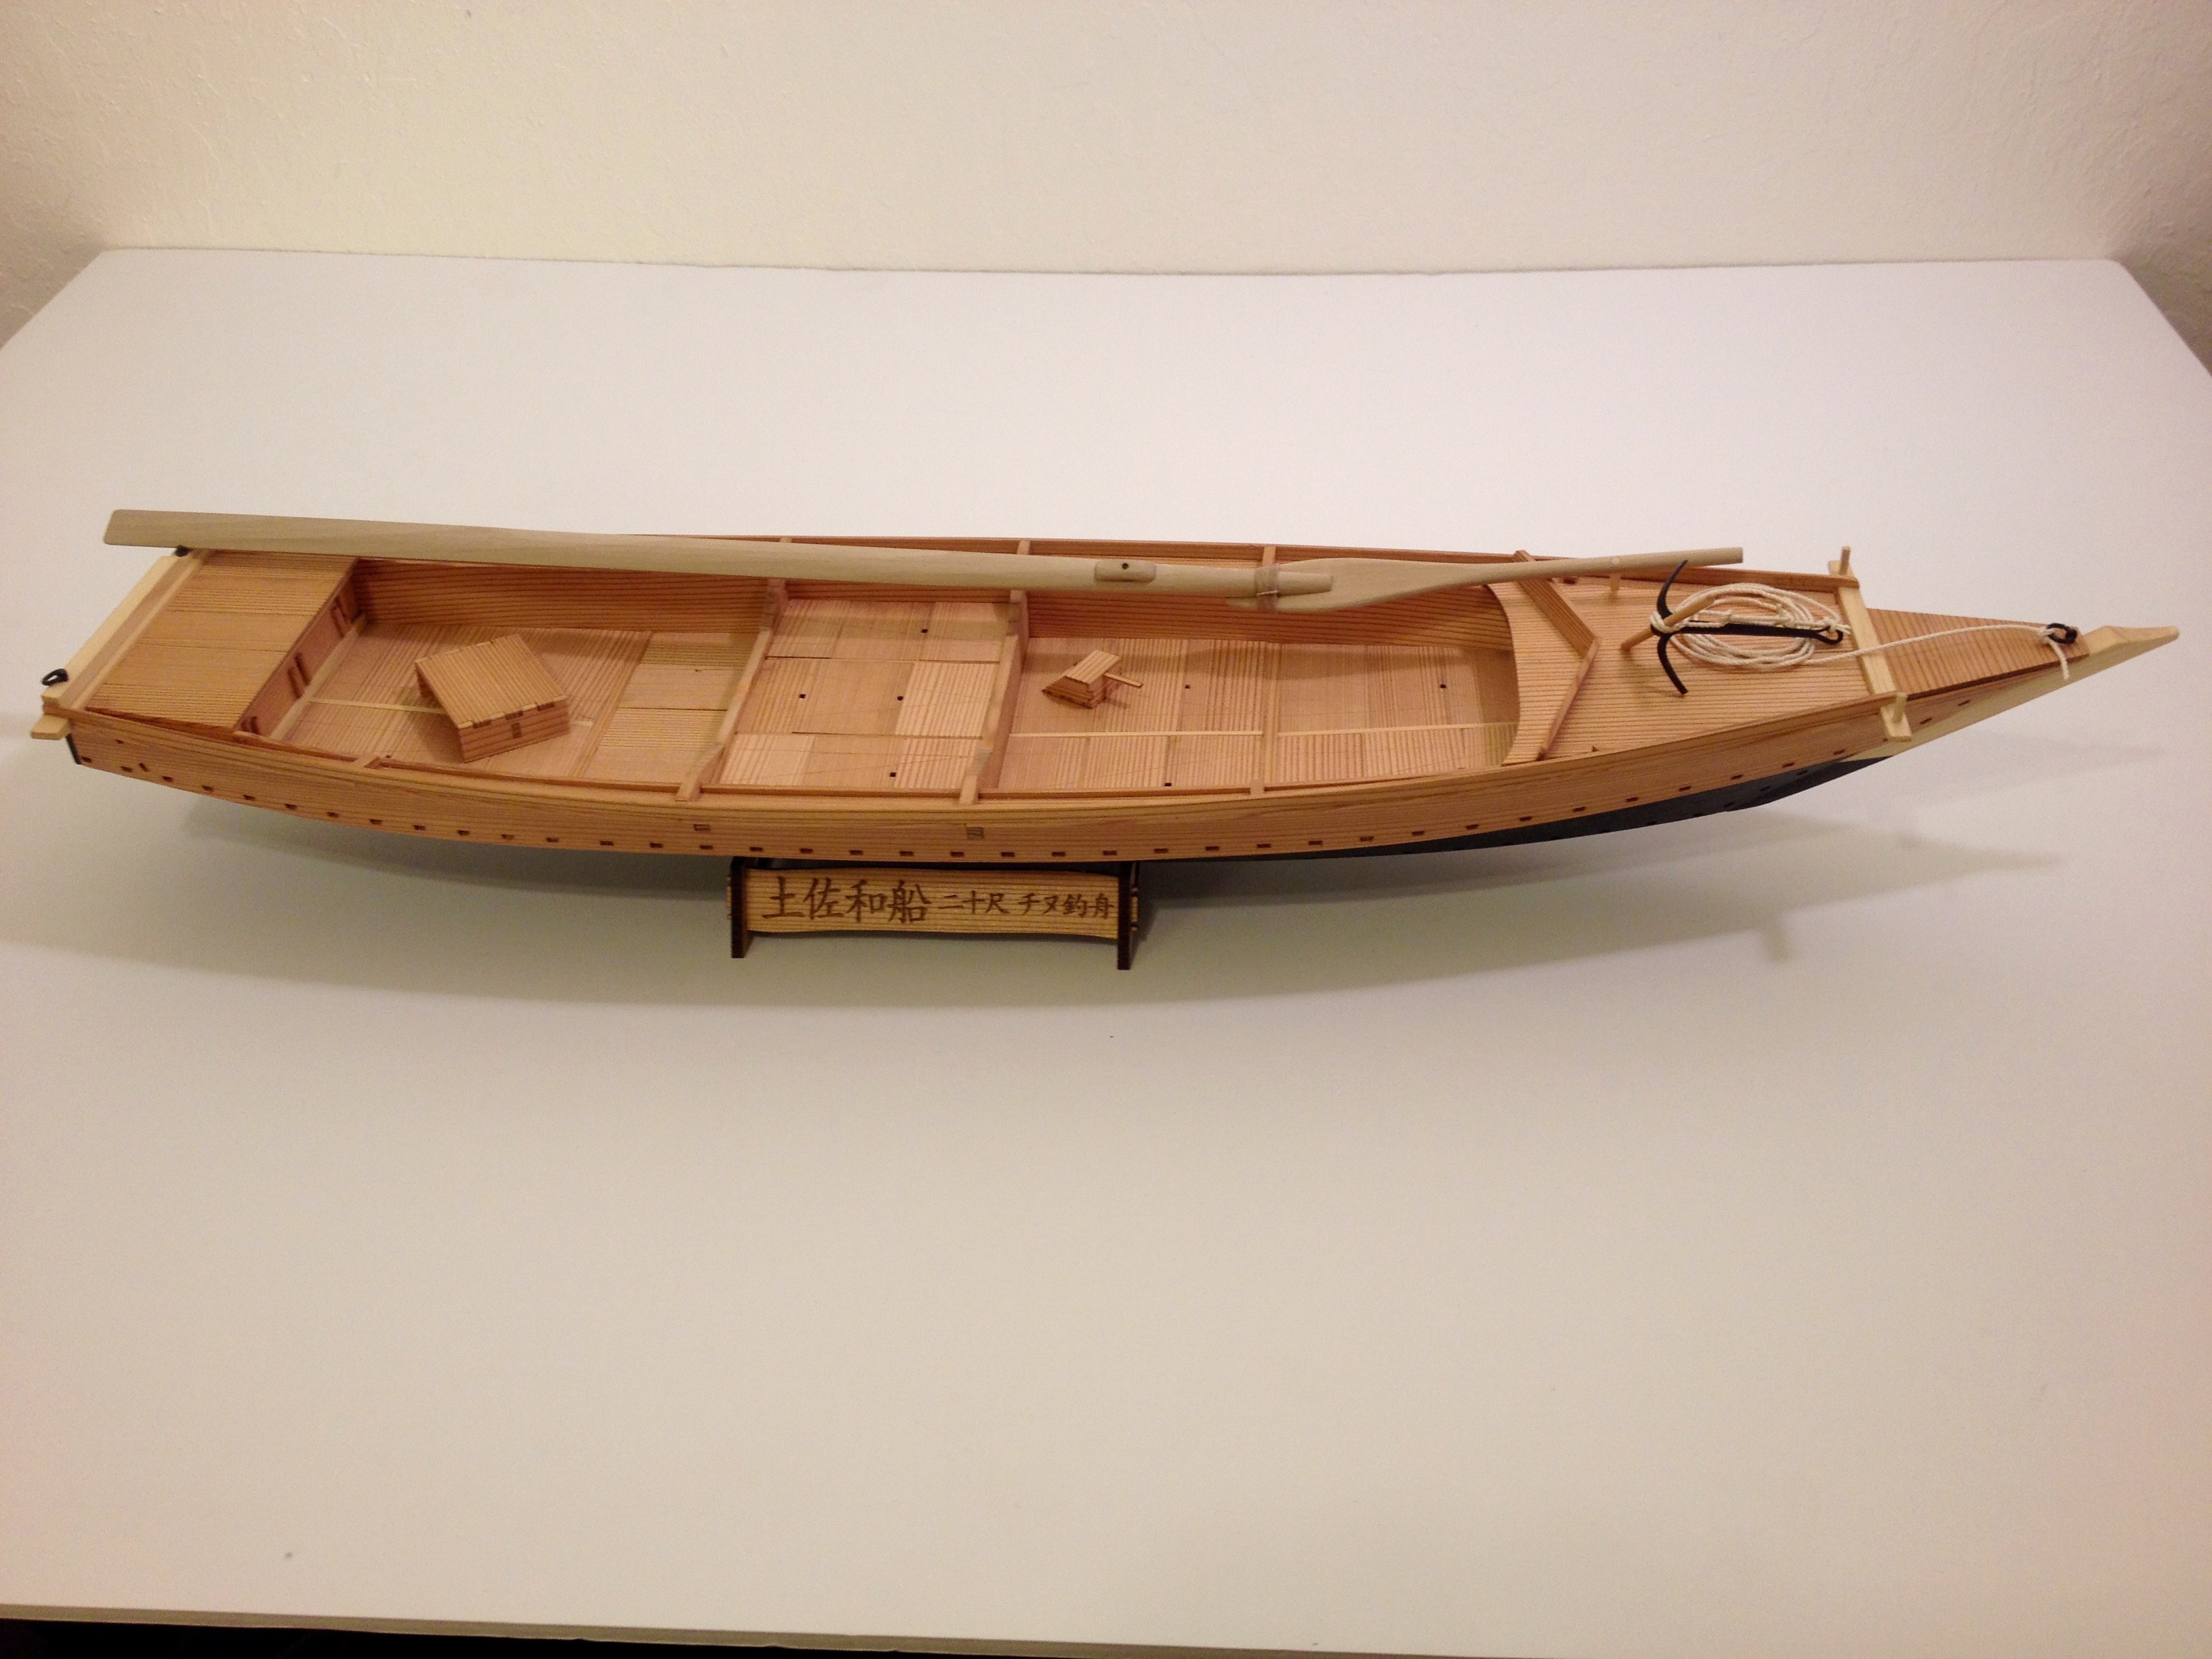
The last steps of the Tosa Wasen kit involve adding the finishing details. These included the rail supports, oar, ringbolts, anchor, oar and some fisherman’s accessories.
Dealing with the details on the boat first required drilling some 2mm holes to accommodate the ringbolts, etc.
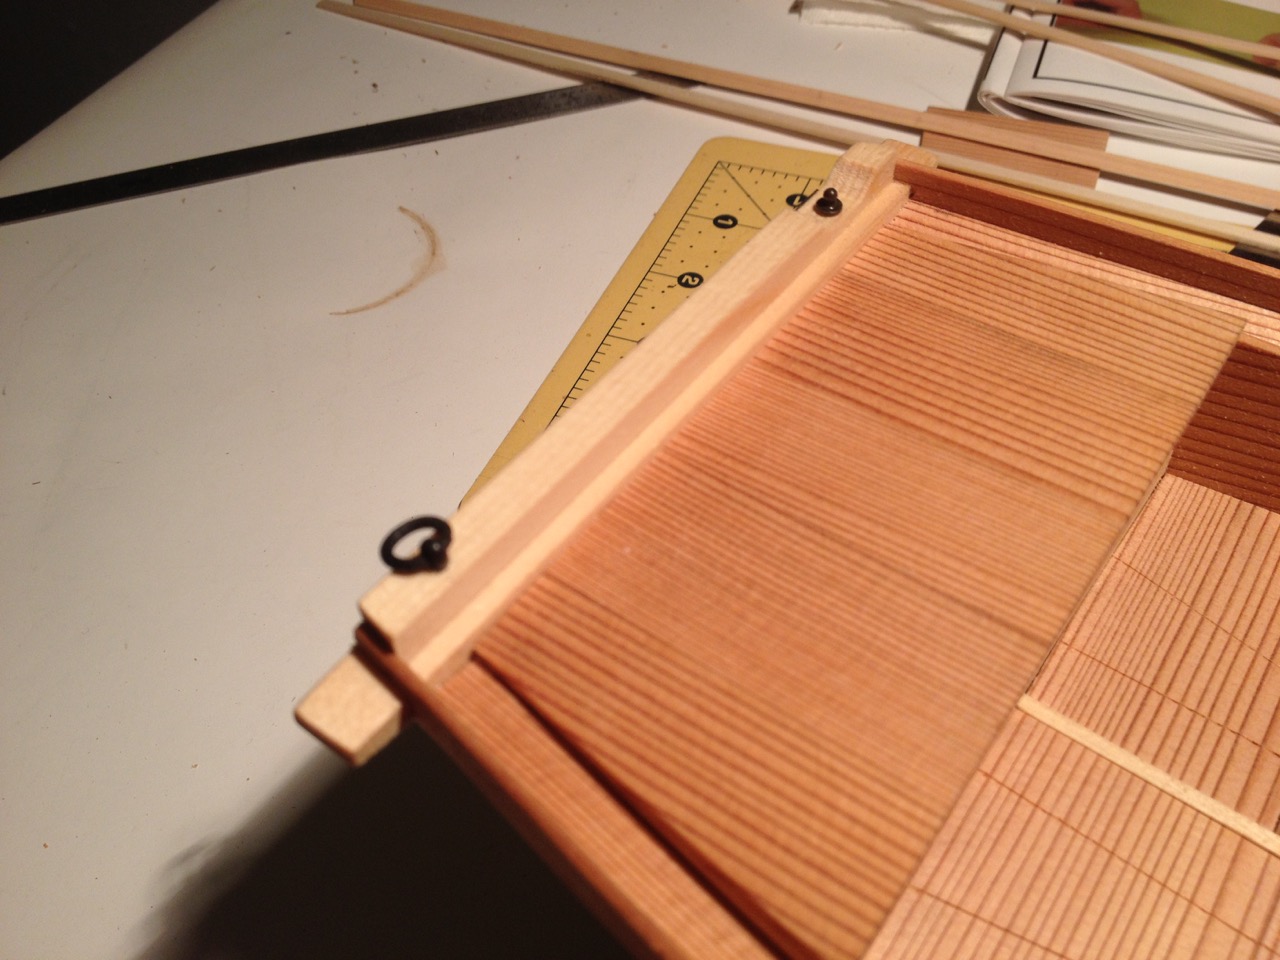
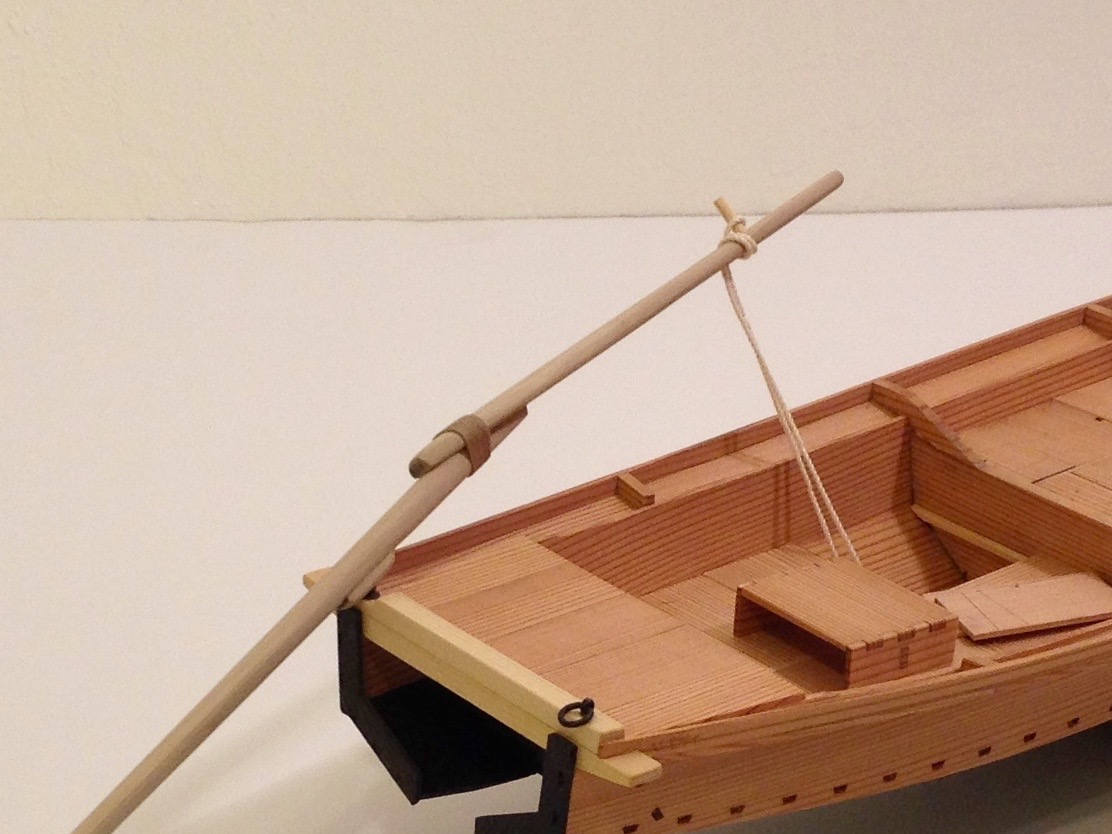
Ringbolt and the pin for the sculling oar added to the stern beam.
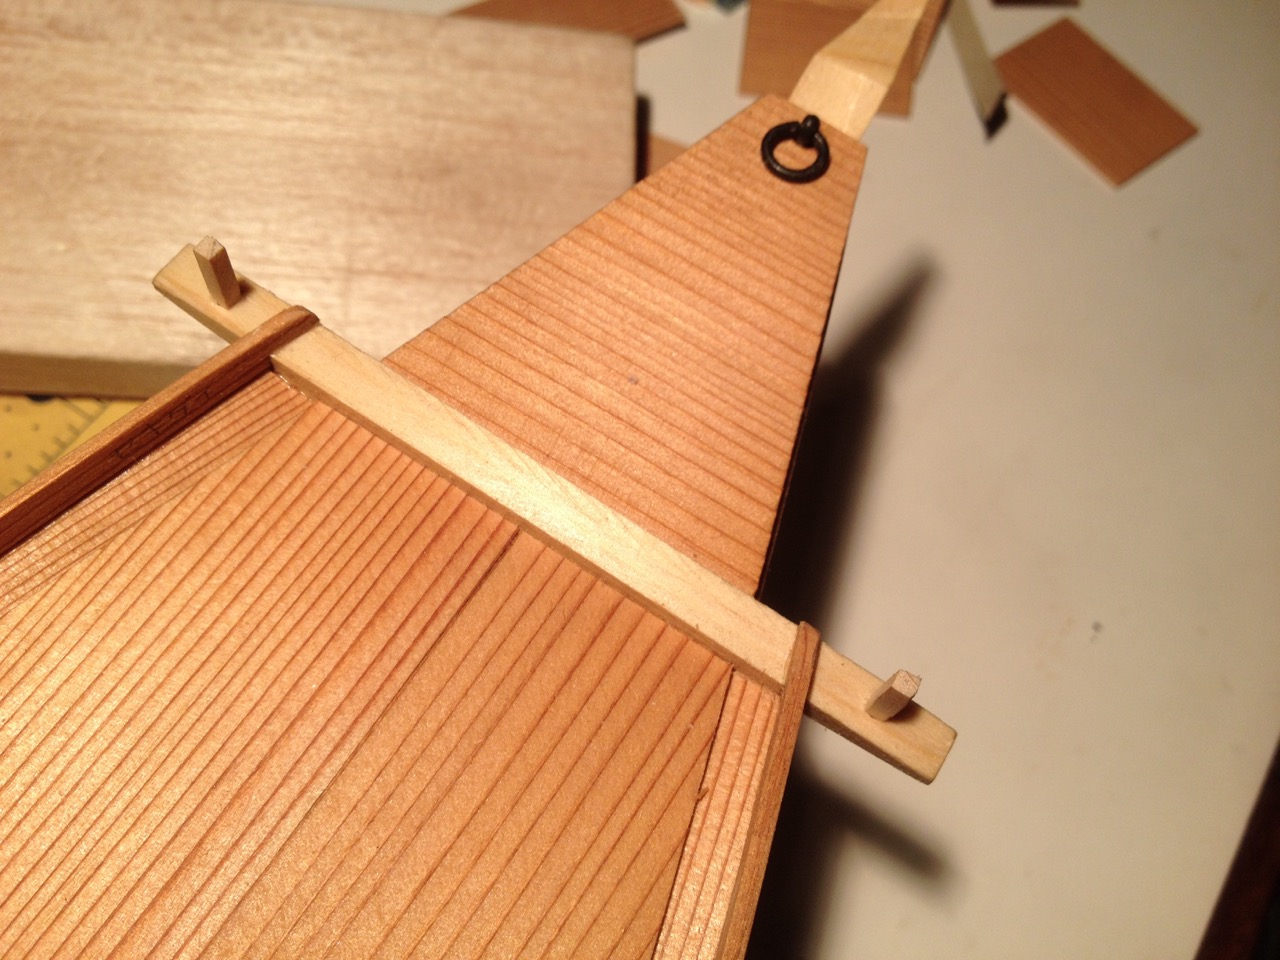
Ringbolt and, for lack of better term, “belaying pins”, which are mounted on the bow beam.
The kit includes some accessories that I jumped ahead and worked on because they looked fun and interesting. Specifically, there are two wooden seats, a small hand-paddle, and a bailer for scooping water out of the boat.
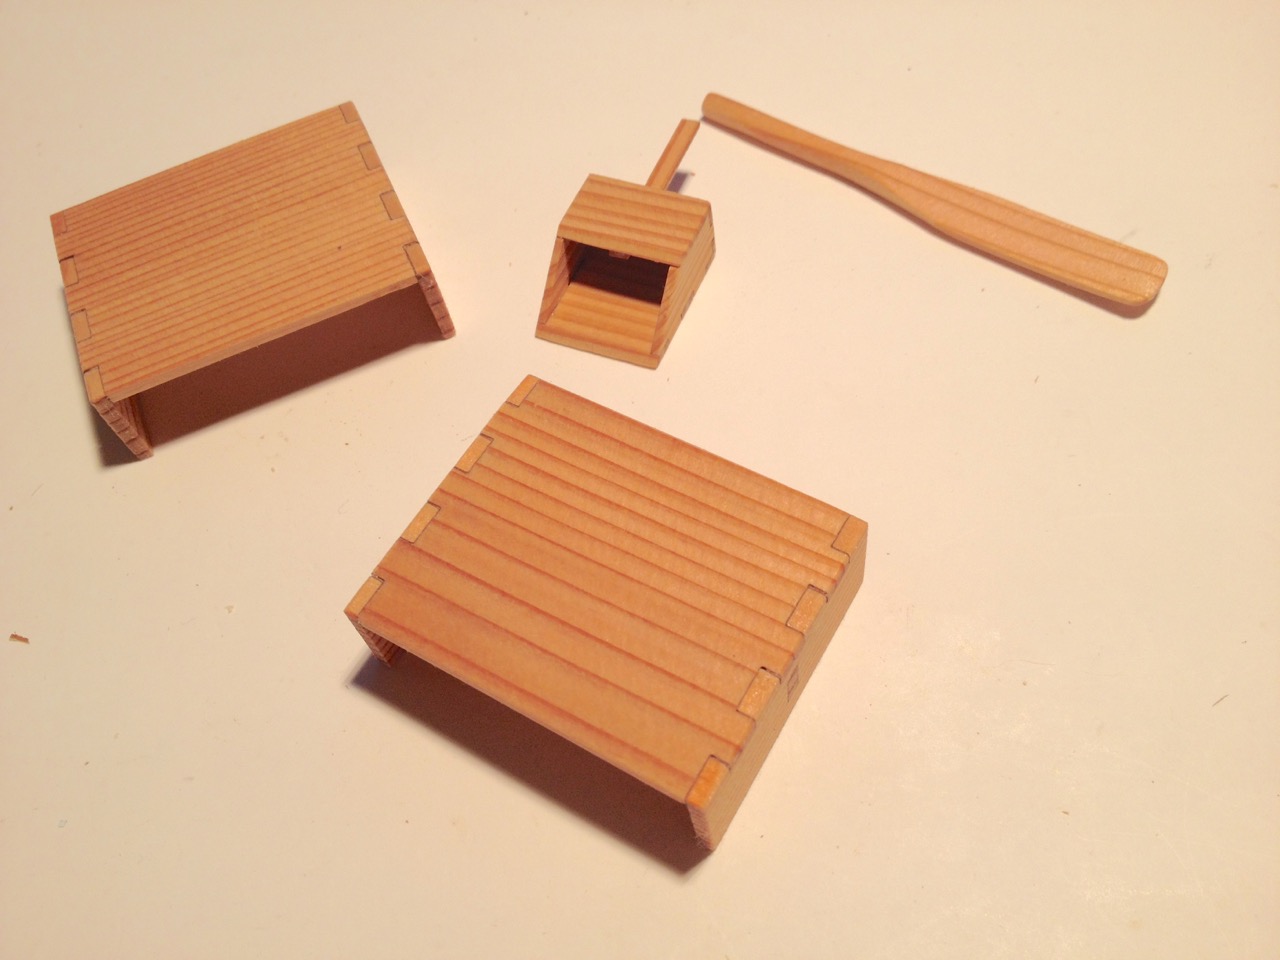
The laser-cut pieces are designed to create nice box joints between all the parts, and as with everything else, the parts go together in a perfect fit. This is true of the bailer as well as the seats. The hand-paddle, called a Tekaki, was the only item here that required any shaping. Everthing else just went together and took a little sanding to soften the edges just a bit.
Afterwards, if you don’t want to display them on deck, they fit quite neatly in the storage spaces below the deck.

The Sculling Oar
The boat, like most traditional Japanese boats, is propelled by a long, rearward facing sculling oar called a “Ro”. The sculling oar in this kit makes an accurate representation of a Japanese sculling oar. The plans show the cross-section of the oar at different points along its length, and the scale is large enough for people to see the shape detail.
The oar comes in two main pieces where were milled, not laser-cut, from Japanese magnolia, or “Ho”. This is kind of a grayish colored wood with a fairly fine grain that is harder than the cedar or cypress in the kit.
I varied a bit from the kit design here in that the kit included a tiny screw and nut to fasten the parts together. This is how the real Ro are made today and for the last 100 years or so. But, going for the Edo period look, I decided to wrap them together with rope instead.
The anchor is the last item of this build. Not sure how they form this, but it seems like a piece of cast acrylic. It’s just a ted flexy, but has a good shape to it. It comes a little too thick, so it required some sanding to get it to look a bit more like the photos in the instructions. I ended up speeding up the process by using my belt sander. The part held up well and didn’t melt, so this worked out pretty well.
The anchor’s shape has a bit of taper, so it’s thinner at the top than at the bottom. At the base, there is a hole from a cross piece, making it look something like a grappling hook.
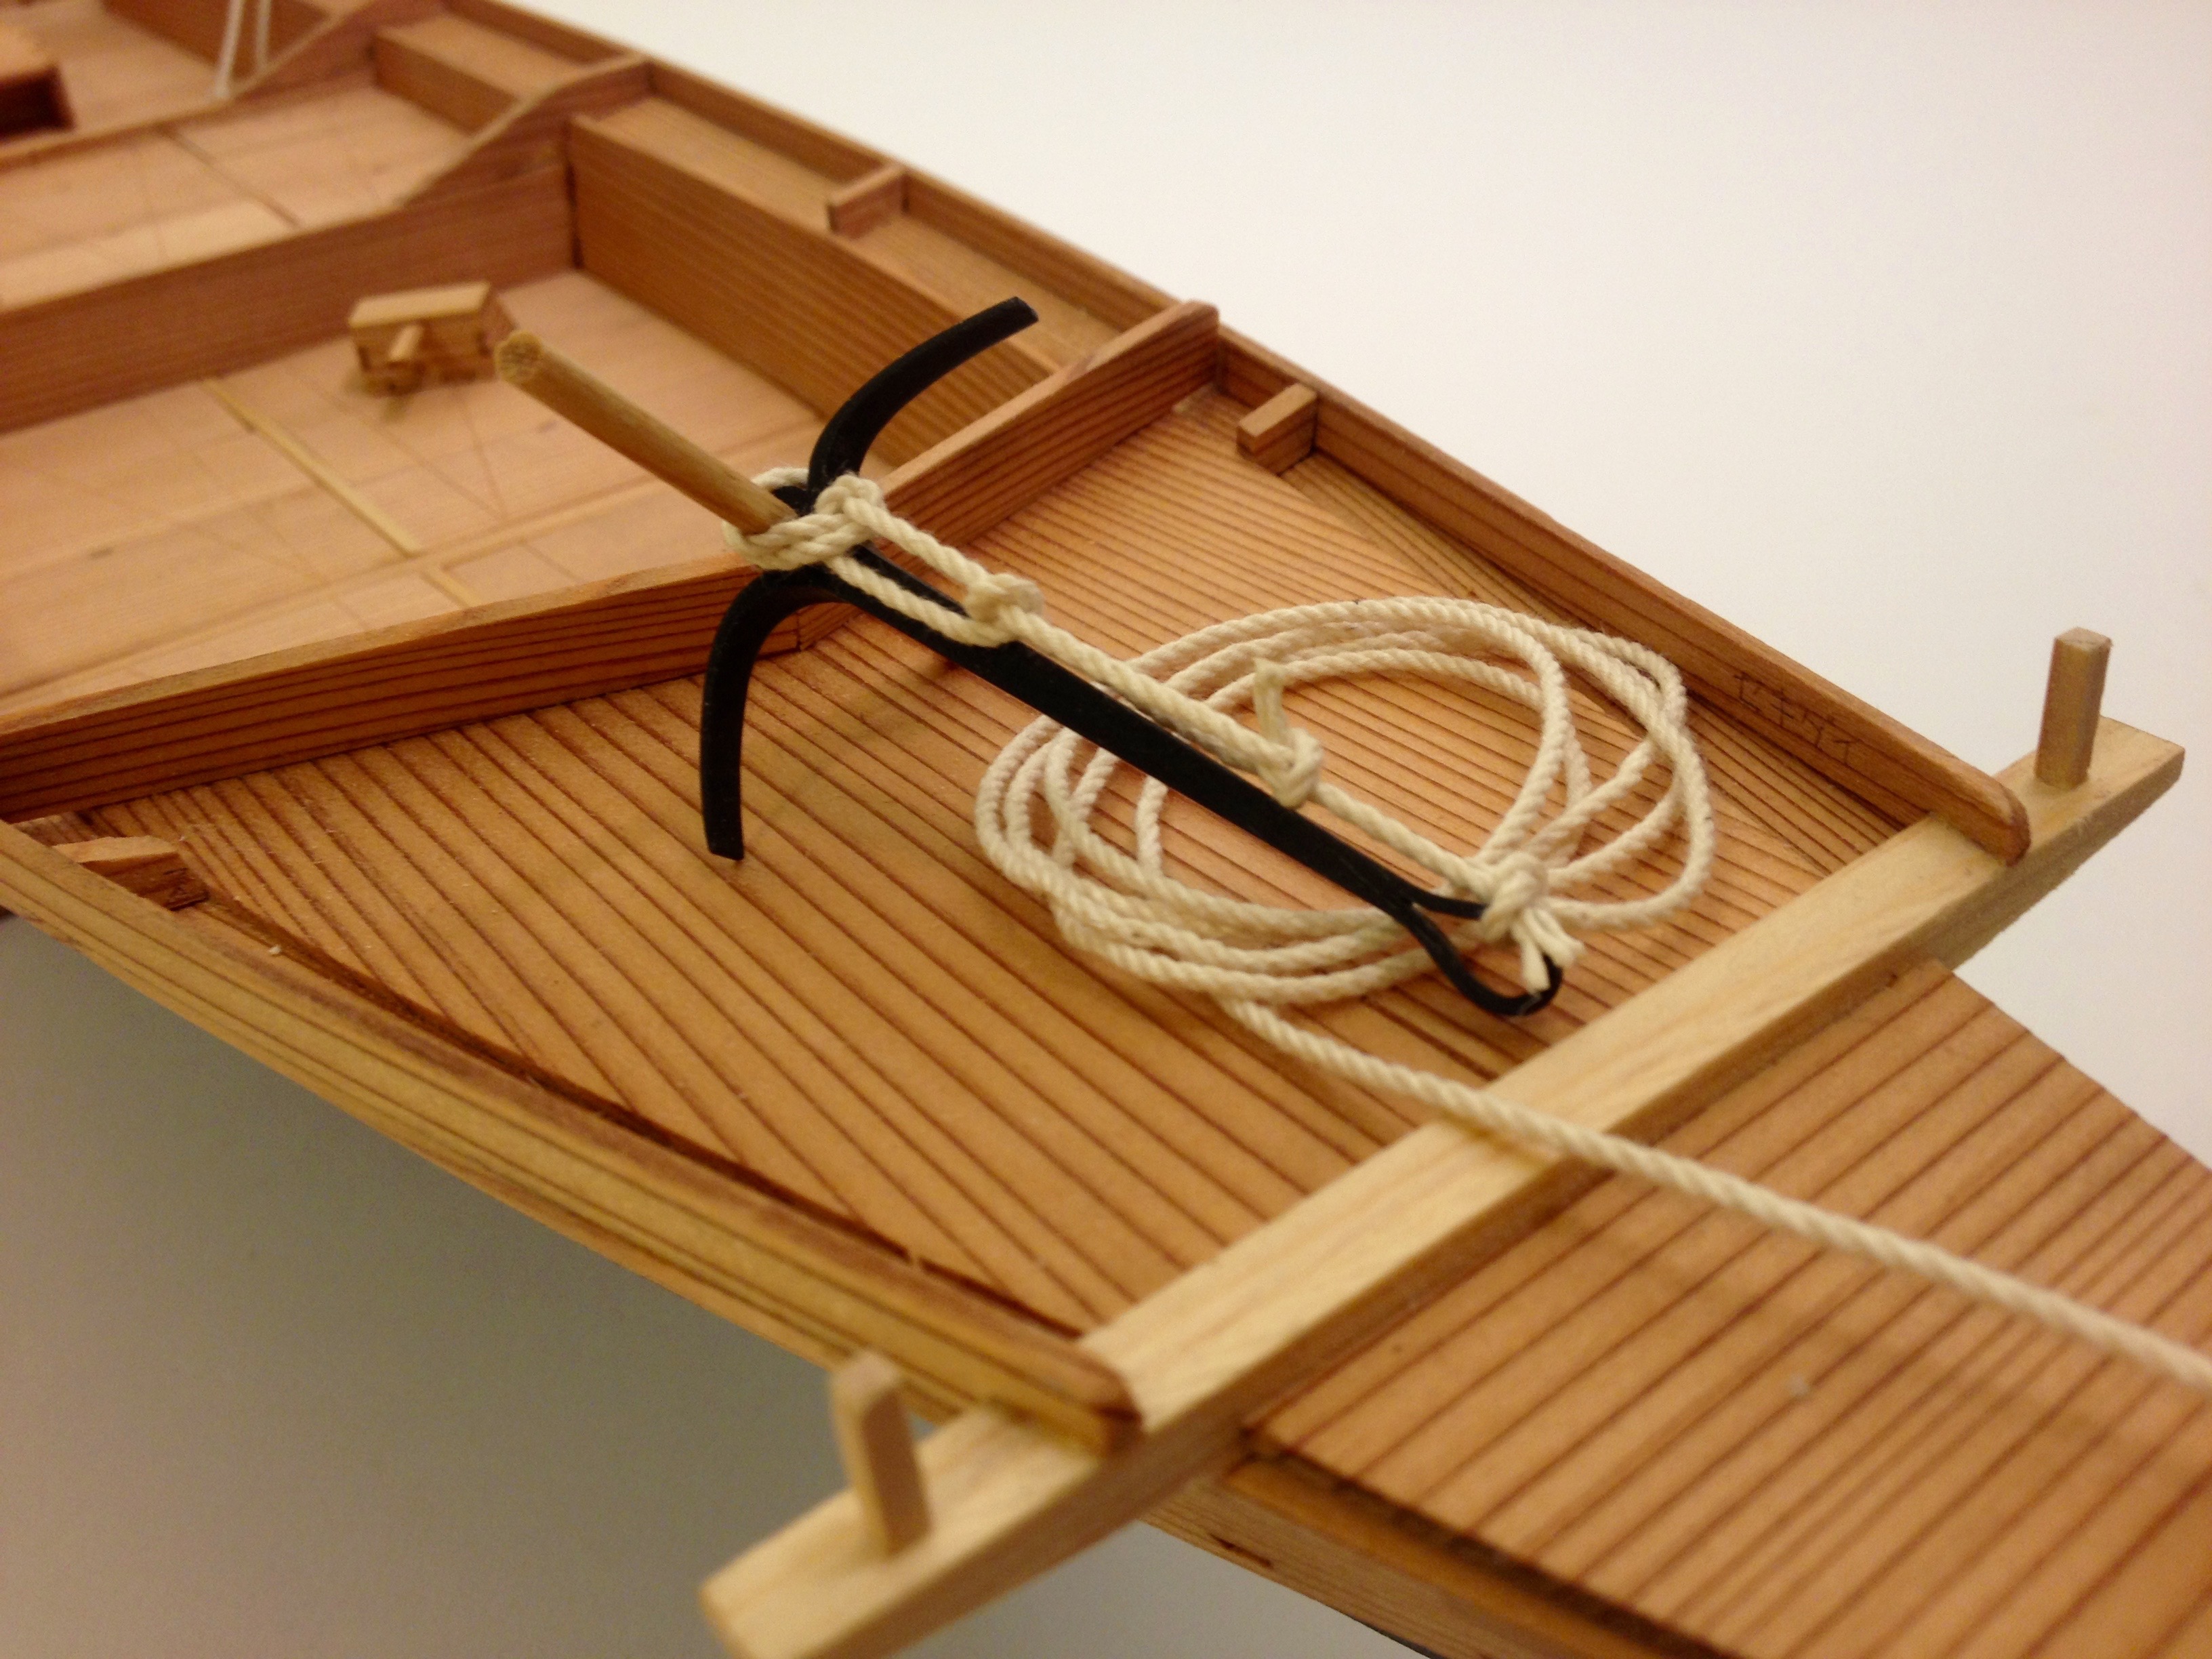
The hardest part was tying the knots. I tried translating the text with Bing Translate, but all I got was a Japanese name for the knot. However, Google Translate came up with “Bowline”, which made life much easier. Basically, there’s a bowline at the base, a pair of half hitches, and the a separate rope ties the anchor cable to the eye of the anchor. The cable is then fastened to the ringbolt on the stem using a bowline.
A short piece of the supplied rope for the anchor cable was needed for the loop that secures the sculling oar. When not in use, that loop of rope stores away nicely under the deck.
The finished project turned out beautifully. I used a coat of natural stain to finish it off and seal the wood. According to the label on the Minwax can, it seals, so that should help the longevity of the model as well as bring out some of the color of the wood.
I’ll eventually build a case for the model. With not masts, a cased Tosa Wasen model will fit easily in the bookcase. My Wasen Display is still running at the bank in San Francisco’s Japantown, but I have plenty to do with other projects, so I won’t worry about adding this model until Wasen Model Display 4.0 maybe in the Summer.

Again, this is a great model kit for those interested in traditional Japanese boats. Email info@thermal-kobo.jp for ordering information. For now, the kit has a very low price – about $130 shipped by express service, payable using Paypal. If you would, tell them I sent you. Ω
