

Illustrated History of Japanese Traditional Boats
As I mentioned last time, I’m using drawings in one of the books I ordered from Japan earlier in the year. There were three I bought at the same time using a buying service called Buyee.com. This allows me to shop on Japanese online stores more easily than ordering directly from the stores since the purchases are done in English. It doesn’t help with product descriptions, but once I find something I want, buying it is fairly easy.
This service also receives the items using local shipping service in Japan, inspects the products, and ships them internationally to me. There is a small fee in addition to the shipping charges. I’ve only needed to use the service a couple times, but has so far worked well.
The books I purchased were all on the subject of traditional Japanese boats and were written by Kenji Ishii, published in 1983. Professor Ishii was the authority on Japanese traditional boats, but I can’t tell you any more detail about him at this point. What I know is that Paul Fontenoy, the editor of the Nautical Research Journal and Curator of Maritime Research and Technology at the North Carolina Maritime Museum, had worked with him in Japan and talks very fondly of him.
The main book is the Illustrated History of Japanese Traditional Boats, or Zusetsu Wasen Shiwa (図説和船史話). It is an out of print book, which I feel lucky to have found, though it cost about $200 to get it and ship it. It was certainly worth the cost, as I would be nowhere without the information I’ve found, and am still finding, in its pages. It’s still difficult to extract the information I need as it is written in Japanese, but, mostly, it takes time.
In any case, the section on the Kamakura era ships has a drawing of the large umi-bune which includes top and side views as well as a couple cross-sections. Given that the cross-sections on a ship of this type are essentially identical, and actually included a scale, I decided to give it a try as a scratch build subject. At some point, I’ll try to execute a decent drawing of my model. For now, here’s an image I found on a Japanese blog site that appears to be from one of Professor Ishii’s book.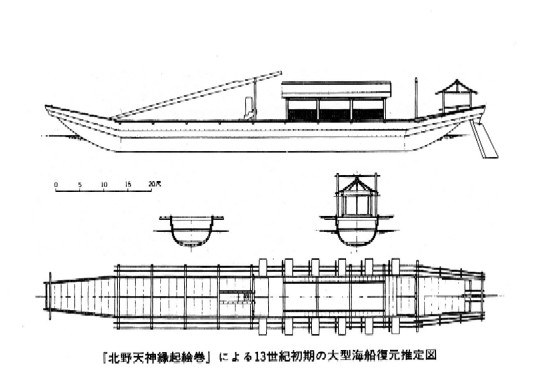
I took the image in my book and tried rescaling it to different sizes, but settled on 1/50 as the most reasonable size for a simple model that I could build and display easily.
The original specifications describe a ship 93 shaku in length (a shaku is roughly 1 foot), 8.4 shaku wide, and 5.7 shaku deep, with a crew of 12 oarsmen and a cargo capacity of 250 koku, or about 37.5 tons. At 1/50 scale, the model would be just about 21-1/2″ long.
I should point out that one of the reasons for choosing this scale, which does not match any of the wasen models I’ve built up to now, is that it’s very close to 1/48 scale or 1/4″=1′, which a nice ship modeling scale that I’ve worked with before. Also, at just short of 2′ long, the final model would fit in well with the other models of my Japanese boats display, even though I’ll have to create yet another different sized boatman silhouette figure for scale illustration.
I scanned the image in the book and brought into Adobe Illustrator. Although I have an old CS 5.1 version that still works, Adobe’s month-to-month Creative Cloud subscription works out pretty nicely for projects like this. Paying for a single month of software usage, I could have worked out the drawings for this project and then some before the end of the 30 days for about $30. By using Illustrator, I could print the large, 1/50-scale image by tiling it onto regular sheets of paper, though I really would like a large format printer someday for just this kind of thing.
In the meantime, I grabbed photos of the museum models off the Internet and have been studying their construction. Boatbuilder Douglas Brooks sent me photos of one that was on display along with other models when he was building a boat for a museum in Kobe.

I did a lot of zooming in on the photos to see as much details as possible.

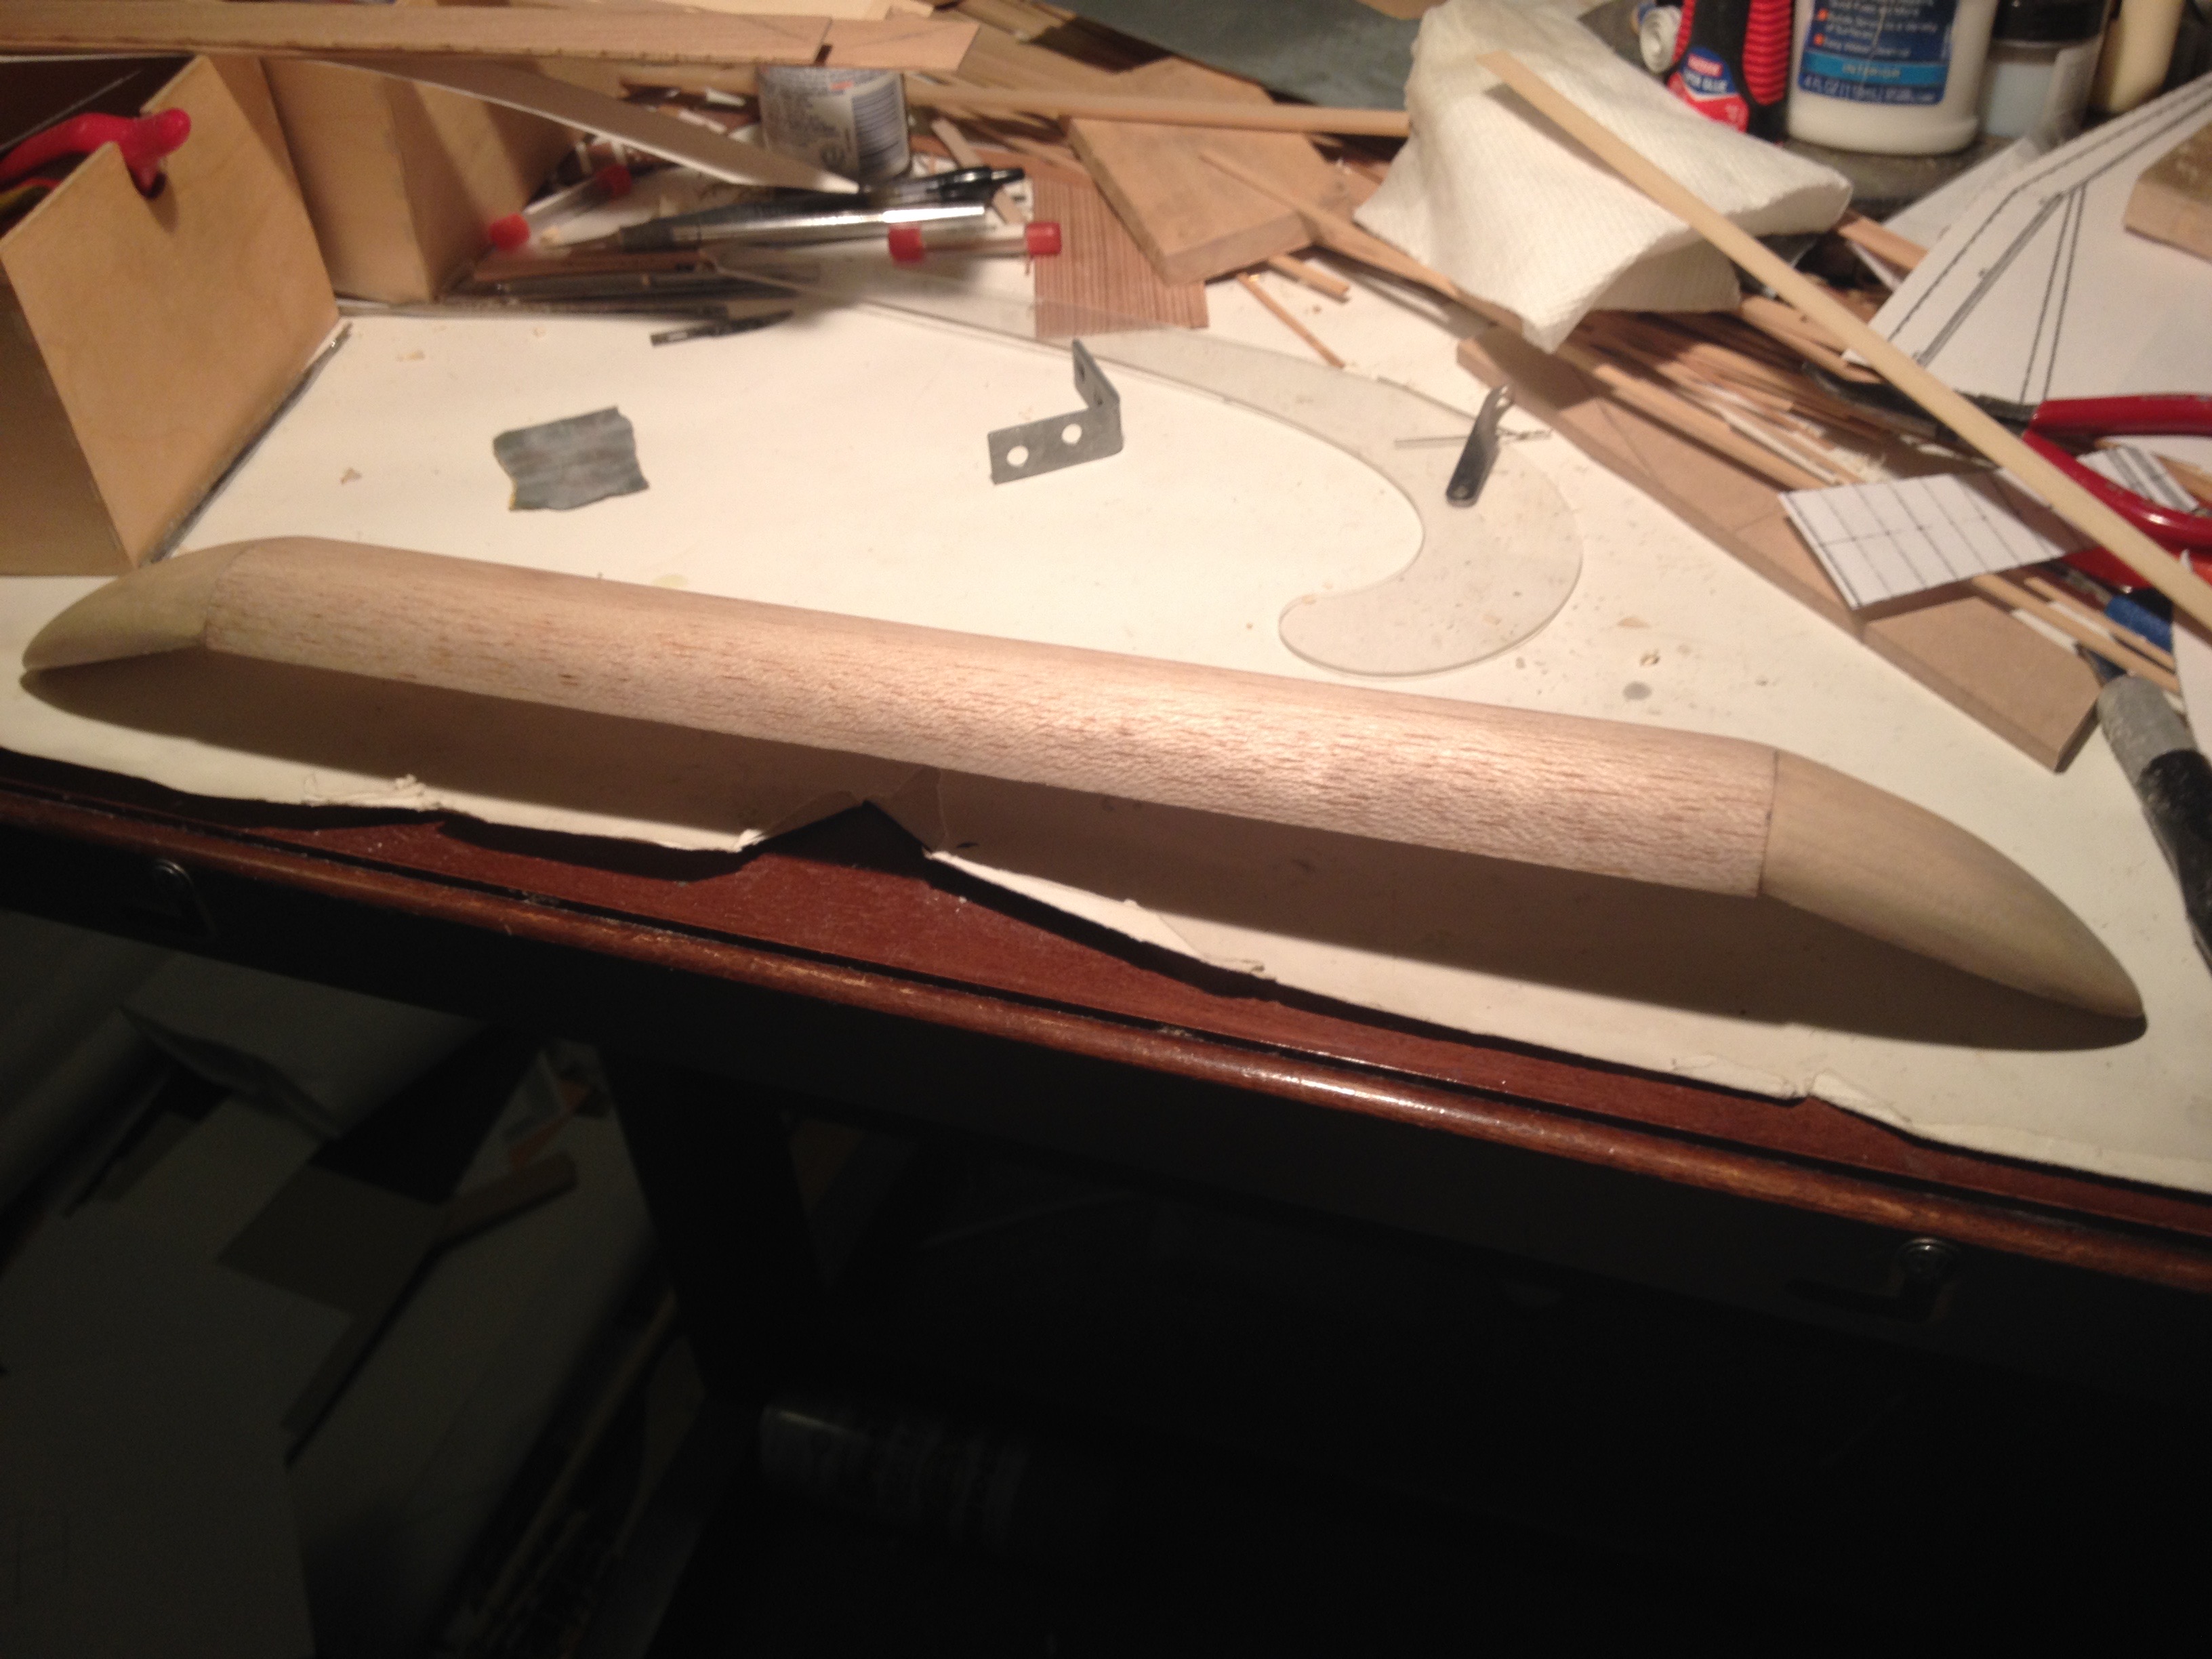
I thought about methods of hull construction for this model for quite a while before I got this far. I could have tried my hand at carving the hull inside and out, but decided I could go an easy route and make the basic, semi-cylindrical hull plank-on-bulkhead fashion since the deck would cover the interior anyway. The cross-sections in the drawing provide me with the exact shape for the bulkheads. I would then cover the bulkheads with a single, thin sheet of wood, which ended up being 1/32″ thick balsa for the sake of convenience.

While I like working with Japanese wood, I decided the structural parts, being hidden anyway, could be made from domestic lumber. So, I cut the bulkheads, the horizontal strong back, and the centerline supports from simple basswood sheet and glued them all together. As soon as the glue was set, I took a piece of 1/32″ balsa sheet, wet it, and bent it over the framework, holding it in place with rubber bands until it dried.
I wouldn’t normally use balsa as it dents way too easily, but I figured that for the long, straight, narrow hull, I could make it work. Also, it was the easiest wood that I could bend over the hull frame. I got some thin plywood for the job just in case the balsa didn’t work out. I also considered using very thin veneer. But, the balsa seemed to work well enough.
The bow and stern pieces would go on next, but needed to be carved first. I made patterns for the sides. I cut the ends of the blocks first, so that when attached, they would have the upward angle needed. Next, I used the side patterns, to get the upward curve of the blocks. Some of the shape I carved by hand, but I ended up finishing them up on my bench sander, which has a disc sander as well as a belt sander.
I then needed to determine the shape when looking down from the top. The drawings don’t provide this view of the bow, so I had to guess a bit. But, paintings of the boat and other models showed a kind of torpedo-shaped ends. So, I eyeballed the shape and drew them onto the tops of the blocks. These had to be sharp enough that the taper of the bow and stern decks would cover the hull ends completely.
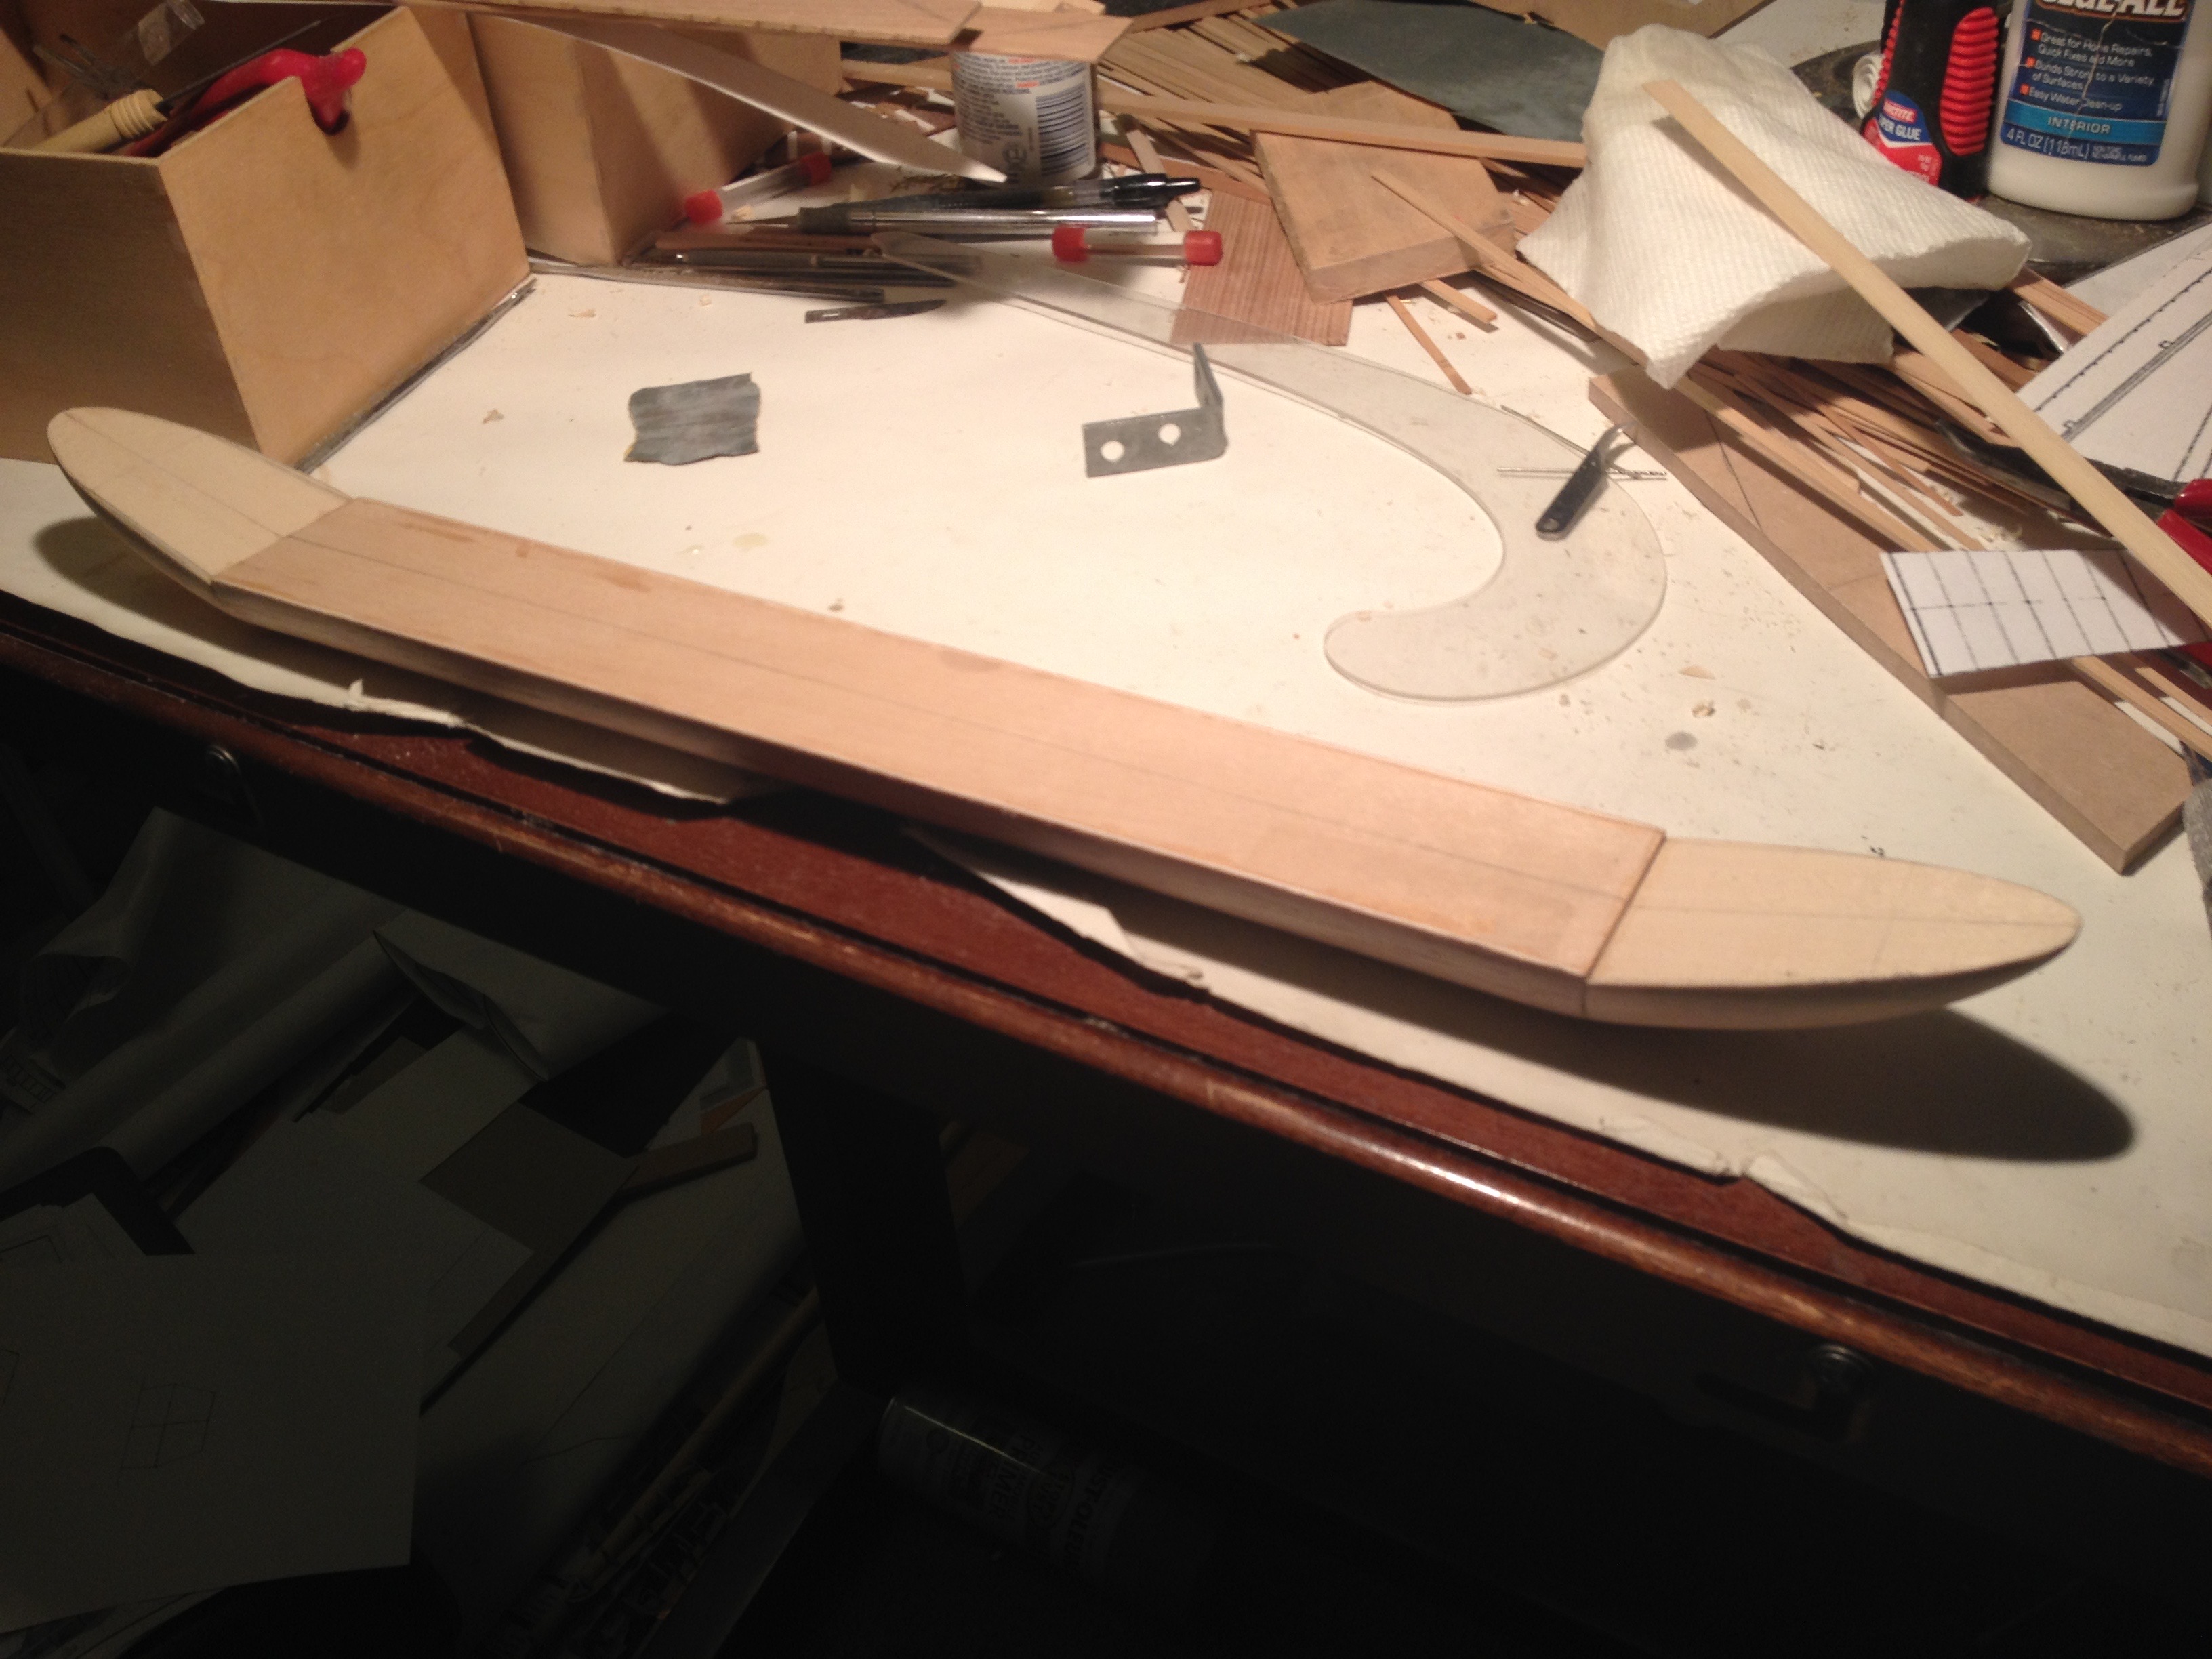
At this stage, I thought the boat was basically double-ended, with the bow and stern being the same shape. The drawing earlier on this page seems to look that way and existing models seem to look that way, but on closer examination, I noticed that the hull planking at the ends were slightly different. The ends I made worked okay, but later on I’ll discuss reasons I might consider building the model differently in the future…
