
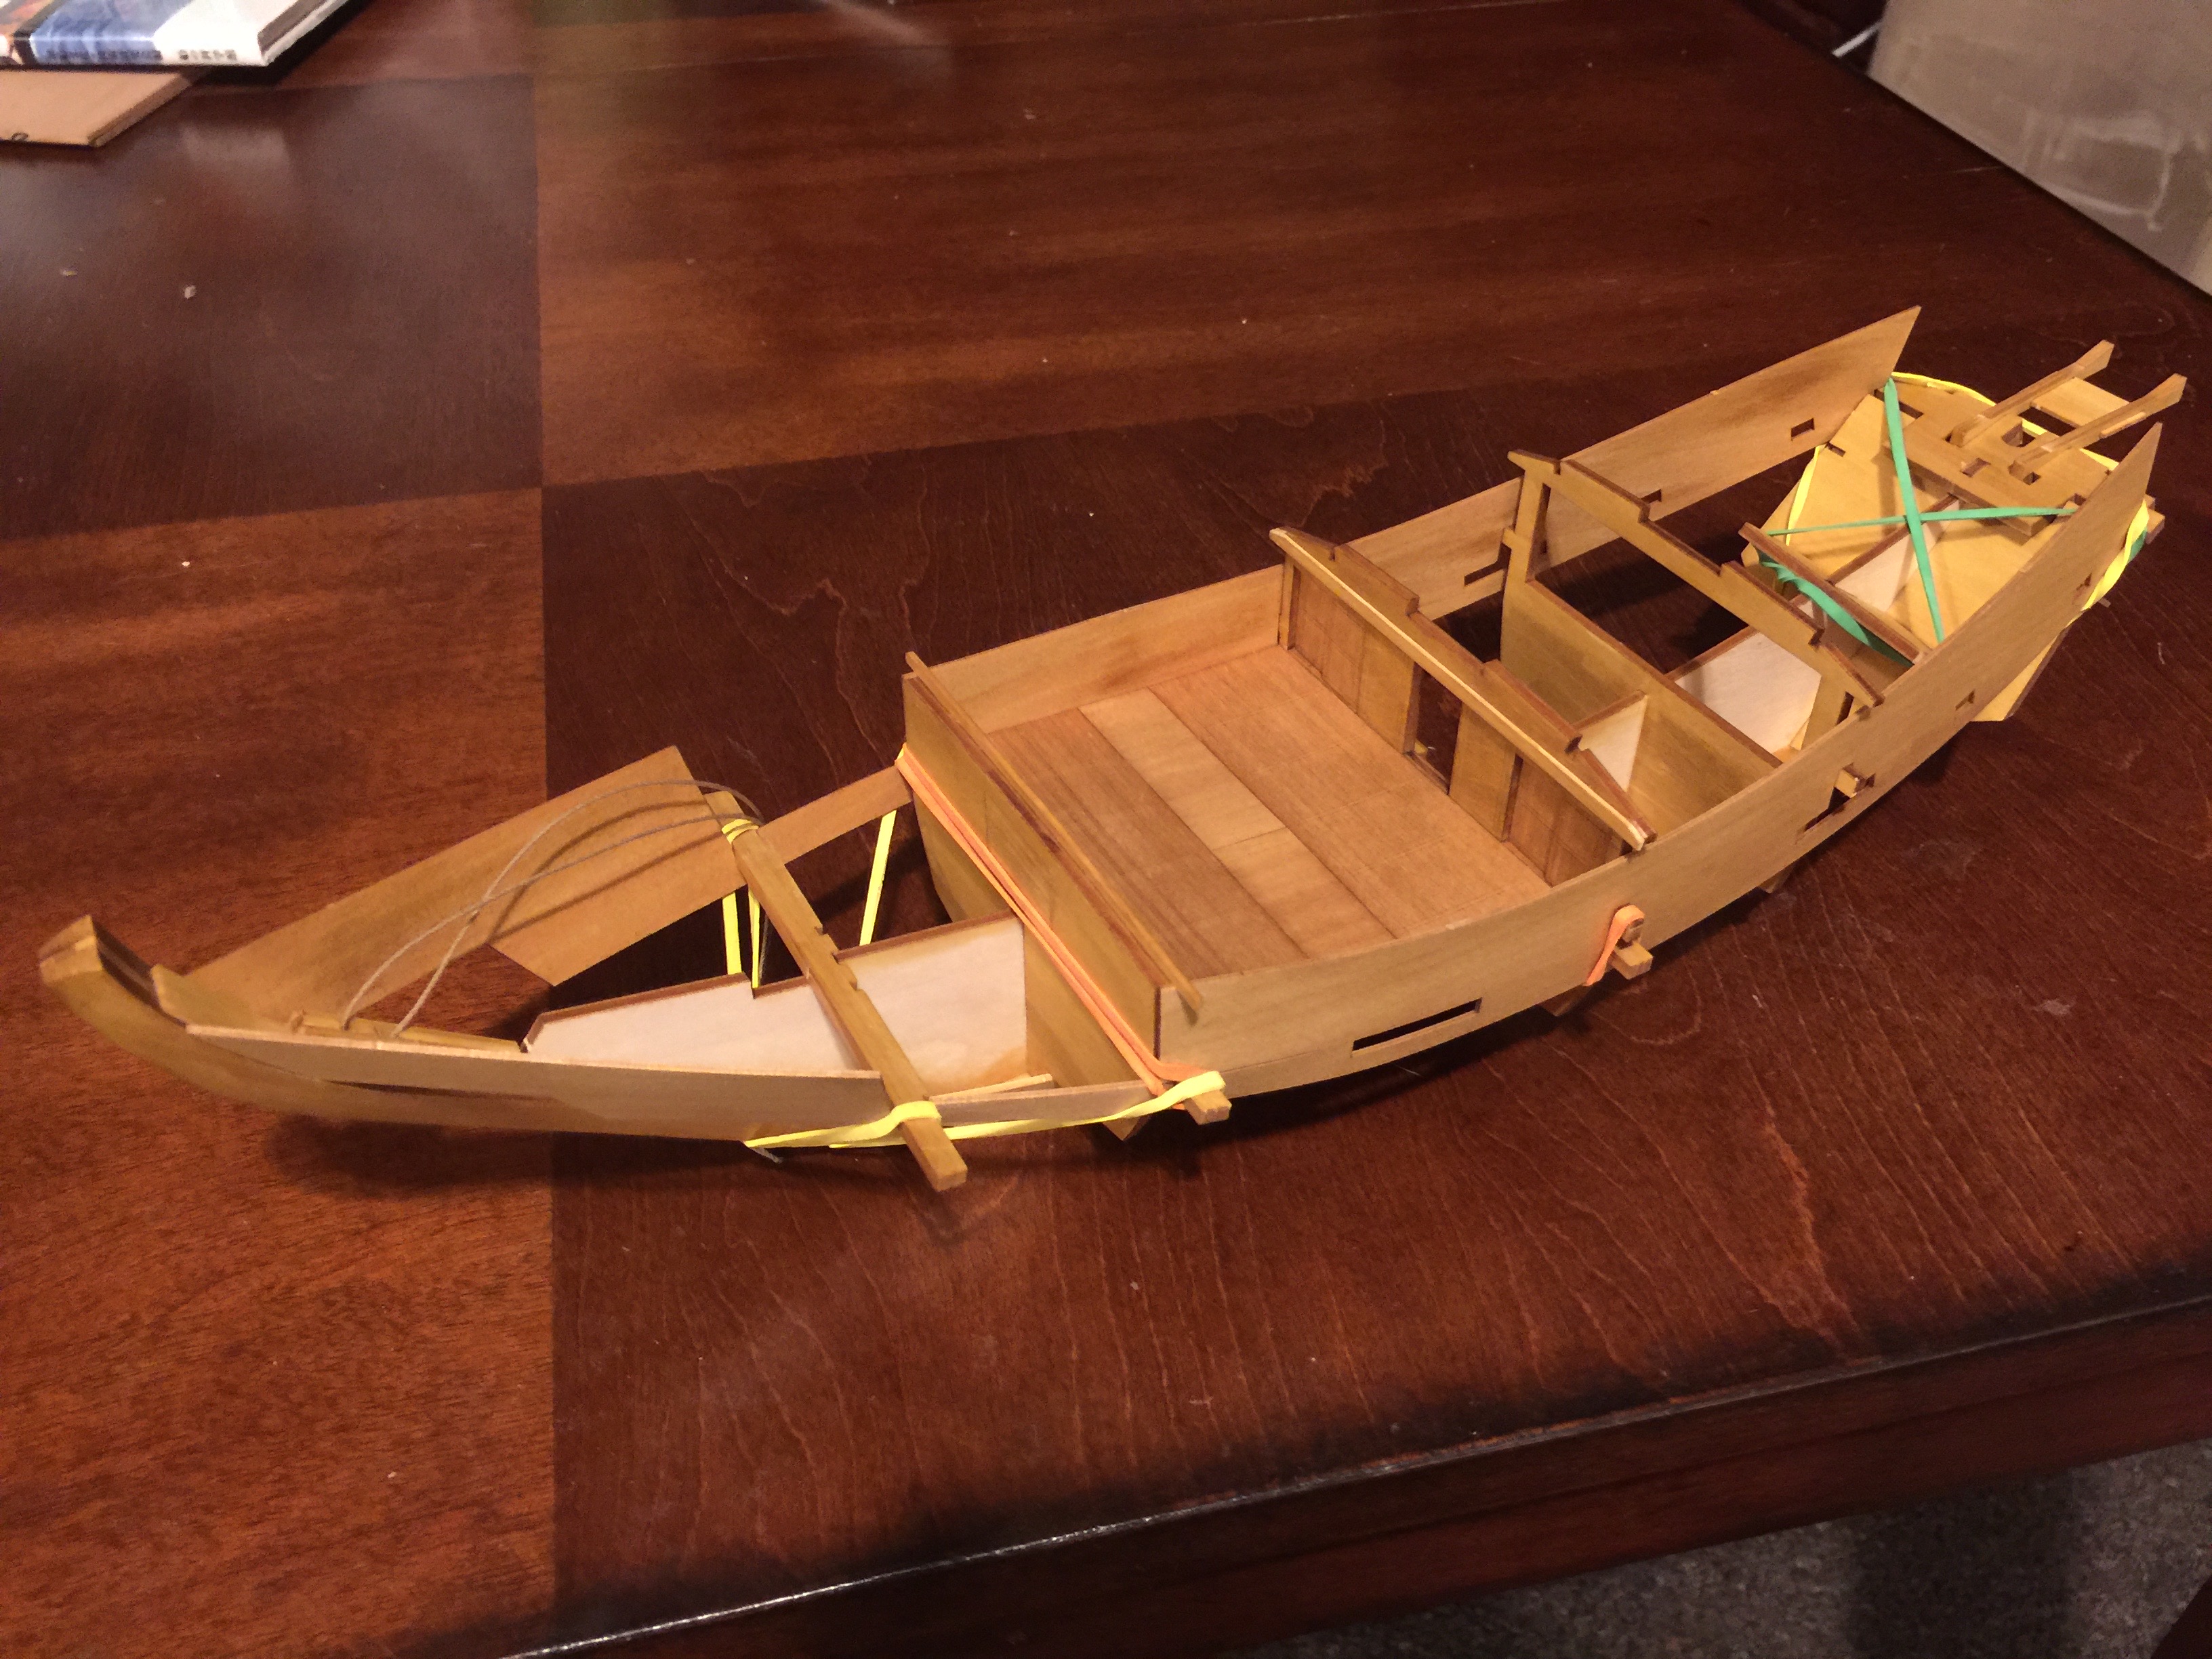
Work continues on the Kitamaebune kit from Woody Joe. This 1/72-scale laser-cut kit is the simplified cousin to their earlier Higaki-Kaisen kit. The Kitamaebune is a northern port coastal transport used extensive in the Edo period. Because they sailed on the stormier Sea of Japan, they were a bit beefier than the Higaki-Kaisen, which journeyed along the Pacific coast between Osaka and Edo.
At this stage, the model is shown with a bulwarks sheet test fit into place.
Overall, I’ve found that while this build is less time consuming than the Higaki-Kaisen kit, it has its challenges, even with simplified construction.
While the first 6 steps were pretty simple and straight forward, step 7 takes a bit of work. It involves gluing together three parts making up the miyoshi or stem. This then has to be cut or sanded to a trapezoidal cross-section that’s wider at the tip and sharper towards the base. This is pretty much the same as was required for the Higaki Kaisen kit.
One major change from the Higaki Kaisen kit is the use of laser-cut deck sheets. With the Higaki Kaisen, planks were laid much like on the original vessels. The new decking is certainly easy to install, but is very thin.

The main deck is made up of three sheets, which allows the grain to run in the proper direction with respect to the planks. The only issue I ran into was that the three sheets are glued edge to edge, and their thinness makes the glue joint a bit flimsy.


The main bulwarks are laser-cut. When glued into place, they help support the deck somewhat. I made the mistake of not looking ahead in the build and decided to cleverly glue some wood strips behind the joints between the deck sheets.
DO NOT DO THIS. As it turns out, there is a later step in which beams are inserted across the hull. A pair of these beams fit underneath these deck seams. I’m now going to have to adjust my build, since those two beams will now no longer fit.
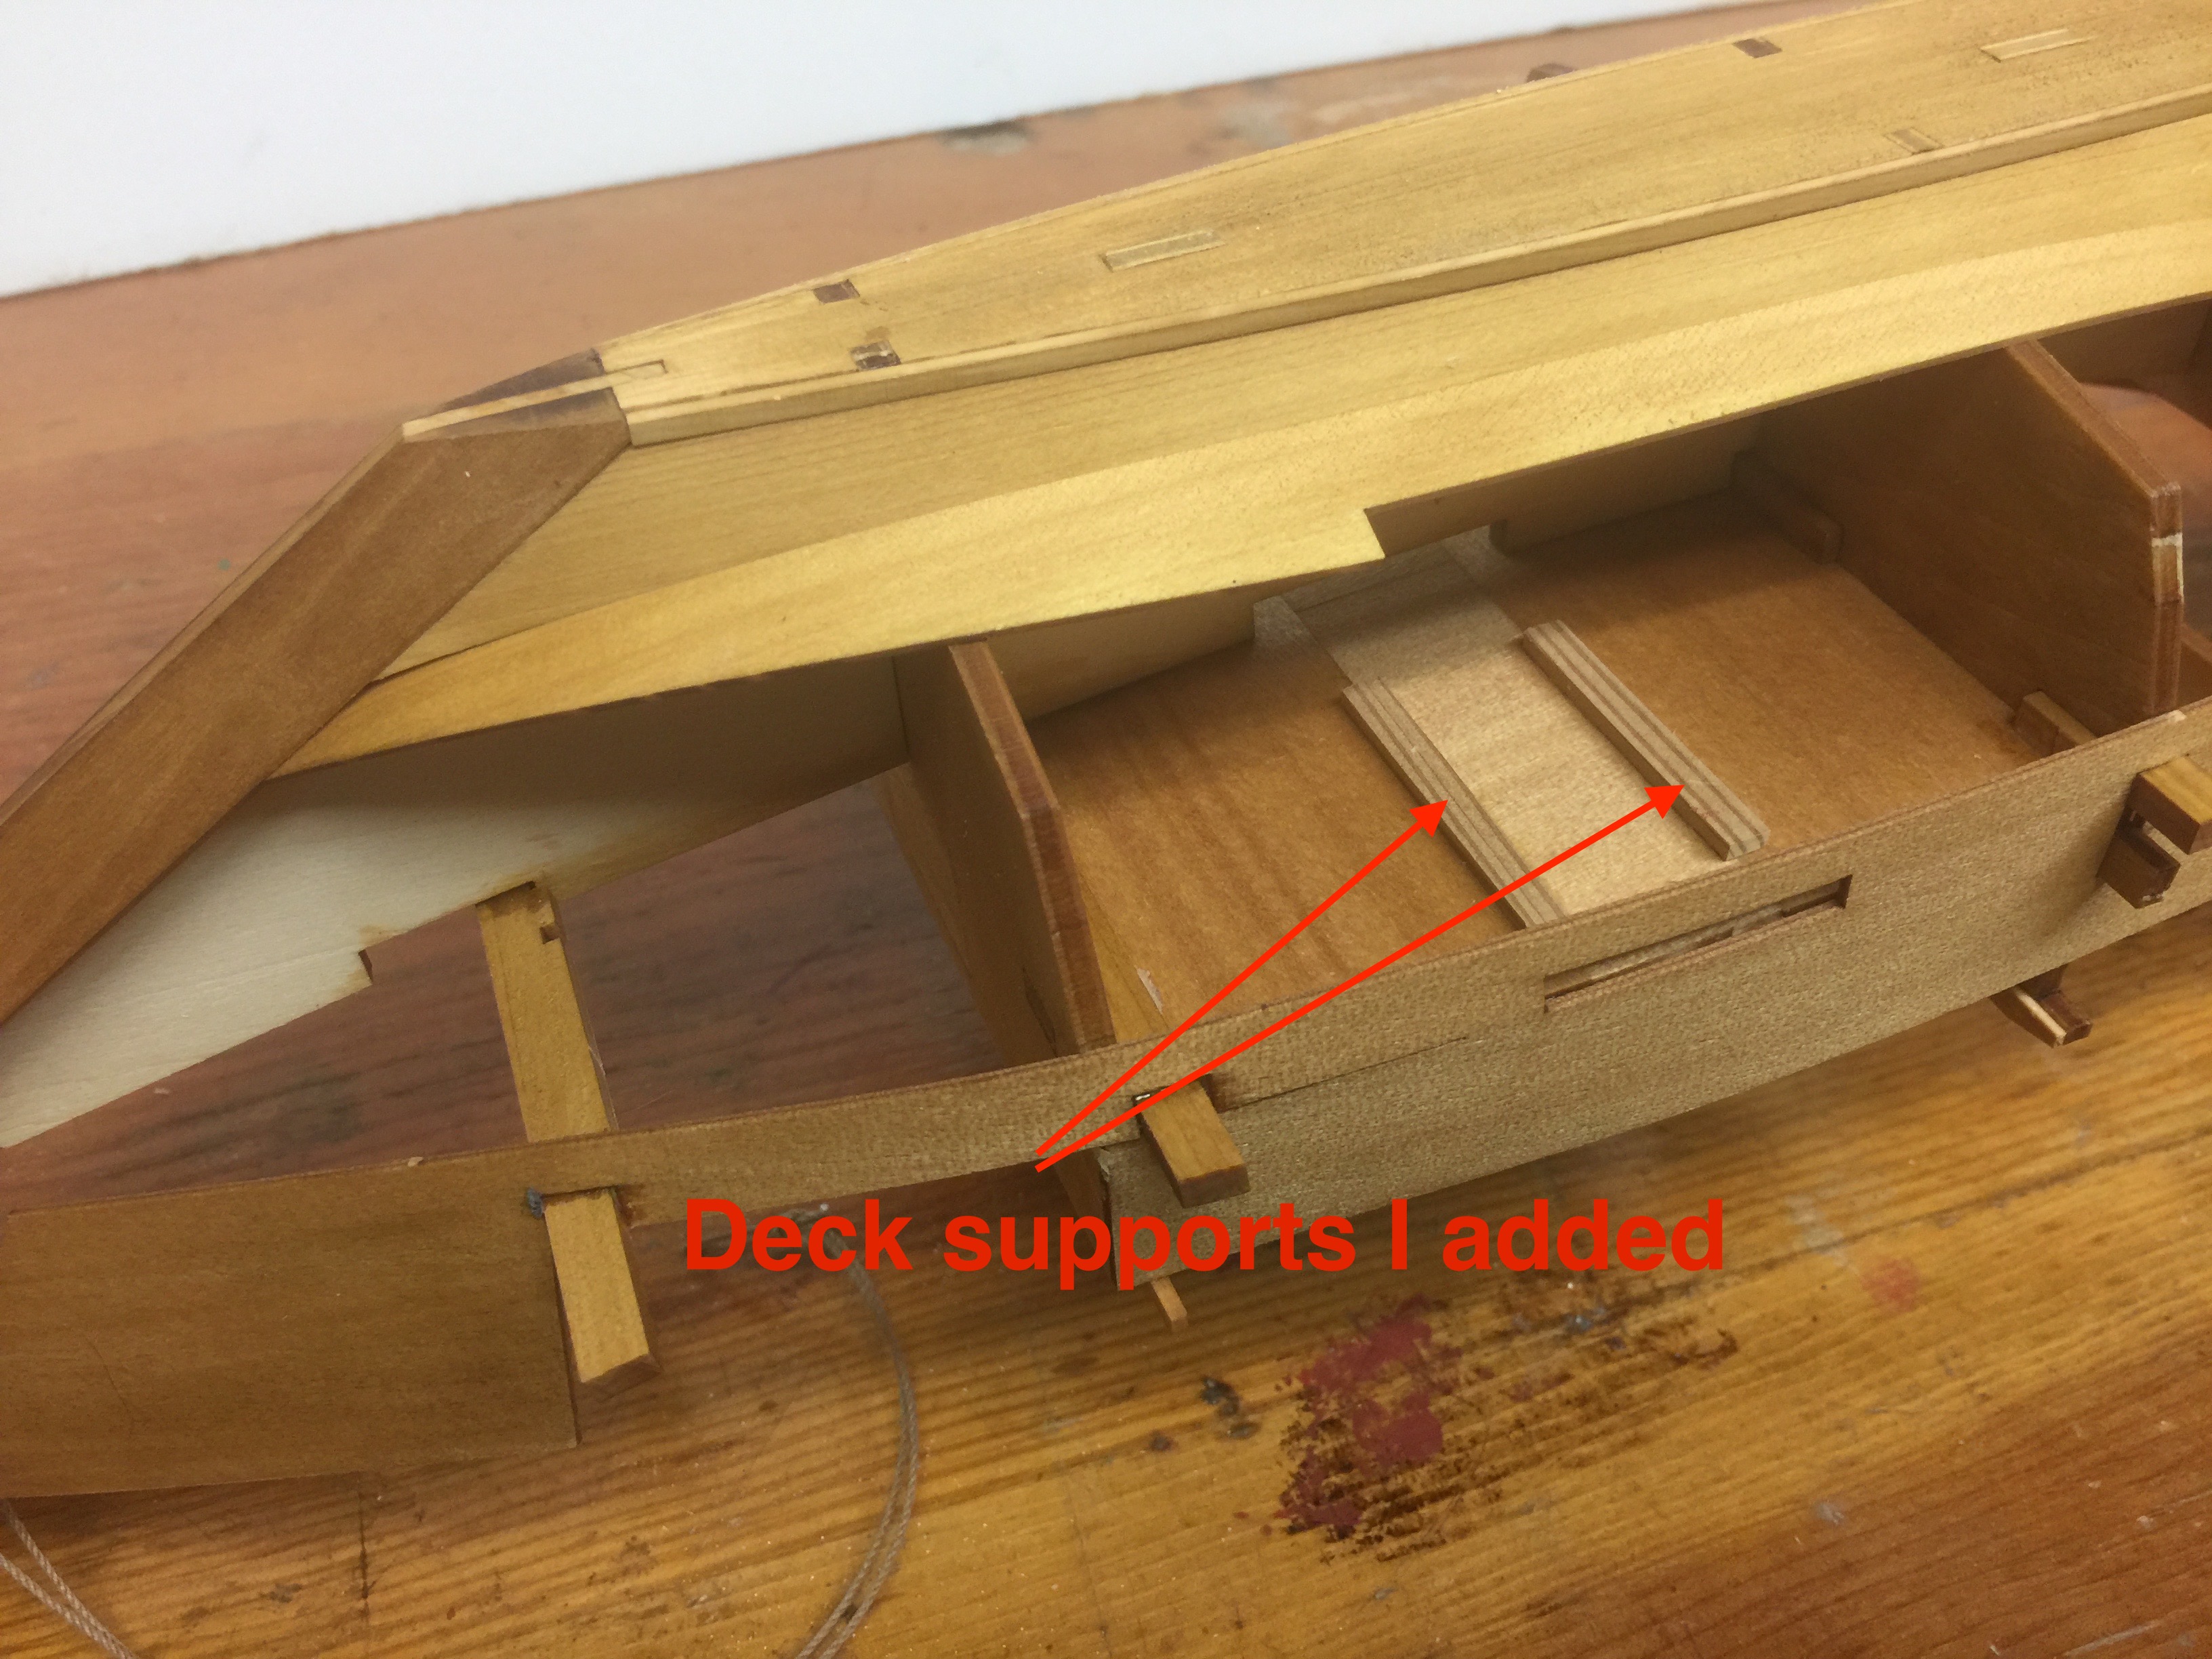
I added these support, but shouldn’t have.
So far, the trickiest part of construction is where the bulwark sheets sit against the stem. You want to be careful with the application of glue, as some of the inside of the assembly will be visible when the model is complete. Also, one doesn’t want to mar the appearance of the wood exterior.

The main problem is that until the rest of the planking is in place, this is a weak joint and will tend to pop loose while trying to get other parts into place. On my model, this happened several times over the course of the next construction steps.

The part that I found most fun in these early construction stages was the assembly of the stern section. This involved several laser-cut parts that fit together very nicely.
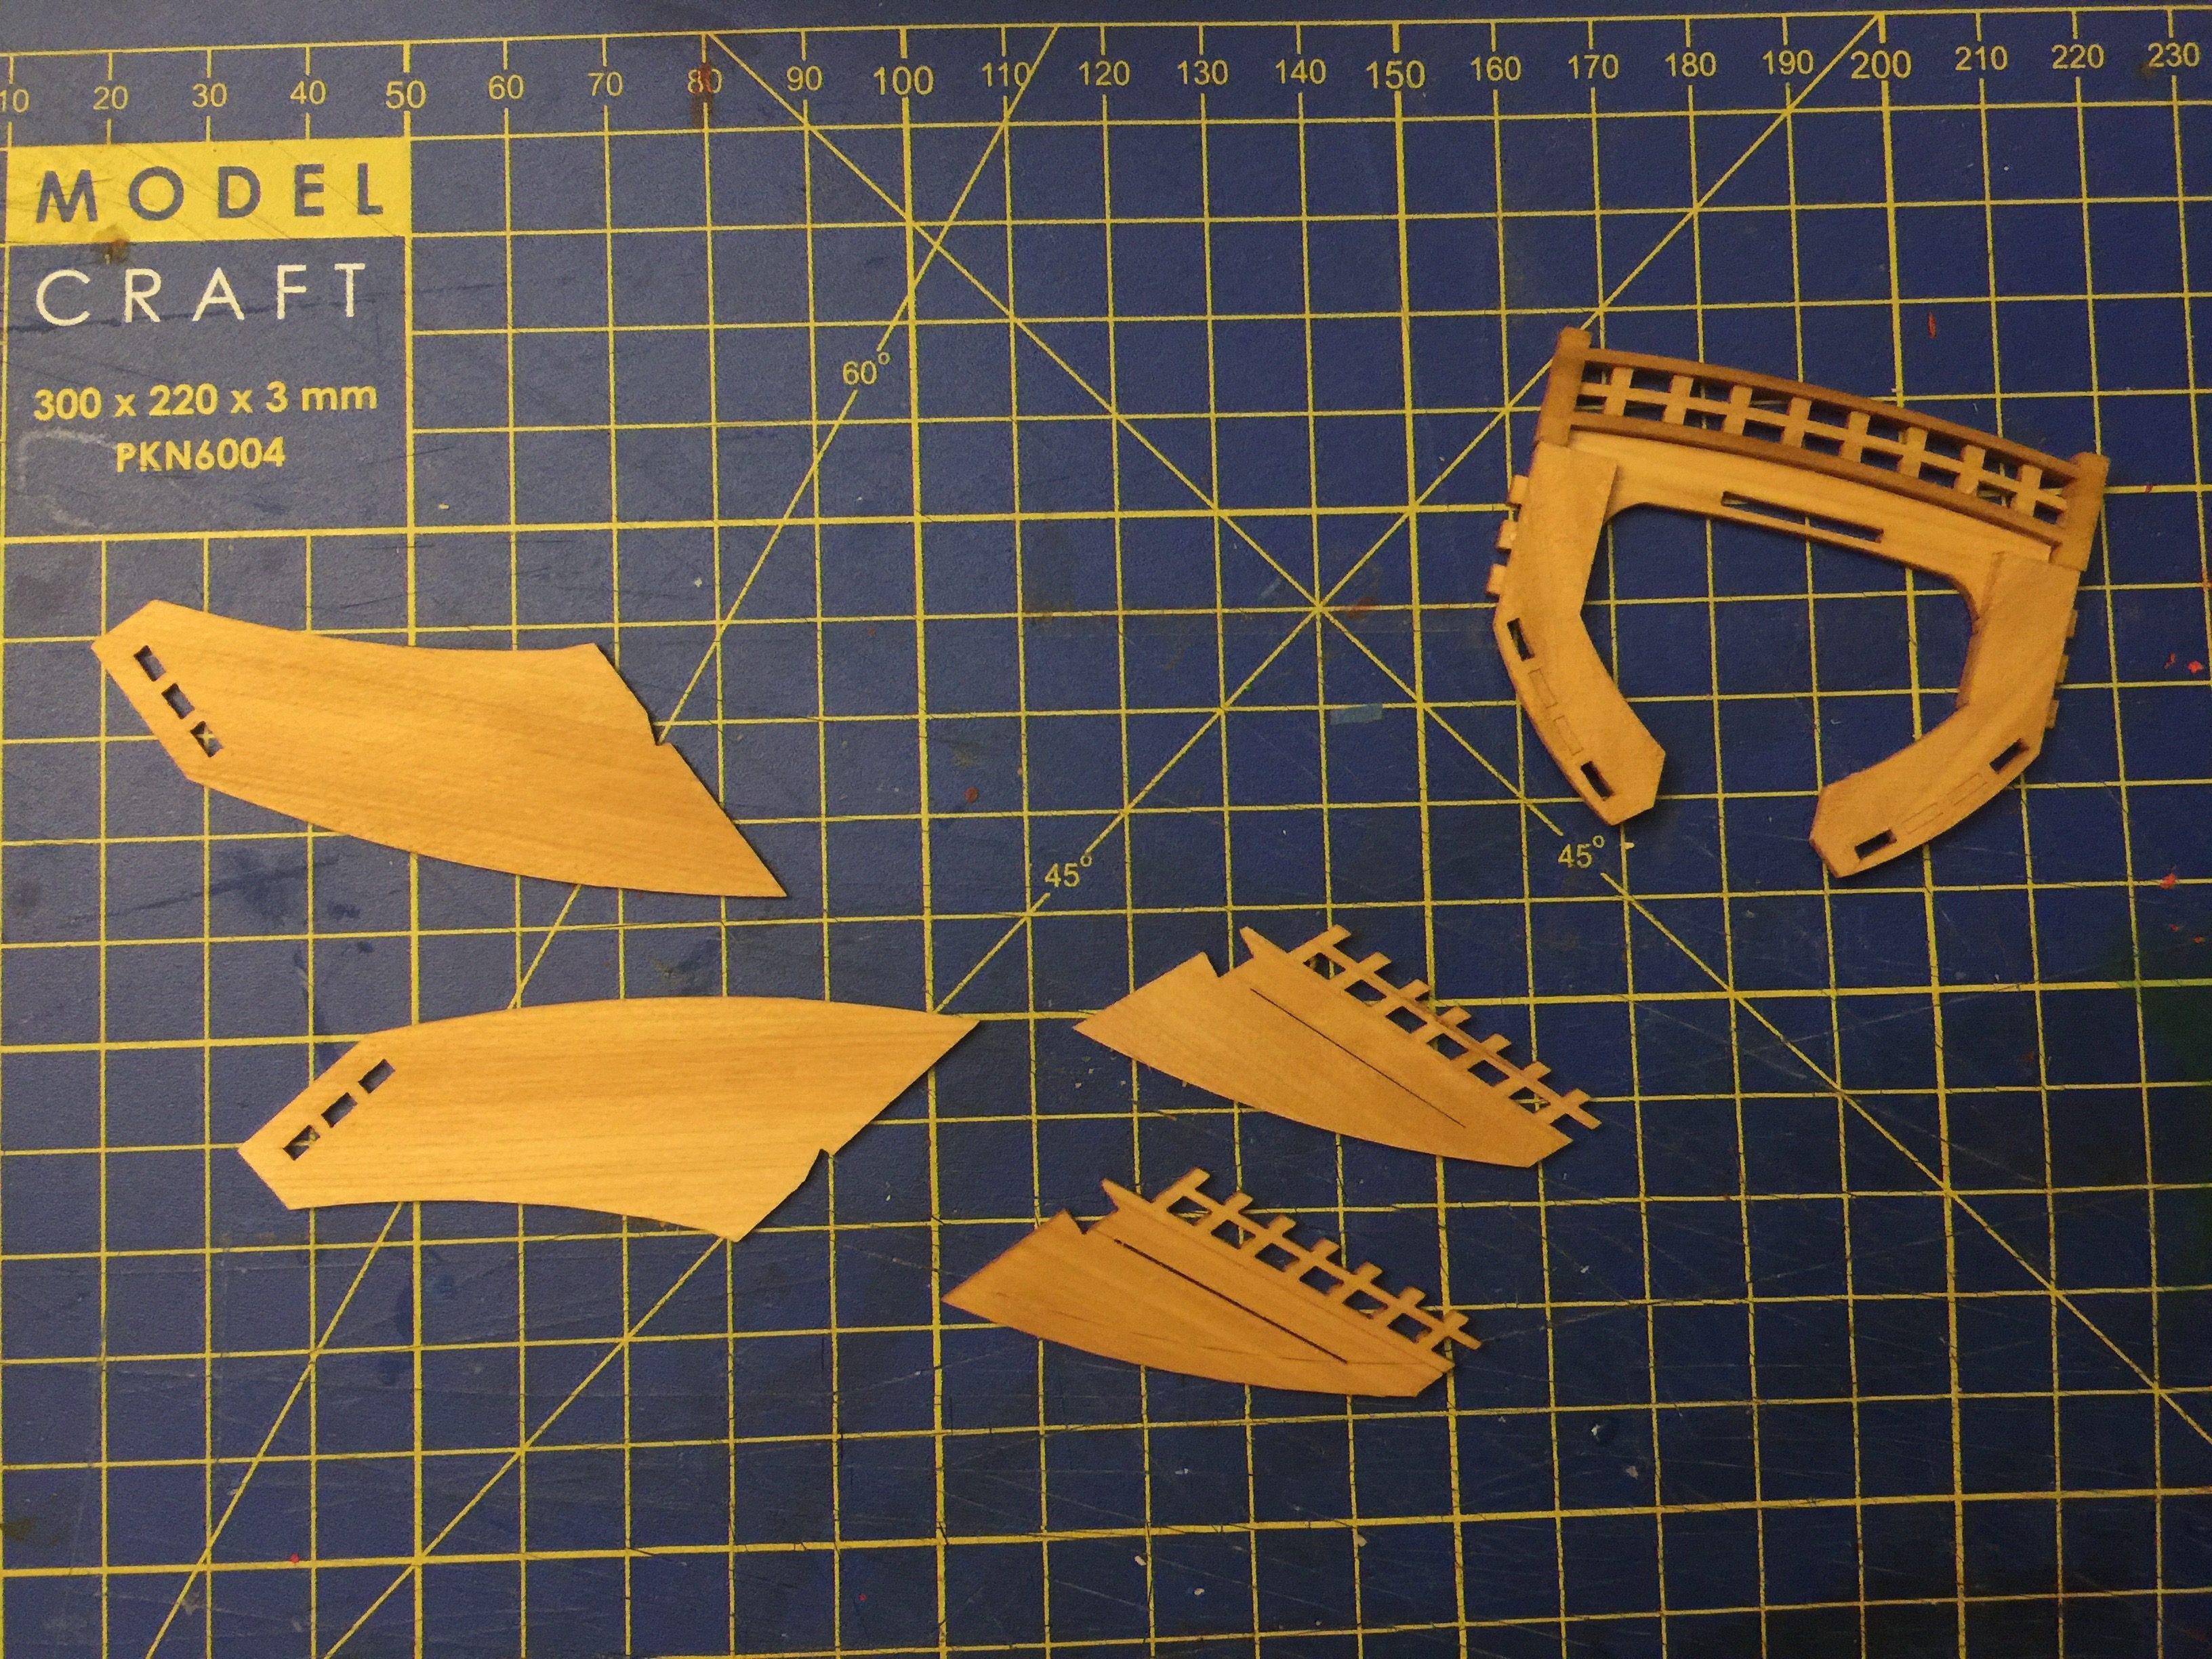

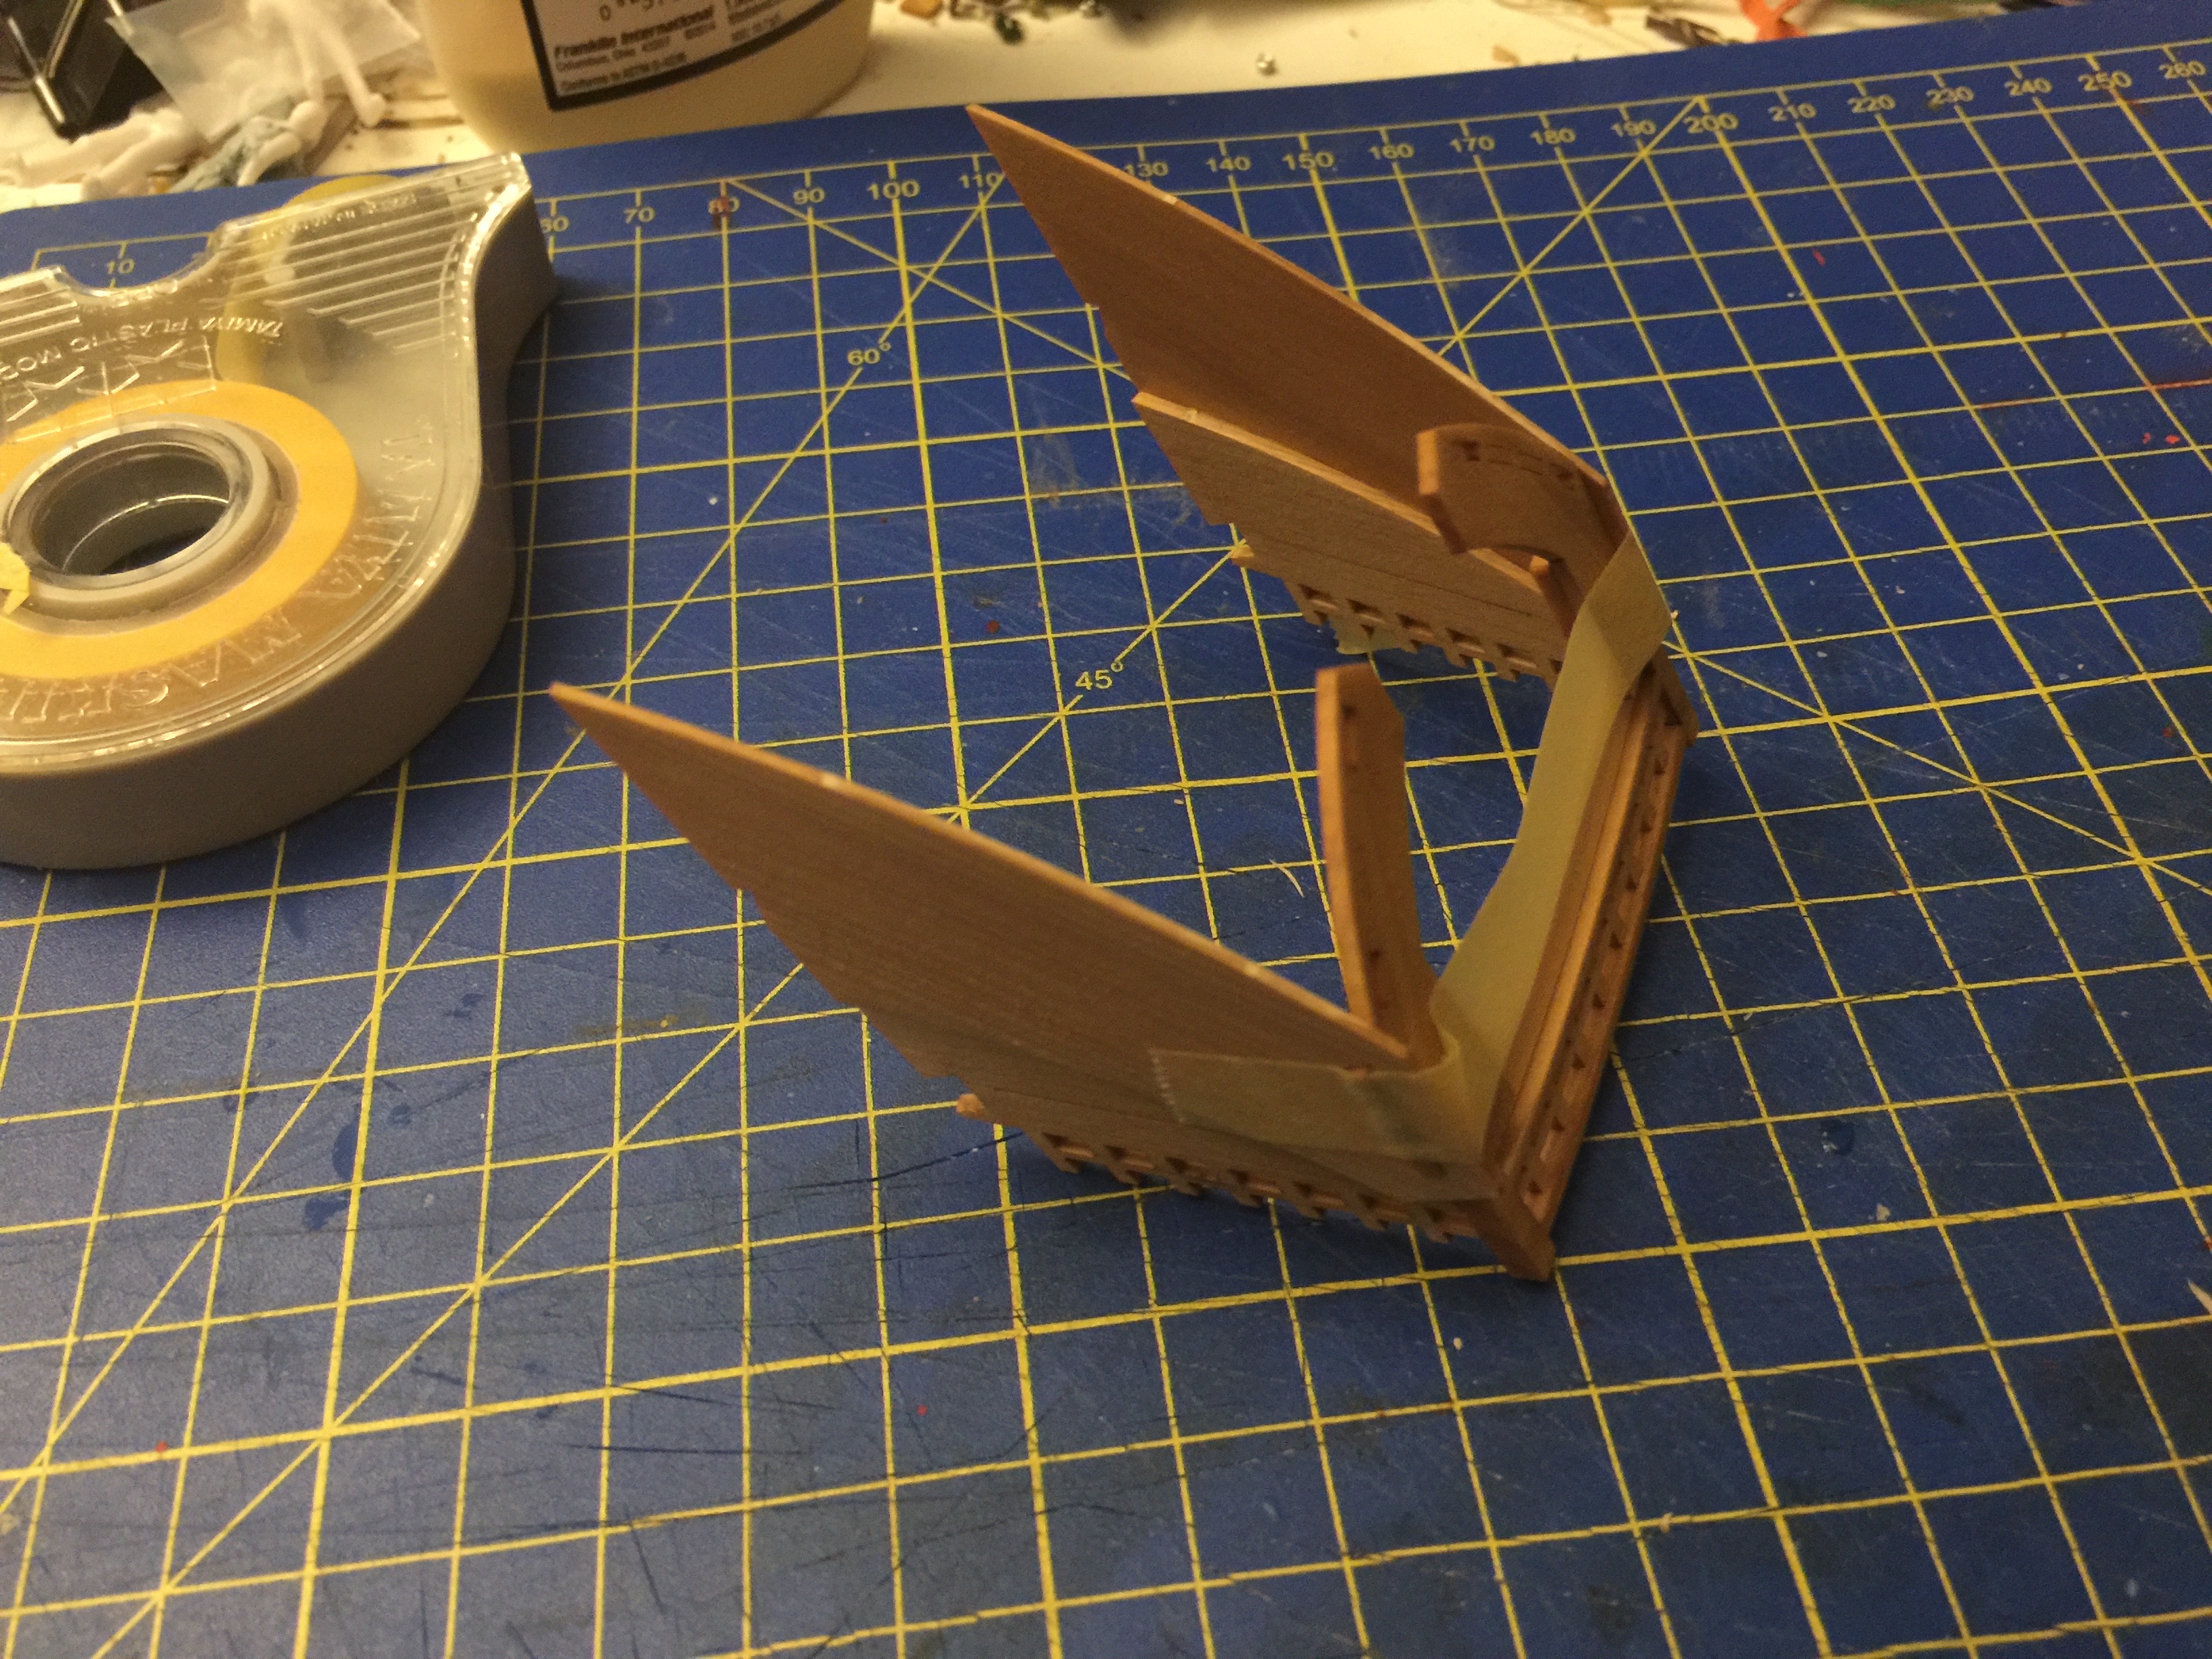

So far, this seems to be an improvement over the Higaki-Kaisen kit’s stern construction, though I was a bit apprehensive throughout the assembly as to whether on not the completed unit would fit properly into place. I seem to have done it correctly, but won’t really know for sure until later steps.
This completes construction up through step 18.
