
Construction of the Honryousen model began with gluing patterns to the wood for the shiki, or hull bottom, and the ottate, which I am told is an informal local term for the bow and transom planks. From an earlier build of a kawabune (riverboat), I learned that the common formal term for the bow plank is omote no tateita and the term for the transom plank is the tomo no tateita.

Honyousen side profile I created in Adobe Illustrator
Patterns were simply printed on large format paper and glued to the wood using rubber cement. This stuff sticks well enough and rubs off pretty cleanly after it has dried.
When I started this project, I wasn’t sure if I needed to build a former for it, like I have for all the other scratch built wasen models I’ve made. The former serves as a temporary backbone and framework that wood hull parts can be clamped to while gluing into place. Instead, I thought I might be able to hold the parts together and band them into position using clamps and such, much like the real boats are constructed.
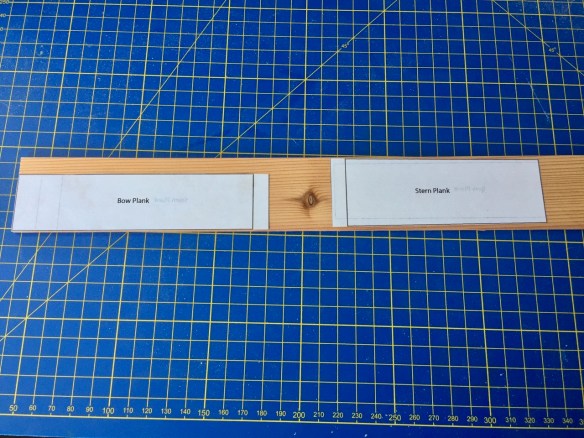
The bow plank is a simple rectangular piece, by the way, while the bow planks flares out slightly. Since the sugi wood grain is pretty prominent, I made sure to center the pattern along the grain.
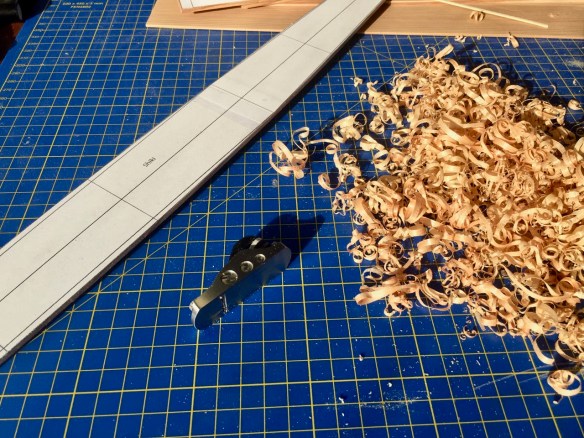
After gluing patterns onto the wood, I trimmed away most of the excess wood using my Byrnes Model Machines table saw. The fine trimming was done with a miniature Veritas brand plane I bought from Lee Valley Hardware. It shaves the wood down very nicely, which gives off a very nice aroma at this stage.
With all the wood cut for the bottom of the boat, I then cut the shiki to allow the hard upward angle in the bottom, cutting part way through the wood on top and on bottom. Afterwards, I dampened the wood slightly at the cut and bent the wood to shape I used a guide I drew up to get the angle correct. The bend is so sharp that I could hear the wood crack slightly. This isn’t a problem, as the joint will be strong enough once the hull planks are glued into place.
Attaching the ottate planks presented a bit of a challenge, as a simple glue joint would be too weak to work with. Again, it will be fine once the hull planks are glued into place, as they’ll hold everything together. Until that’s done, I need a stronger joint.
I read that in building their boat, Nakagawa-san had created a tongue-and-groove joint. This seemed like a good idea, so I tried out something similar. In my case, I cut a groove in both edges to be attached, and then glued a thin strip of wood into one of the grooves.

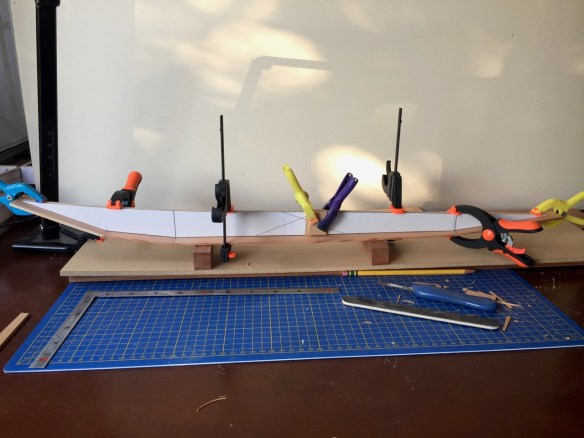
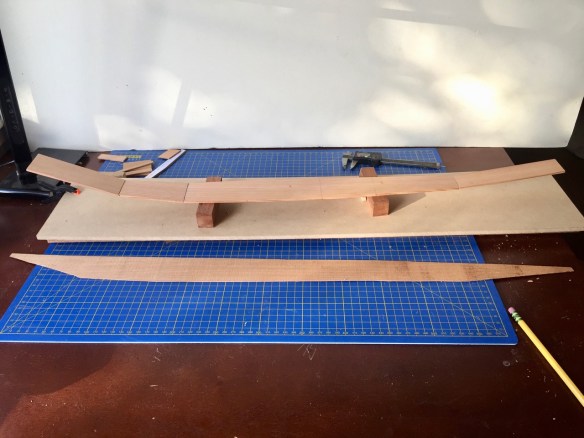
Gluing these up required me to set an angle between the parts. It was at this point that I decided to build the internal former after all to help put everything in good alignment. I built the backbone of the former from 1/4″ MDF particle board, and clamped the parts into place.
The joints were still weak and show slight gaps, so I tried reinforcing by filling the gaps with glue. That stiffened them a little, but the structure will still be weak until the hull planking is added.
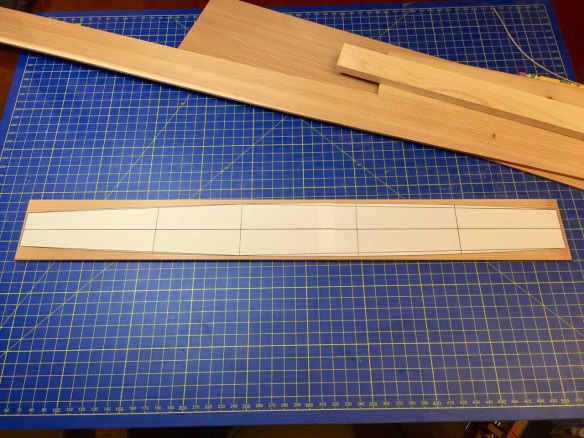
In the photo below, I temporarily removed the former so that you could see the shape of the hull. Below the hull is a pattern I traced out for the hull planks. I was particularly interested to see the exact size of the hull planks, as they are quite large and single pieces, and I was a bit concerned about how much of my wood supply the model would use up. Luckily, I am just able to get the two hull planks out of a single sheet of wood.
The next step is to bend the hull planks to shape so that they can be glued to the hull with minimal pressure or distortion of shape. So, I wet the planks and clamped them so that I might impart a proper bend.
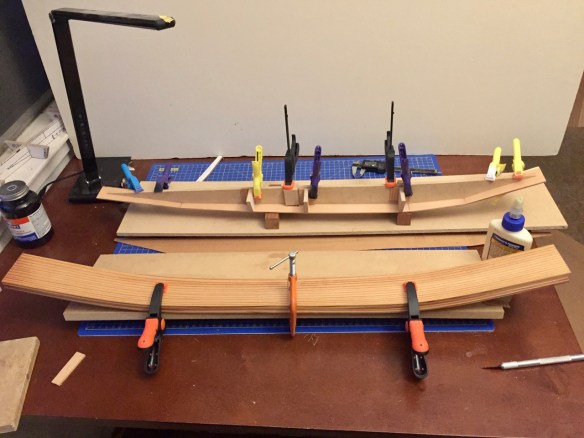
I think this process may take a bit of time, as I need these planks to be as close as possible to their proper shape. There is only one beam in the whole boat that might help to hold the shape of the hull.
In the above photo, you might also notice that I have some angle guides clamped to the hull former backbone. I decided to try using temporary guides instead of ones glue permanently to the backbone. Mostly, the thought was that the shiki may vary slightly in width, and this allows me to reposition the guides to adjust to these variances.
While the wood dries, I’ve been taking the opportunity to bevel the edges of shiki and ottate to receive the hull planks when they’re ready.
