
Reviewing photos of the Himi Tenma that Douglas Brooks worked on last Fall, I’ve been comparing them with the drawings from the Himi City Museum. There are a number of differences which I’ve marked on a copy of the drawings.

Modified copy of the Tenma drawings provided by the Himi City Museum, shown here with permission of the Himi City Museum.
To match the Himi Tenma built last Fall, the features that I’ve marked with red arrows will need to be omitted from my model. The blue rectangles represent the approximate size and location of beams which will need to be added to the model.

Photo showing the positioning of the overlapping frames. Photo courtesy of Douglas Brooks.
In addition, the other main difference is that if you look at the frames in the drawing, they are offset so that the starboard frames aren’t directly across from the port side frames. However, in the boat built last Fall, the tops of the frames actually sit directly across from each other, but since the frames still overlap one another, they are canted slightly. For now, I’m just making a mental note of these things, and will deal with them when the time comes.
One last note for now is that the kanjiki, which I referred to earlier as the garboard planks but I now thinking of them more as just the outer planks of the hull bottom, are made of single boards on either side of the chyou, the heavy, central, bottom plank on the boat built last Fall. If you look at the drawings, there are two boards on either side of the chyou. This, I feel, is the least important difference, as it simply represents that size of the wood that was on hand during the build, and the availability, or current scarcity, of the large flat nails using to fasten the boards together.
For my model, I’m using two boards on either side of the chyou, as it allows me to use narrower boards, making the build a little more economical, if slightly more complicated. Also, the additional mortises will probably make the model appear a little more detailed. Anyway, since I’m using measures from these drawings, mine is a model of a Himi Tenma, based on the one built by Douglas Brooks and company – not a replica of it.
And, speaking of the kanjiki, I’ve started work on that by cutting a cardboard pattern. This isn’t entirely necessary at this stage, but will come in handier later. But, it did help me visualize the next steps in construction. The main issue with using this pattern is that it’s from a 2-D projection of a 3-D object. The actual kanjiki is wider and this drawing is something of a distortion of it. So, I had to add a layer of cardboard, and you can see that layer sticks out a little to make up for the distortion.

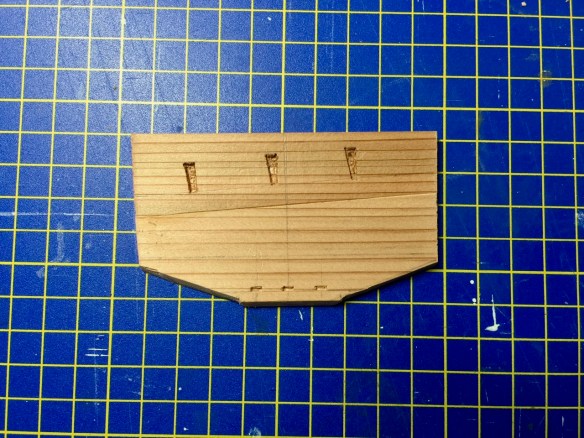
Meanwhile, I needed to finish the konagashi and the todate. I had cut the parts and marked the locations of the mortises, but before adding the pieces to the hull, the mortises had to be cut and then some had to be plugged. I cut the mortises in the todate last time.
I make the plugs by shaping a piece of small strip of wood that is cut cross-grained. The strip is sanded down until the cross-section of this strip is wedge-shaped.

I can then put a little glue into the mortise, press this piece into place and cut off the excess.


There’s still some excess that needs to be trimmed away, but this is easily done with a sharp carving chisel. Finally, a little work with a sanding block smooths this down and cleans up most of my pencil markings.


The plugs are made from the same kind of wood as the hull parts, but as you can see, the grain runs the length of the plug, making them visible on the model, so the detail is not lost, but is still subtle.
For the most part, the wedge-shaped mortises on my model will all be about 2.5 bu long by 0.5 bu wide at the narrow end and 1 bu wide at the wide end. I’m using the traditional Japanese measure out of habit now, particularly with the mortises, since I’ve gotten a certain technique down. I tend to switch back and forth between this and english or metric for other measures. It’s just a matter of what’s most convenient.
The konagashi and todate are now glued into place (yes, I know it seems like a waste to cut all those mortises and not actually use them for nails) and I’m now moving forward with spiling the kanjiki to fit the hull, which I’ll discuss next time.
