
As you may recall from my previous post on this build, I was mentioning the planking of the deck of the “steering well,” for lack of better term, that’s at the rear of the large top deck of the Atakebune. After expanding the slot in the deck for the rudder, I extended the slot into the back wall. I then commenced planking the deck using some 1mm thick wood I have on hand.

Now, you may notice that the upper part of that back wall is missing too. That’s because I want to create an extended wall that rises up through the deck and separates the main deck from the little section aft. This is a feature that appears commonly on larger Japanese watercraft I’ve studied, namely the bezaisen like the Kitamaebune and Higaki Kaisen. The reason for the separation is mostly because is wall is really the “main” wall. The area behind this is more of an add-on extension.
If you look carefully at the museum model, you can see this wall rise slightly above the deck, and that’s the effect I want to get. The way I’m doing this is not necessarily the best way. In fact, I’m sure it’s not. It’s more of an expedient way. But, more on this later. The next thing was to get the deck planked.
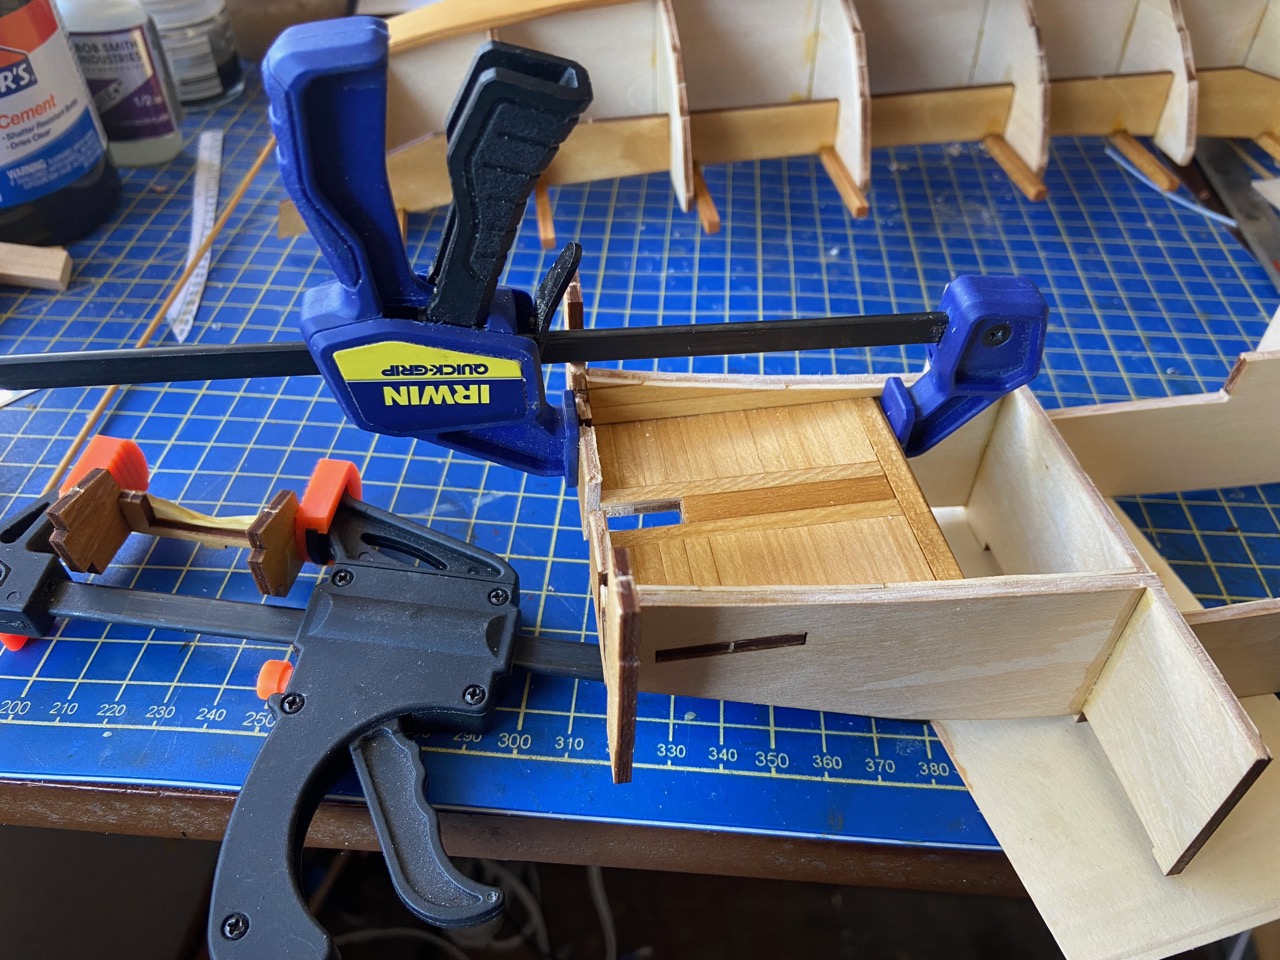
As you can see, I ran a pair of planks longitudinally, along the slot opening. I cut a piece the width of the slot to fit in between these, and then filled in with the regular deck planks, starting from that back wall. I continued the planking to a final plank that ran the full width of the platform.
This planking patter was just guesswork. I had considered that when the rudder was raised up, the post of the rudder might need to lay down, and I thought there might be a plank-covered well that continued forward of the slot. I don’t in any way have any evidence that was the case. It’s purely conjecture. Plus, it looks interesting.
I also planked the side walls, though I think it is quite possible that there were no side walls and that you would have just seen the inside of the ship. I’ve seen this type of thing before and I suppose it facilitates communication with the lower deck, etc.
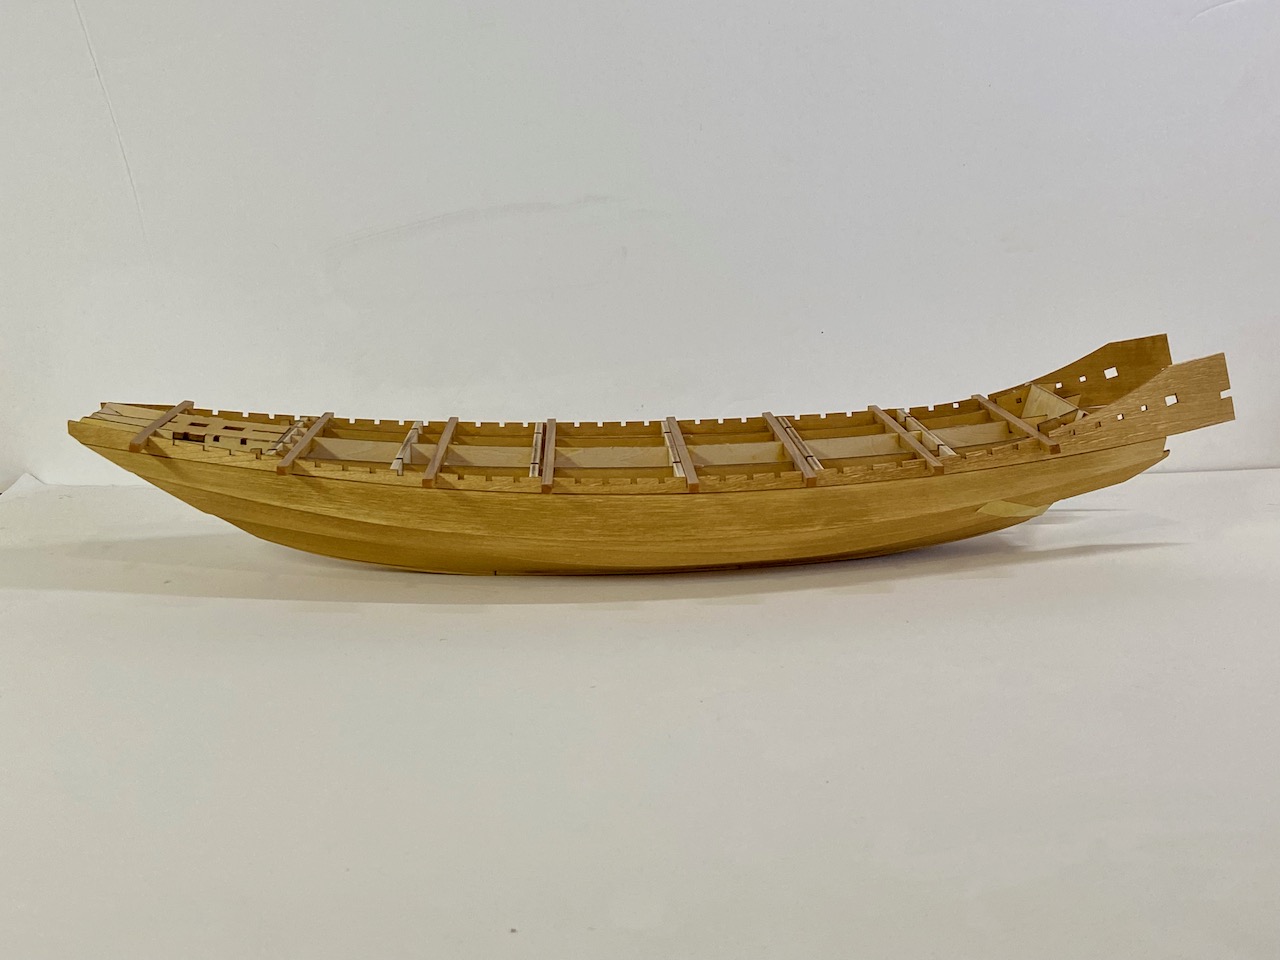
Getting back to the main hull, the next step was to add the main beams, then begin the planking of the hull.
 Already, the next modification comes into play with the adding of the lower hull planks. I had noted that the on the museum model, the lower planks extend just a short distance past the transom and the ends of the plank were pretty much squared off.
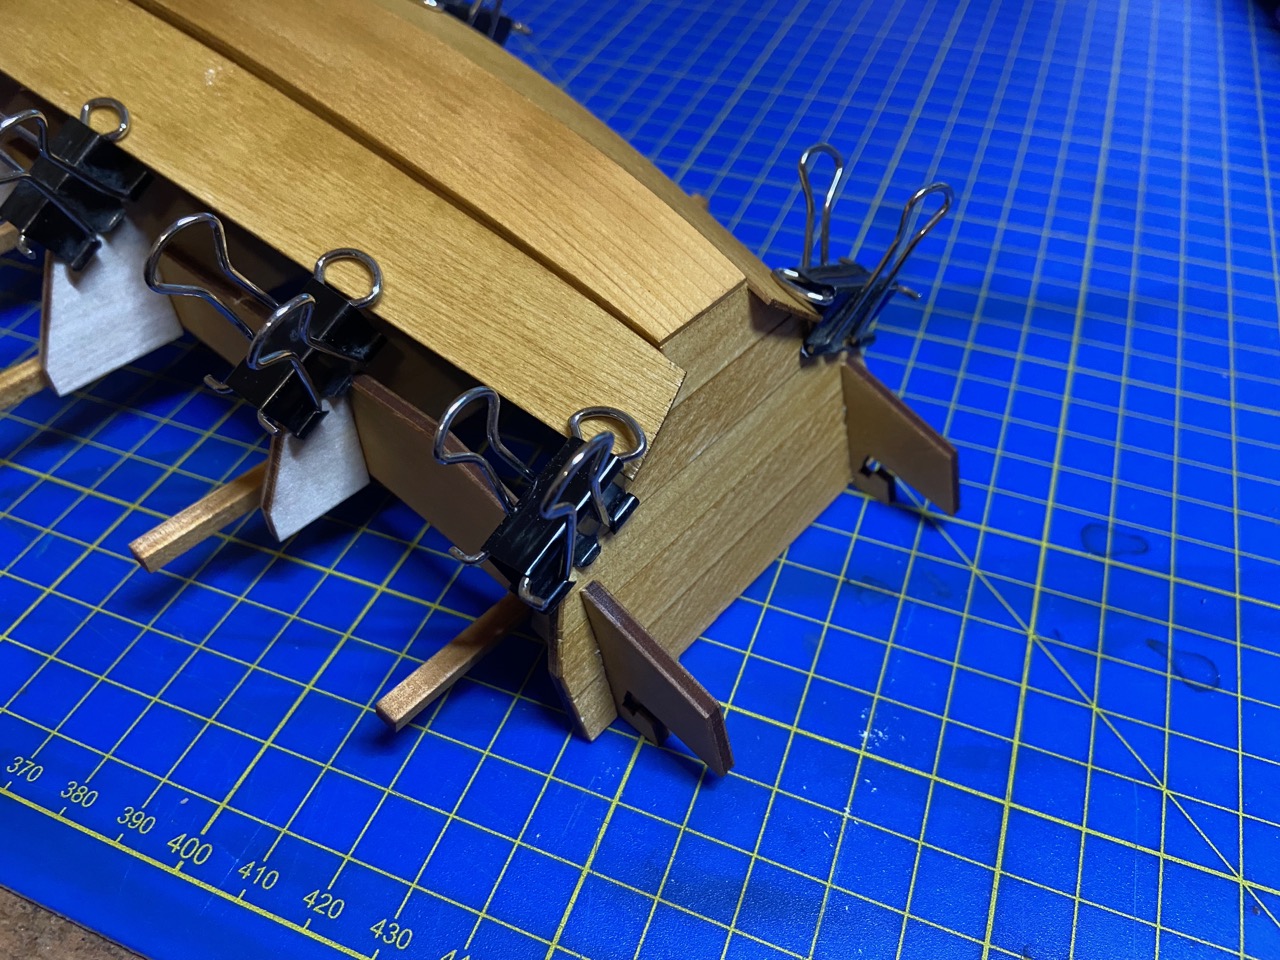
Below is a photo of the museum model where you can see that the lower most plank barely protrudes past the transom.

In the next couple photos you can see that, plus my use of the modified binder clips that I wrote about on my shipmodeler blog. They work quite well on this type of model. You can even see one of the clips equipped with the Amati clip modifier.


The other planks went on, unmodified, but I didn’t actually add the upper plank until I dry fit the laser-notched filler piece into place, to make sure that the last plank was actually properly positioned before gluing it into place.
I had to a little bit of shifting the planks around to eliminate most of the gaps between planks. I wasn’t 100% successful, but and gaps at this point are narrow slivers. And, as long as you can’t see light through them, they’re fine. I didn’t need to do anything more than add a little extra wood glue on the inside, but on my Kitamaebune model, I ended up cutting long thin pieces of wood to put behind the sliver gaps, and that worked very well too.

I’m pretty happy with how the hull has gone together up to this point. The laser-notched filler piece is fitting very well, so I glued most of it into place. The only place where I didn’t glue it yet is at the stern, as there is a kind of a trapezoidal stern platform that fits back, and I need to be able to open up the back a little to fit it in later.

While the hull was drying, I was working on the large box structure, gluing the deck into place. Because I had shortened the framework slightly, I needed to be extra careful that everything would fit together properly, without any weird warping.

The next major issue that’s required a lot of contemplating is the that trapezoidal stern piece I mentioned earlier. That’s going to require a bit of explanation, so I’ll save that for my next post.
As I mentioned before, be sure to check out the posts on the Zootoyz Facebook page showing the Atakebune kit being built by Mr. Kazunori Morikawa. He’s very far along on his build and is approaching the final stretch. We’ve been in communication about some of the issues we’ve both encountered and things we’re wanting to try. Most importantly though, his model is looking very nice!

Great stuff. Thanks for sharing!
LikeLike