
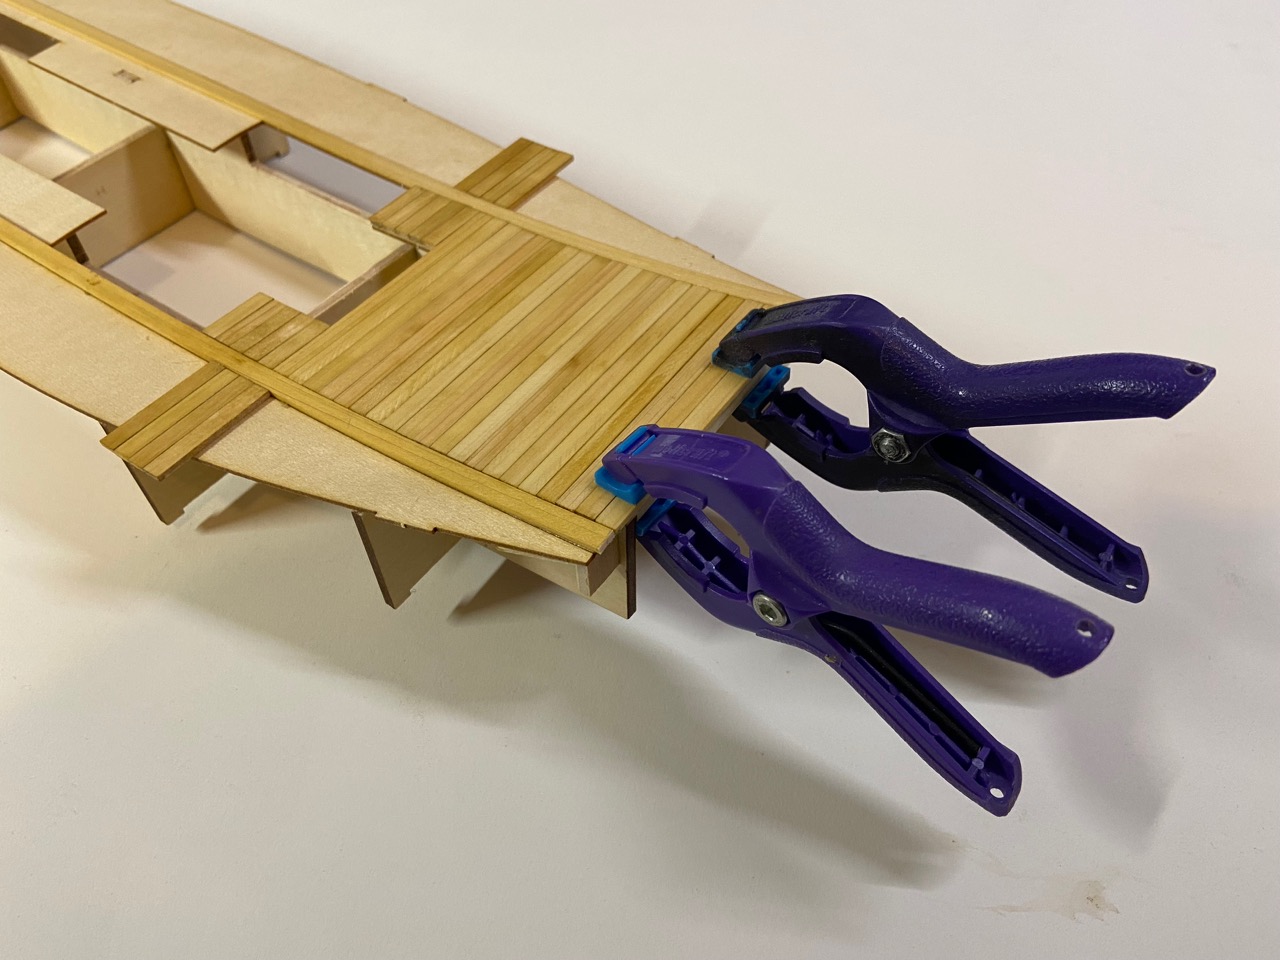
Today’s is a brief update. I’ve started adding the plank onto the main deck. For this kit, Woody Joe has opted to provide 2mm thick planks for the deck. I suppose they are so thick, because the sub-deck they are glued to is pretty thin.
While deck planking mostly runs across the width of the ship, the first pieces to glue into place actually run the length of the ship. To make sure that these run correctly and fit well, I temporarily taped down some of the pieces provided that will have to fit in between them first.

After that, it was a rather quick matter to lay down the long fore-and-aft planks, and then the rest of the planking pieces.
Something interesting about this kit is that in order to simplify construction, Woody Joe milled the planks to three different lengths. Those long pieces in the middle were already cut, and I jus laid them into place. Below, you can see all three sizes of planks. I’ve had to do no cutting for any of this.
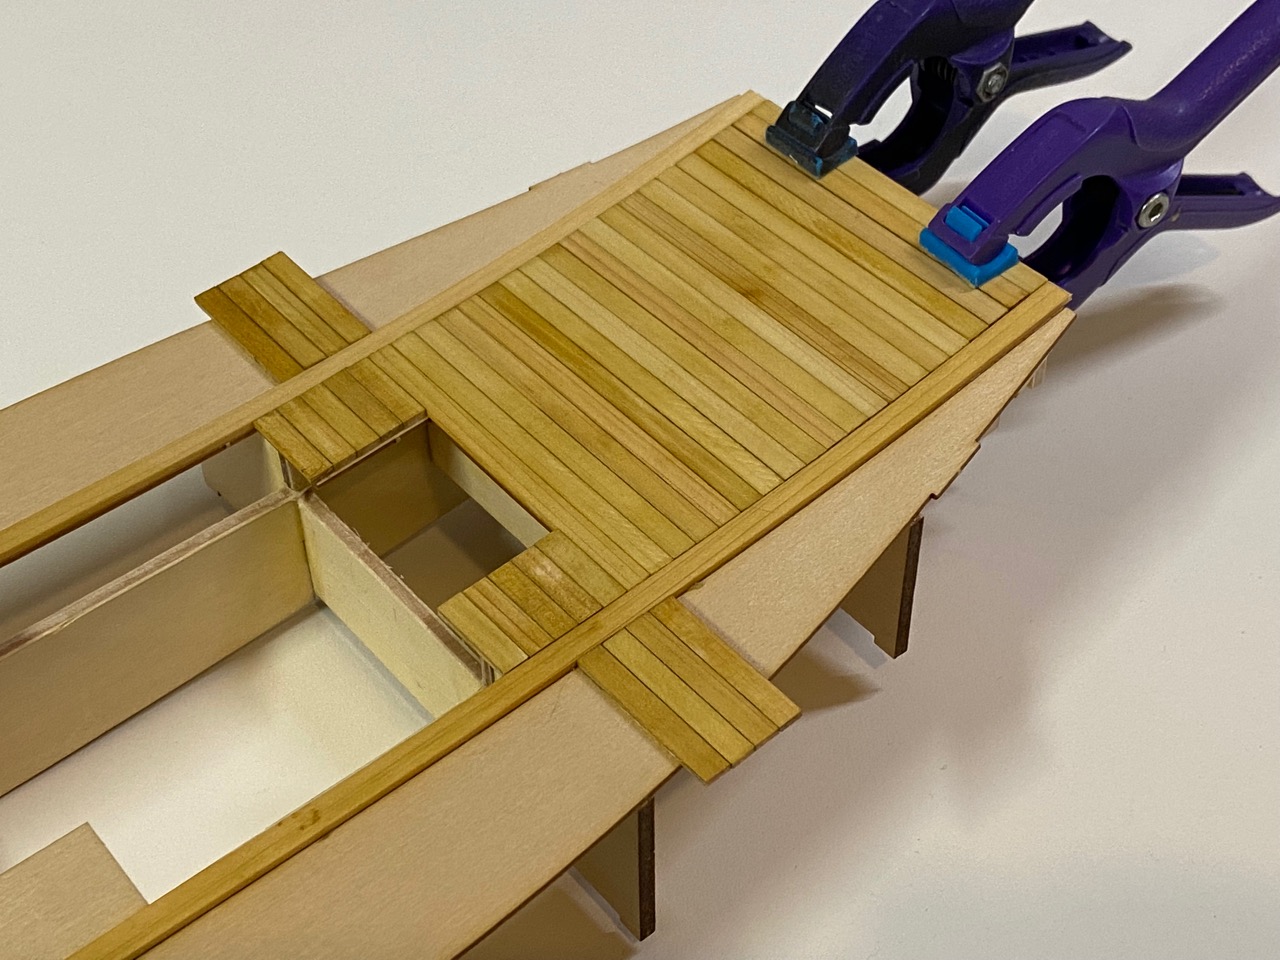
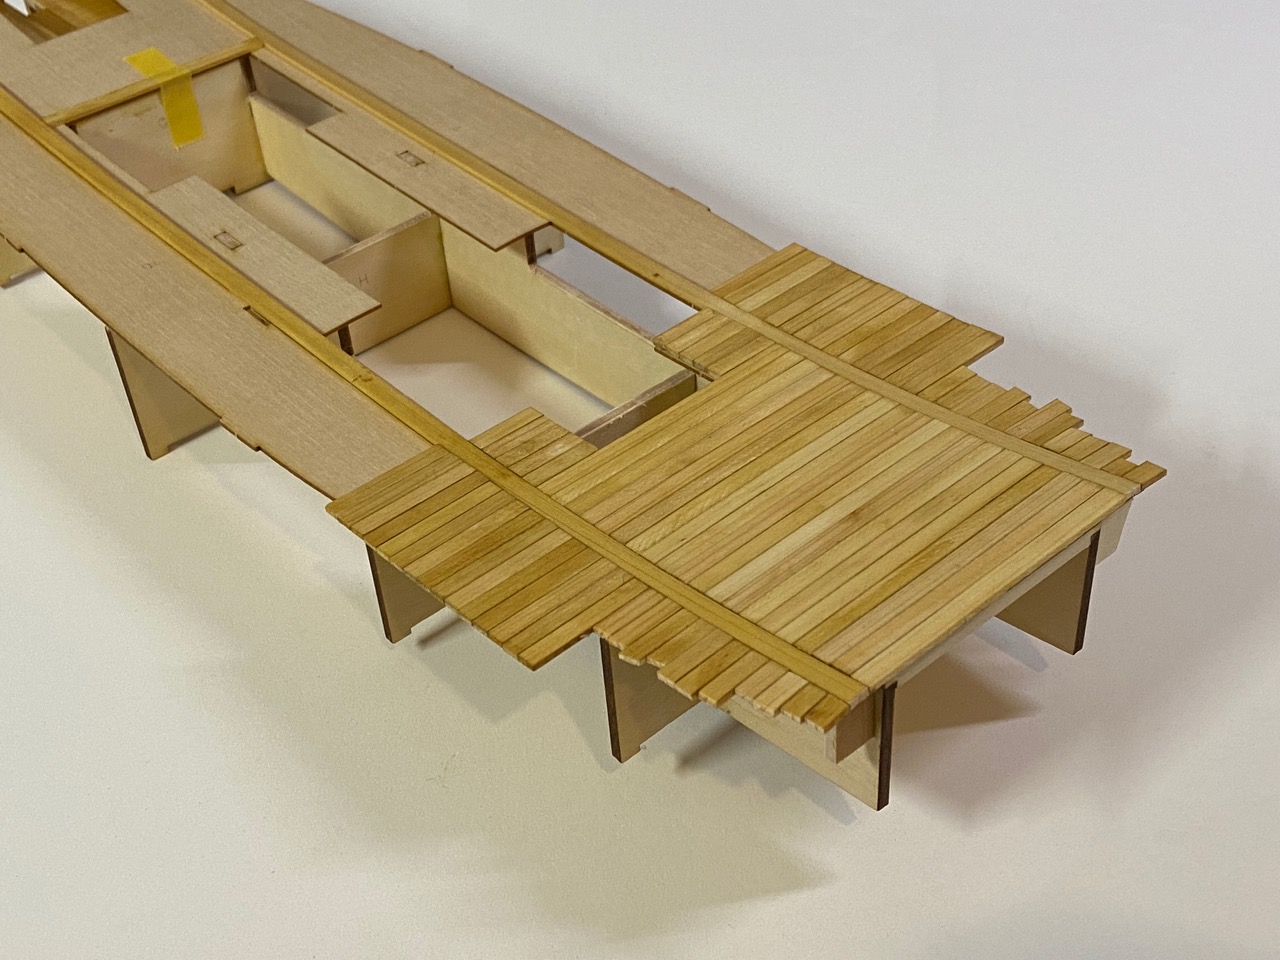
It wasn’t long before I had the bow section done. Note that in order to keep the middle and outer planks aligned, the instructions show to start the planking from the edge of deck opening, working outward from there. Later, those plank ends that are sticking out over the edge of the deck will need to be trimmed.
Meanwhile, on the lower hull, as you may recall, I wrote about changing the design of that trapezoidal piece at the stern (tomo) of the ship. The kit provides a solid piece, and it would most certainly have been built-up from beams and planked over on the real ship. So, I came up with a structure that mimics what I believe that structure would have been like. So far, it’s without any deck planking.
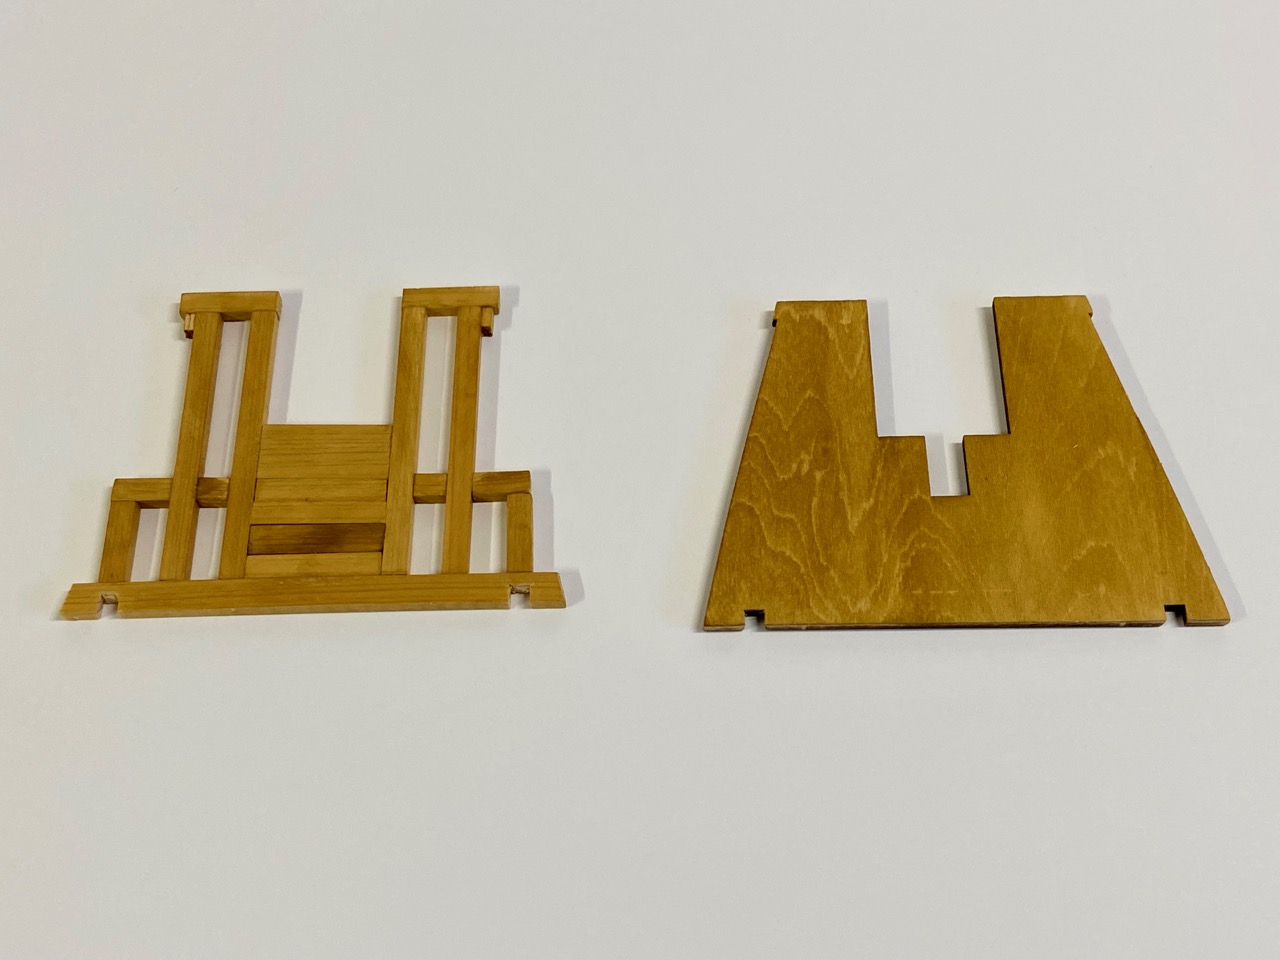
The design here is somewhat of a compromise, as the original piece is designed to lock into the structure of the hull in a couple ways, so I had to keep certain elements. Some of it, I just had to make up, to give it more rigidity. Basically the idea is that the model look more like a real ship structure, though it will only be visible if you look from behind and underneath slightly.
What’s really more important to me is that there is a beam at the stern of the ship that’s usually called the ōtoko, or great beam. This is notched at the back, and provides stability and a point of leverage for the large rudder. The kit actually places the rudder in front of the beam instead, which would prevent the rudder from being raised up, the way all Japanese rudders are designed to do. Again, you can’t see this from normal viewing, but I wanted to make a bit of a correction.
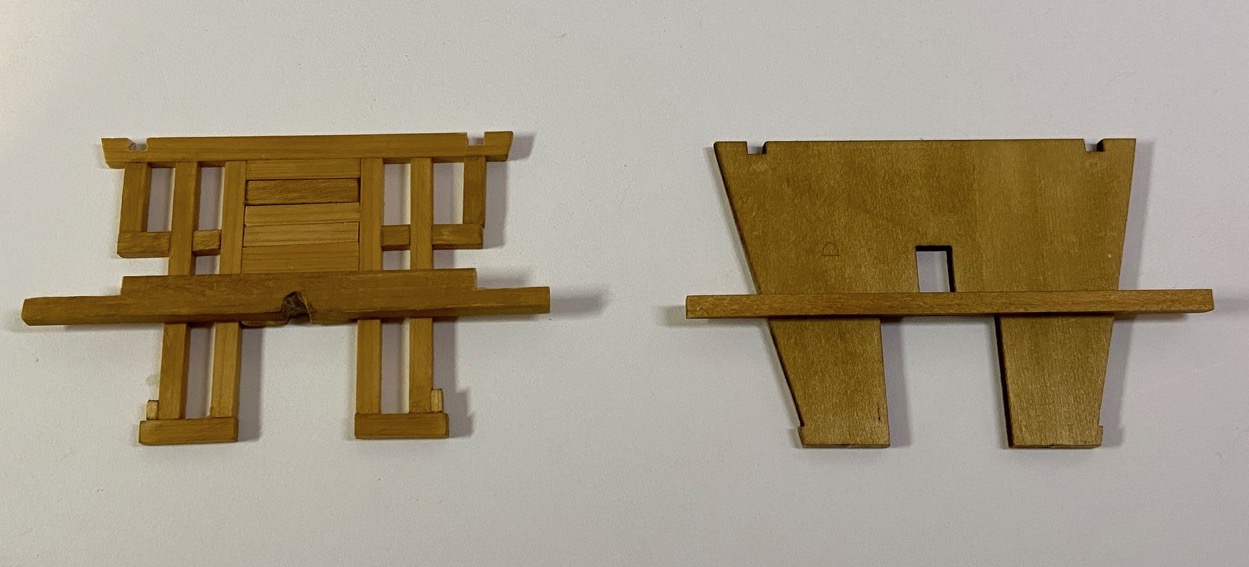
So, I made a new ōtoko, and I made it thicker so that it could more easily accommodate the rudder. Below, you can see the kit-supplied arrangement of the stern platform and beam on the right, and my replacement on the left.
Now, there’s still a problem, as this beam should really be underneath this platform, not on top of it. The platform should have a normal deck, with the beams supporting it, not the other way around. But, to do that would require lowering the beams and creating a new hull piece that is pierces for the lower positioned beams.
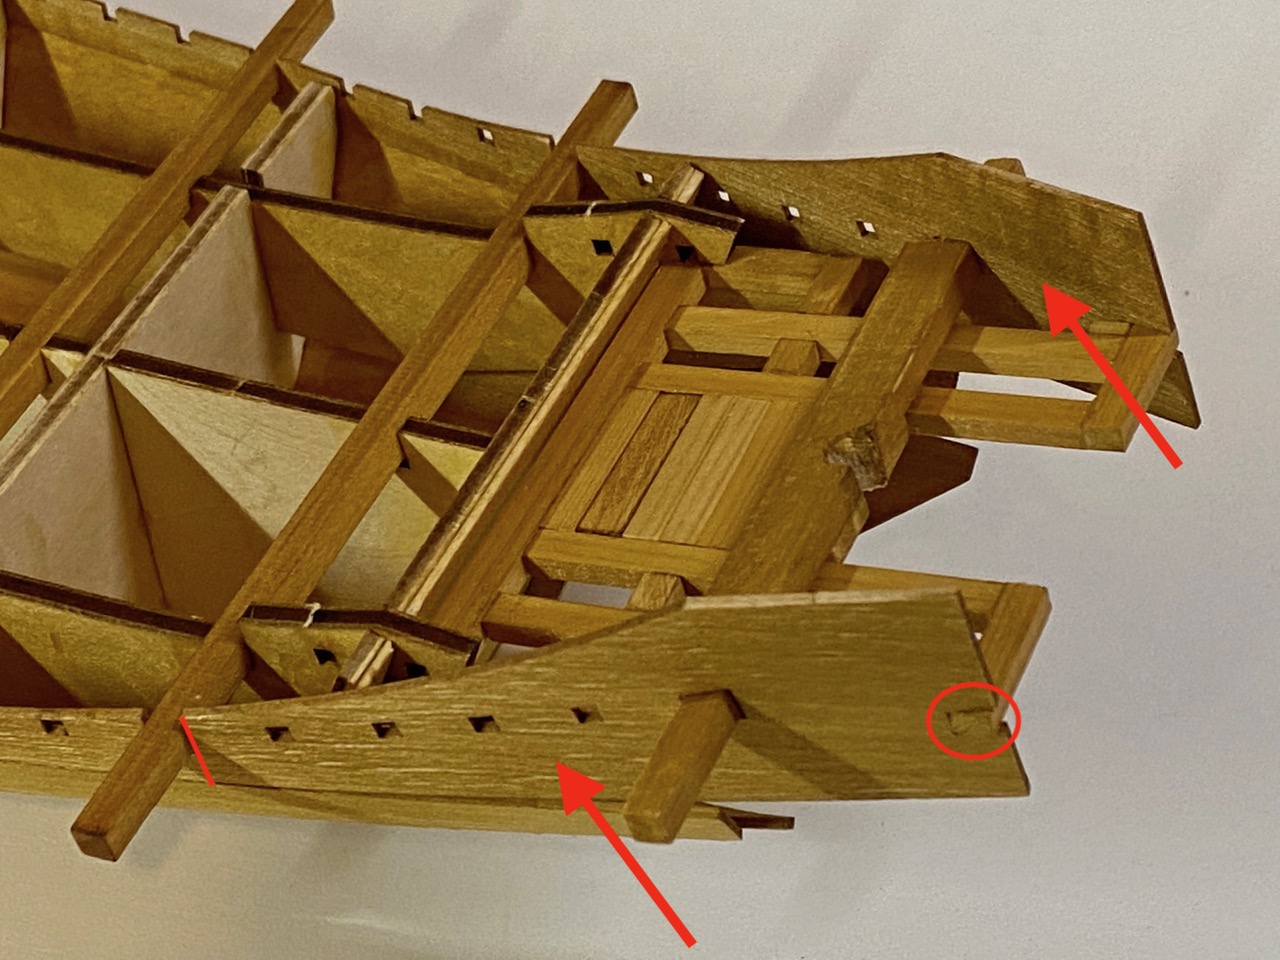
This could be done, as I haven’t glued this section of the hull planking into place yet. I could cut this piece at the red line where the next beam is located, and I could then get rid of that positioning notch at the very end of the hull. But, that’s a lot of modification. So, I took some time and studied this for a while and weighed the pros and cons.
Now, one major benefit of doing this is that I could then make the model really look more like the museum model, as the box structure doesn’t ride directly on these aft-most beams. There is a curved filler piece in between, as you can see marked by the green arrow in the photo below.
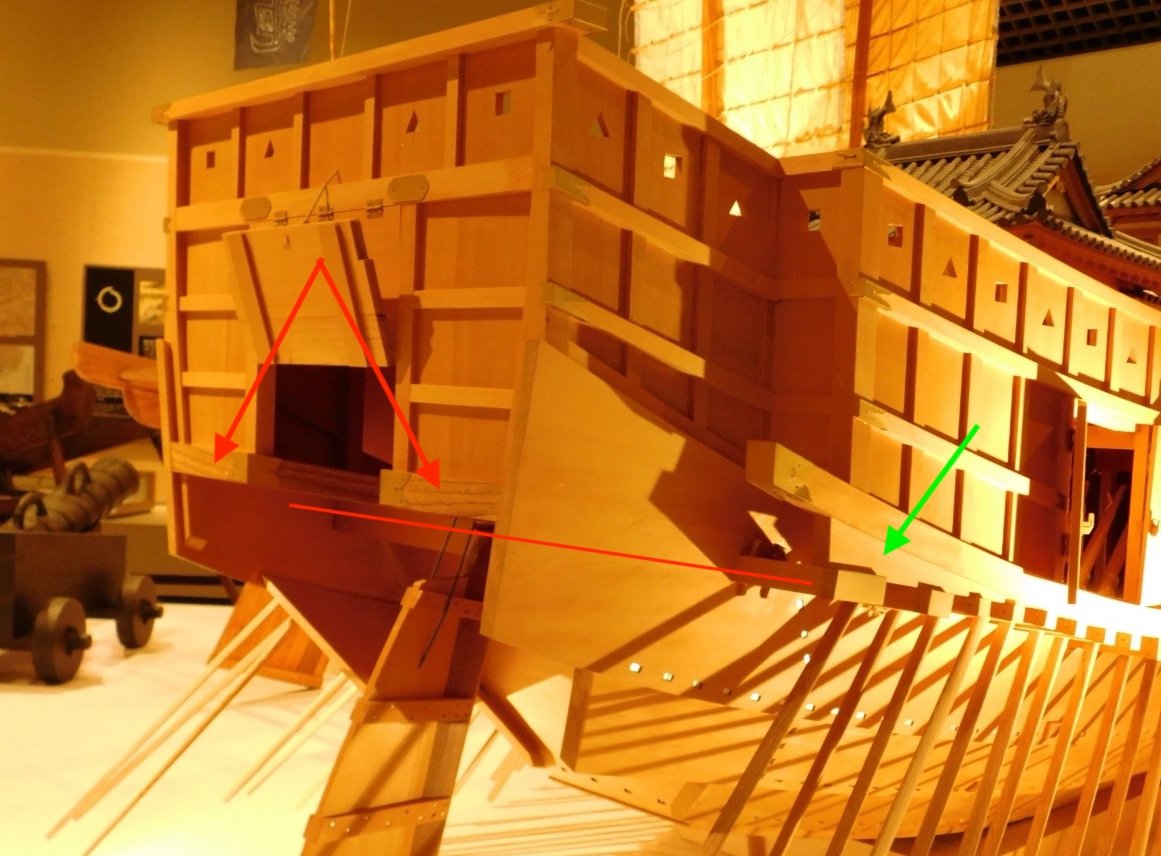
You can see where I drew a red line, indicating the run of the great beam. Note how it’s actually below that aft deck. Also, note how much wider that beam looks – it’s not square in cross section.
Well, I’ve been contemplating this while I moved ahead to the work on the box structure, which has been much of my motivation for focussing on the box structure. Again, there is a second Atakebune kit that I can do other modifications with. So, maybe I’ll save this design change for it. Or not. Who knows? It will probably be just some random flip of a coin once I feel I’ve figured out how to make it work.
Now, the one thing that concerns me about my design changes is that the rudder will stick out to the rear a bit more than a straight kit build, and it’s more noticeable because of the way I cut the hull planking short. But, we’ll just have to see – It’s a bit too far ahead for me to imagine it. By my next post, I should have at least decided what I’m going to do, if I haven’t already done it by then.
In the meantime, just a reminder that the easiest way to buy this kit is from the Japanese online hobby dealer Zootoyz. Here’s a direct link to the kit: https://www.japan-wooden-model-kits-zootoyz.shop/contents/en-us/p25066.html
