
I’d been making progress on the Ogura Pond Boat up through the month of March, but I hadn’t posted very much information about it here. Last I posted was back in January. At that time, I had glued up the three boards that make up the shiki, or bottom plate of the boat. Next is to shape the shiki, which is really quite easy the way I’m building these models. It simply requires printing out a portion of the drawings I’m using.
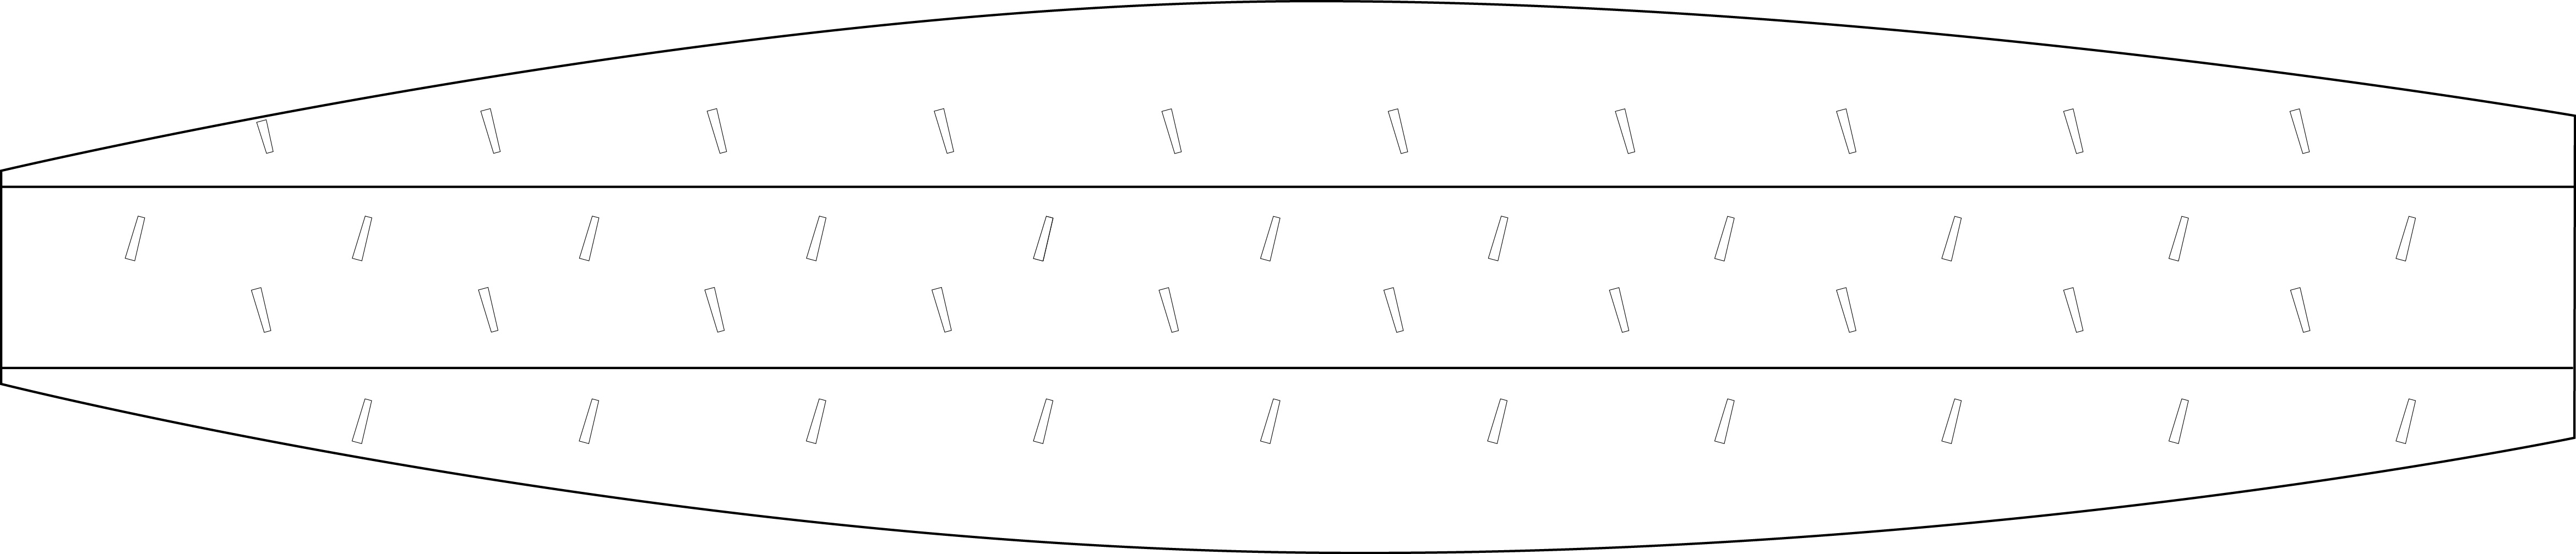
In this drawing, you’ll notice that I’ve marked out the mortises as well. This was something that was not on the original drawings, but I could see some of them in Ogawa-san’s photos. As I mentioned in my last post, what’s special here is that the mortises clearly aren’t perpendicular with the edges of the planks. This is something I’ve never seen this before, except where an occasional mortise has to angled to avoid a knot in the wood or similar reason. Here, however, they seem to be regularly placed so that the nails are driven at a slight angle towards the bow.
In any case, I glued the paper to the wood using rubber cement, carved away the bulk of the excess wood, then used a miniature plane to carefully shave the wood to the final shape. In this case, I was able to make use of a miniature Japanese plane that once belong to Japanese boatbuilder, and Douglas Brooks’s teacher, Mr. Kazuyoshi Fujiwara, who passed away several years ago.
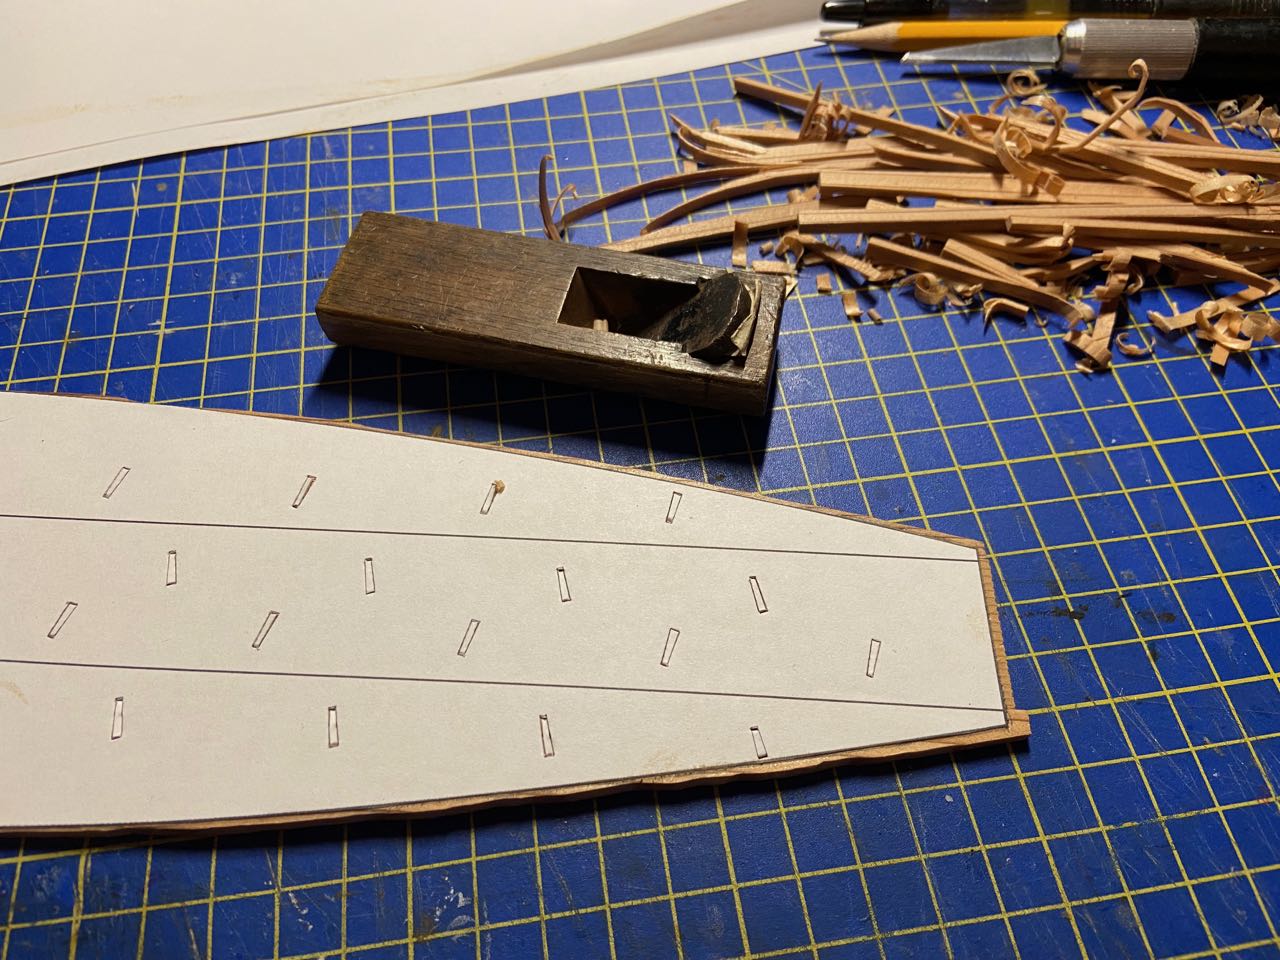
With previous wasen models, I measured out and drew the positions and outlines of all the mortises. With this model, due to the angle of the mortises, I decided it would be easier to use the template I made as a cutting guide. This greatly simplified the cutting of the mortises. I did something similar for the cutting of rectangular mortises on another model, and this definitely seems to be the way to go. Of course, it requires the availability of a computer and illustration software of some type. In this case, my drawings were all done using an outdated version of Adobe Illustrator that I’ve managed to keep running on an older Apple iMac.
Below, you can see how I’m using an X-acto chisel blade that I’ve ground down, so that the width of the blade matches the length of the mortise. This makes quick work of cutting the mortises.

The ends of the mortise are cut using some narrow Japanese carving chisels that I’ve similarly ground to the necessary width. The brand I’ve been using are a relatively inexpensive brand called Power Grip. The smallest size available is 1.5mm, but I bought an extra one and ground it down to 1mm for very small jobs. Again, these are inexpensive, and I got mine for about $9 each from Hida Tool (that’s hee-dah, not hide-a), which has an online shop at http://hidatool.com.
With the mortises cut in the shiki, the next step is to add the plugs. In order to do this properly, I cut a piece of sheet wood that’s about the right thickness to fit the mortises. To make things a little trickier, in order for the direction of the grain to be correct, the piece I cut has to be cut across the grain of the sheet wood.
The little wood strip is a bit flexible and flimsy, but you don’t want end grain showing for the face of the plug. The strip needs to be tapered to the trapezoidal shape of the mortises. I’ve often done this by simply sliding the strip across a piece of sandpaper, applying more pressure to one edge, flipping it over and doing the same on the other side, until I get an acceptable shape that fits the mortises.
I’ll then take the whole strip, apply a little yellow carpenter’s glue to one end and then press the strip into the mortise.

I’ve gotten fairly adept at this over time, so as soon as the plug is glued into place, I’ll immediatly use a carving chisel to cut the strip close to the face of the shiki, and repeat the gluing process on the next mortise. I’ll also take a small jeweler’s hammer and tap down on the glued plug, to make sure it’s fully seated into the mortise. Later, after the glue had dried, I’ll cut off the excess of the plugs and finish off with a light sanding.
Note that because I’ll be wetting the wood of the completed shiki in order to give it the necessary slight bend, I’ll try to make sure to use a water resistant wood glue, like Titebond II. I don’t know that the glue necessarily needs to be water proof, unless you’re planning to float the boats in a pond. But, I’ve found Titebond II sufficient, and it cleans up much better than Titebond III.
The next step is fairly simple for this model, and it’s to impart a slight curvature of the shiki. What I do basically mimics the way that the boats are actually built. An actual wasen boatbuilder, called a funadaiku (船大工), would prop up the ends of the shiki using blocks, and apply opposite pressure at the center, either using heavy stones, or by using posts and wedges propped against the ceiling beams of the boat shop.
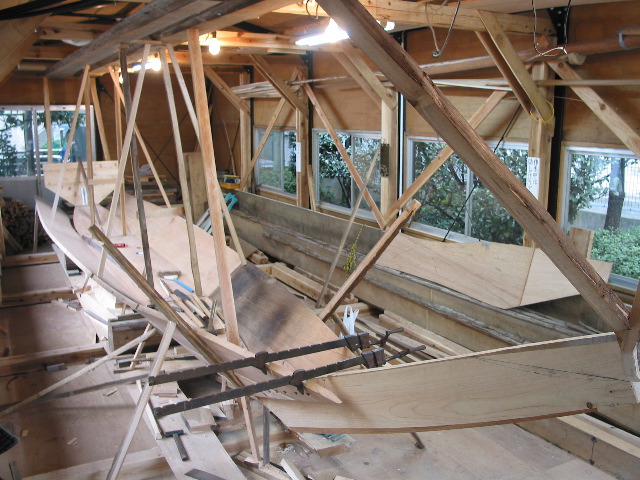
Photo courtesy of Douglas Brooks.
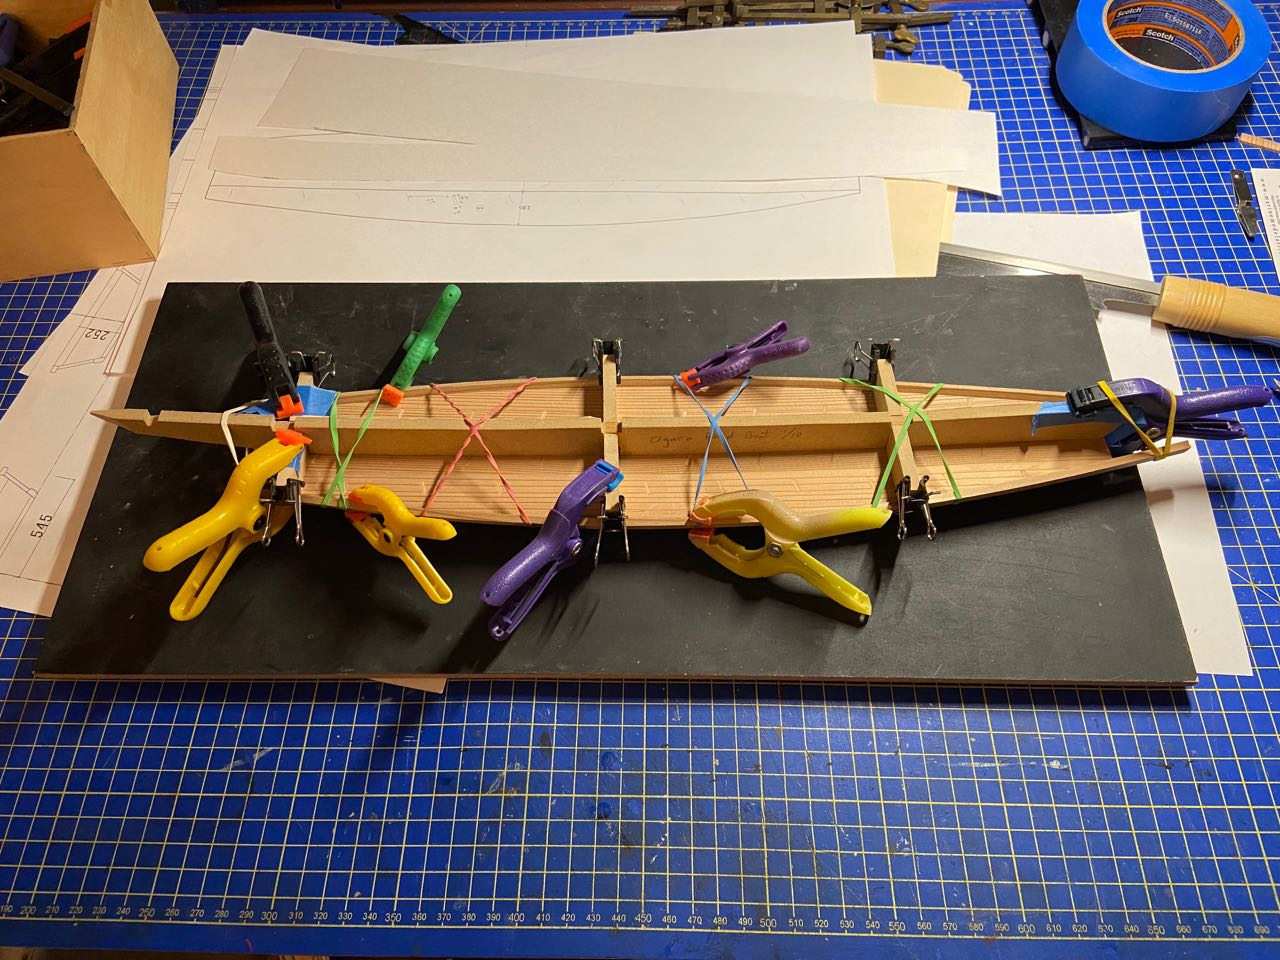
In the case of the model, this can be accomplished using props and clamps. I prepped a building board made of medium density fiberboard (MDF), which sits on runners gllued underneath that are tall enough that I can easily fit a c-clamp, which is what I’m using here to push down on the middle of the board.
I wet the board before clamping it into position. Note that I the building board is painted, primarily because water will ruin the unprotected MDF board, and the paint works to keep the small amount of dampness out.

 After sufficient bending was done, I let the shiki dry. Then, I clamped it to the building frame. Here, I beveled the lower edges of the shiki with a miniature block plane, in preparation for the hull planking.
 The hull planking on this boat consists of two pieces. There is the main hull plank, usually referred to as a tana (棚 or タナ), and there is a narrow lower piece that Ogawa-san refers to as a hata. I’m not familiar with this term and never really encountered this kind of construction before. I’ll be referring to it here as simply the lower plank.
It wasn’t clear to me at the time of building whether this lower plank should be simply attached to the main hull plank and then the whole thing fitted to the bottom board, or if it’s better to just attach the lower plank to the bottom board, and deal with the main hull plank later. On the real boat, it would have made sense that this lower plank was attached to the main hull plank first, for reasons that may be more obvious later. However, I opted to add the lower plank to the bottom board first.
This strip was cut 6mm wide and glued and clamped into place, with the shiki clamped to the building frame.
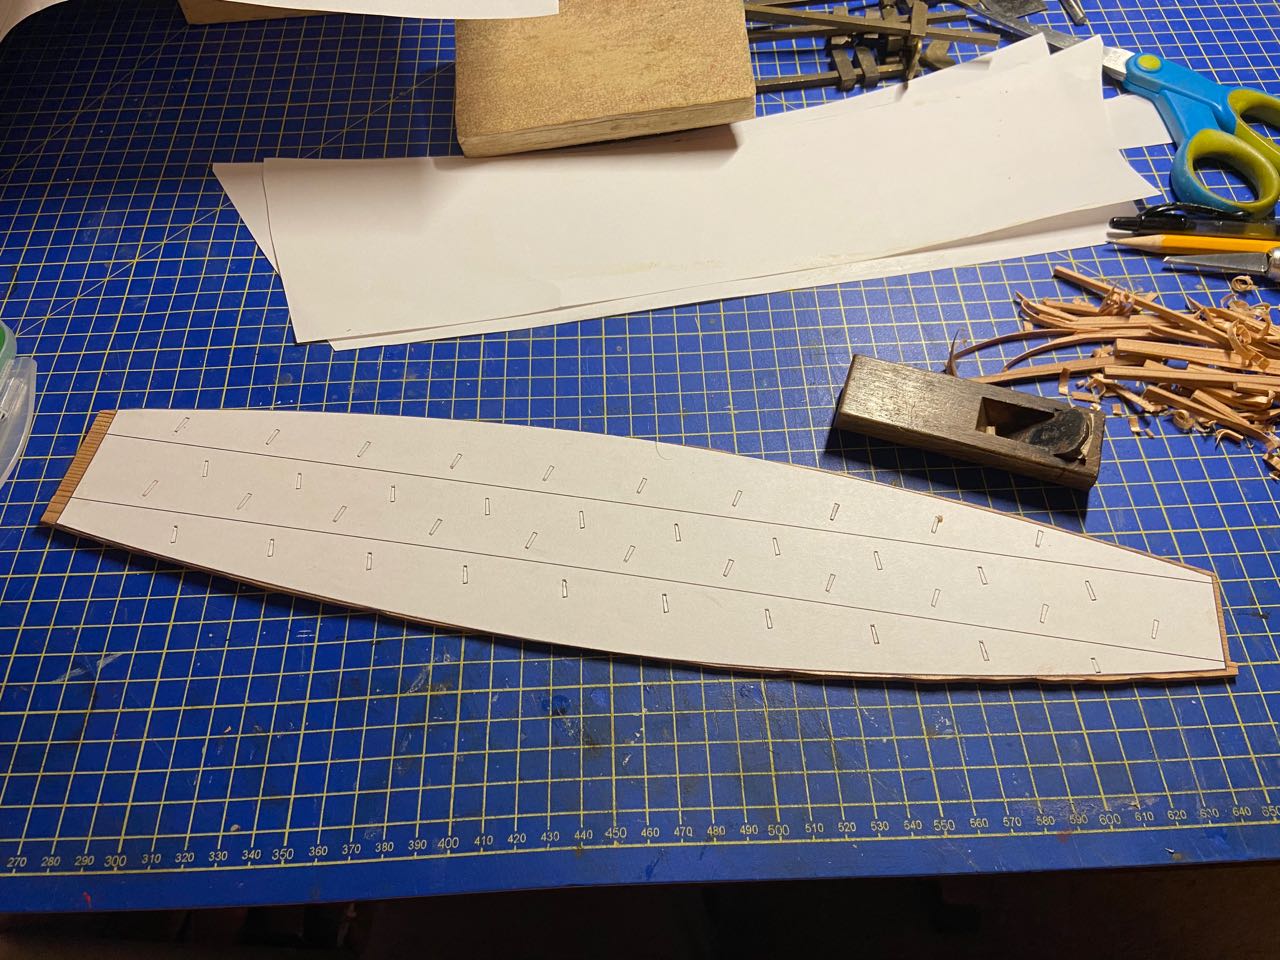
 With the excess length of these lower planks trimmed off, and the whole thing temporarily removed from the building frame, you can see where we are at this point.

Next time, I’ll show the mortises cut into the lower plank, and will be adding the main hull planks.

Reblogged this on Ship Modeler and commented:
Finally getting back to some Japanese boat projects, I’m actually playing a bit of catch-up with the blogging. Here’s more on the Ogura pond boat model, based on the research of Mr. Tomohiko Ogawa.
LikeLike