
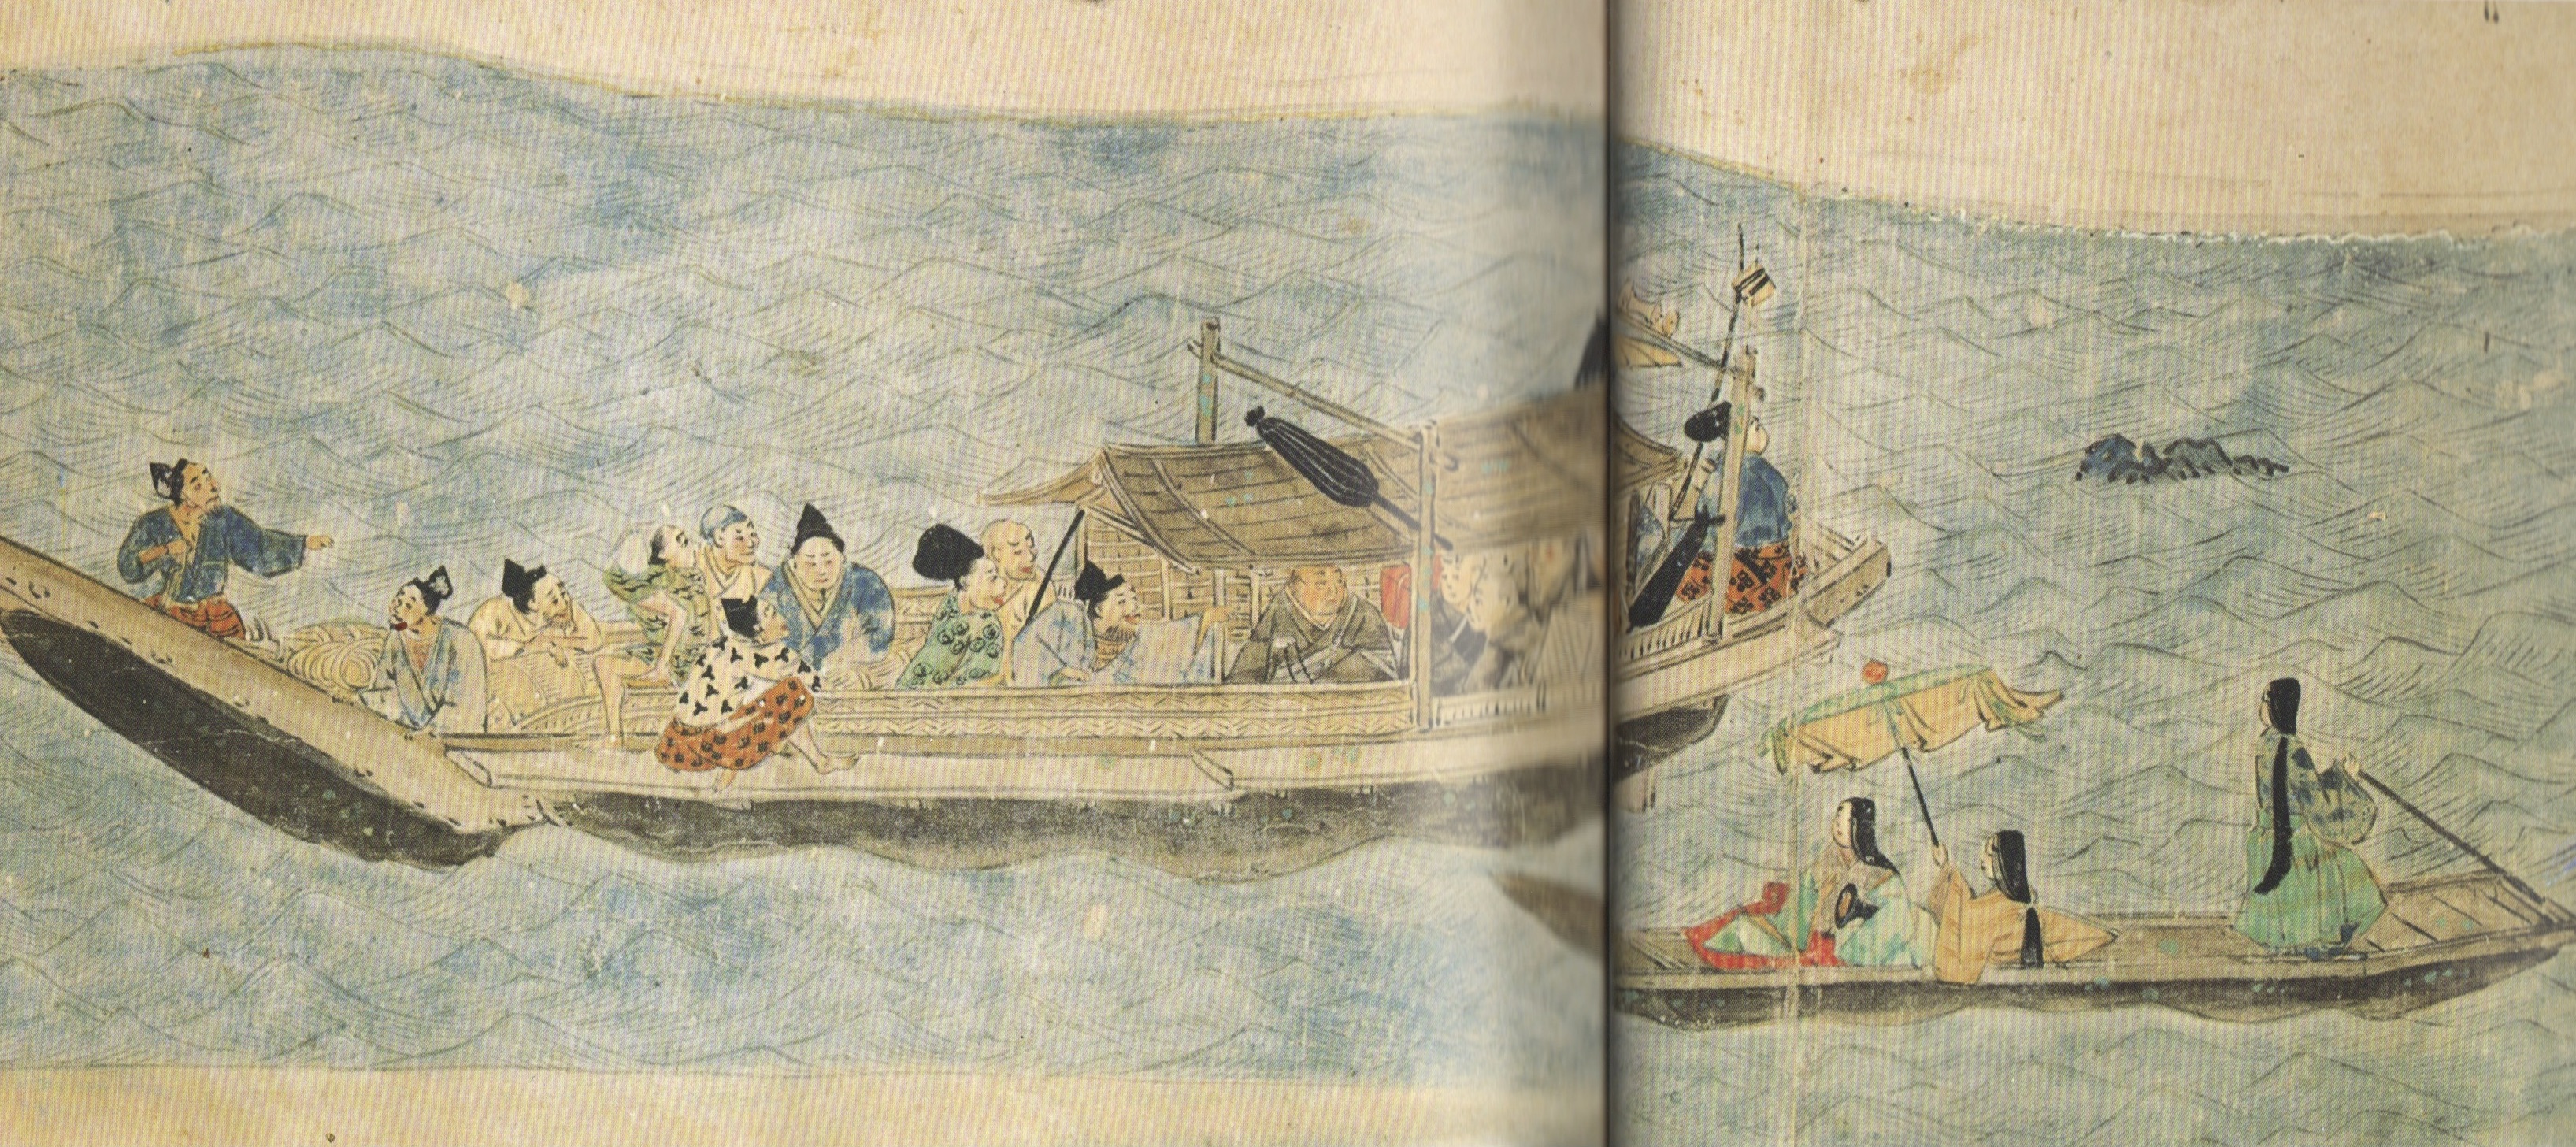
The largest source of Kamakura period boat information appears to be in 13th century picture scrolls that appear in books and on the Internet, but I really know very little about the scrolls themselves. What they depict includes a lot of boats with hull designs very similar to the ship I’m modeling. These are semi-structured ships or junkozosen (準構造船) with dugout-style hull, which have been built up with hull planks. Most of those depicted are river boats, but some appear to be sea boats.
I recently found a great sketch of a large sea ship on a blog site. I believe this was scanned from one of Professor Ishii’s books, but it’s not one that I have.
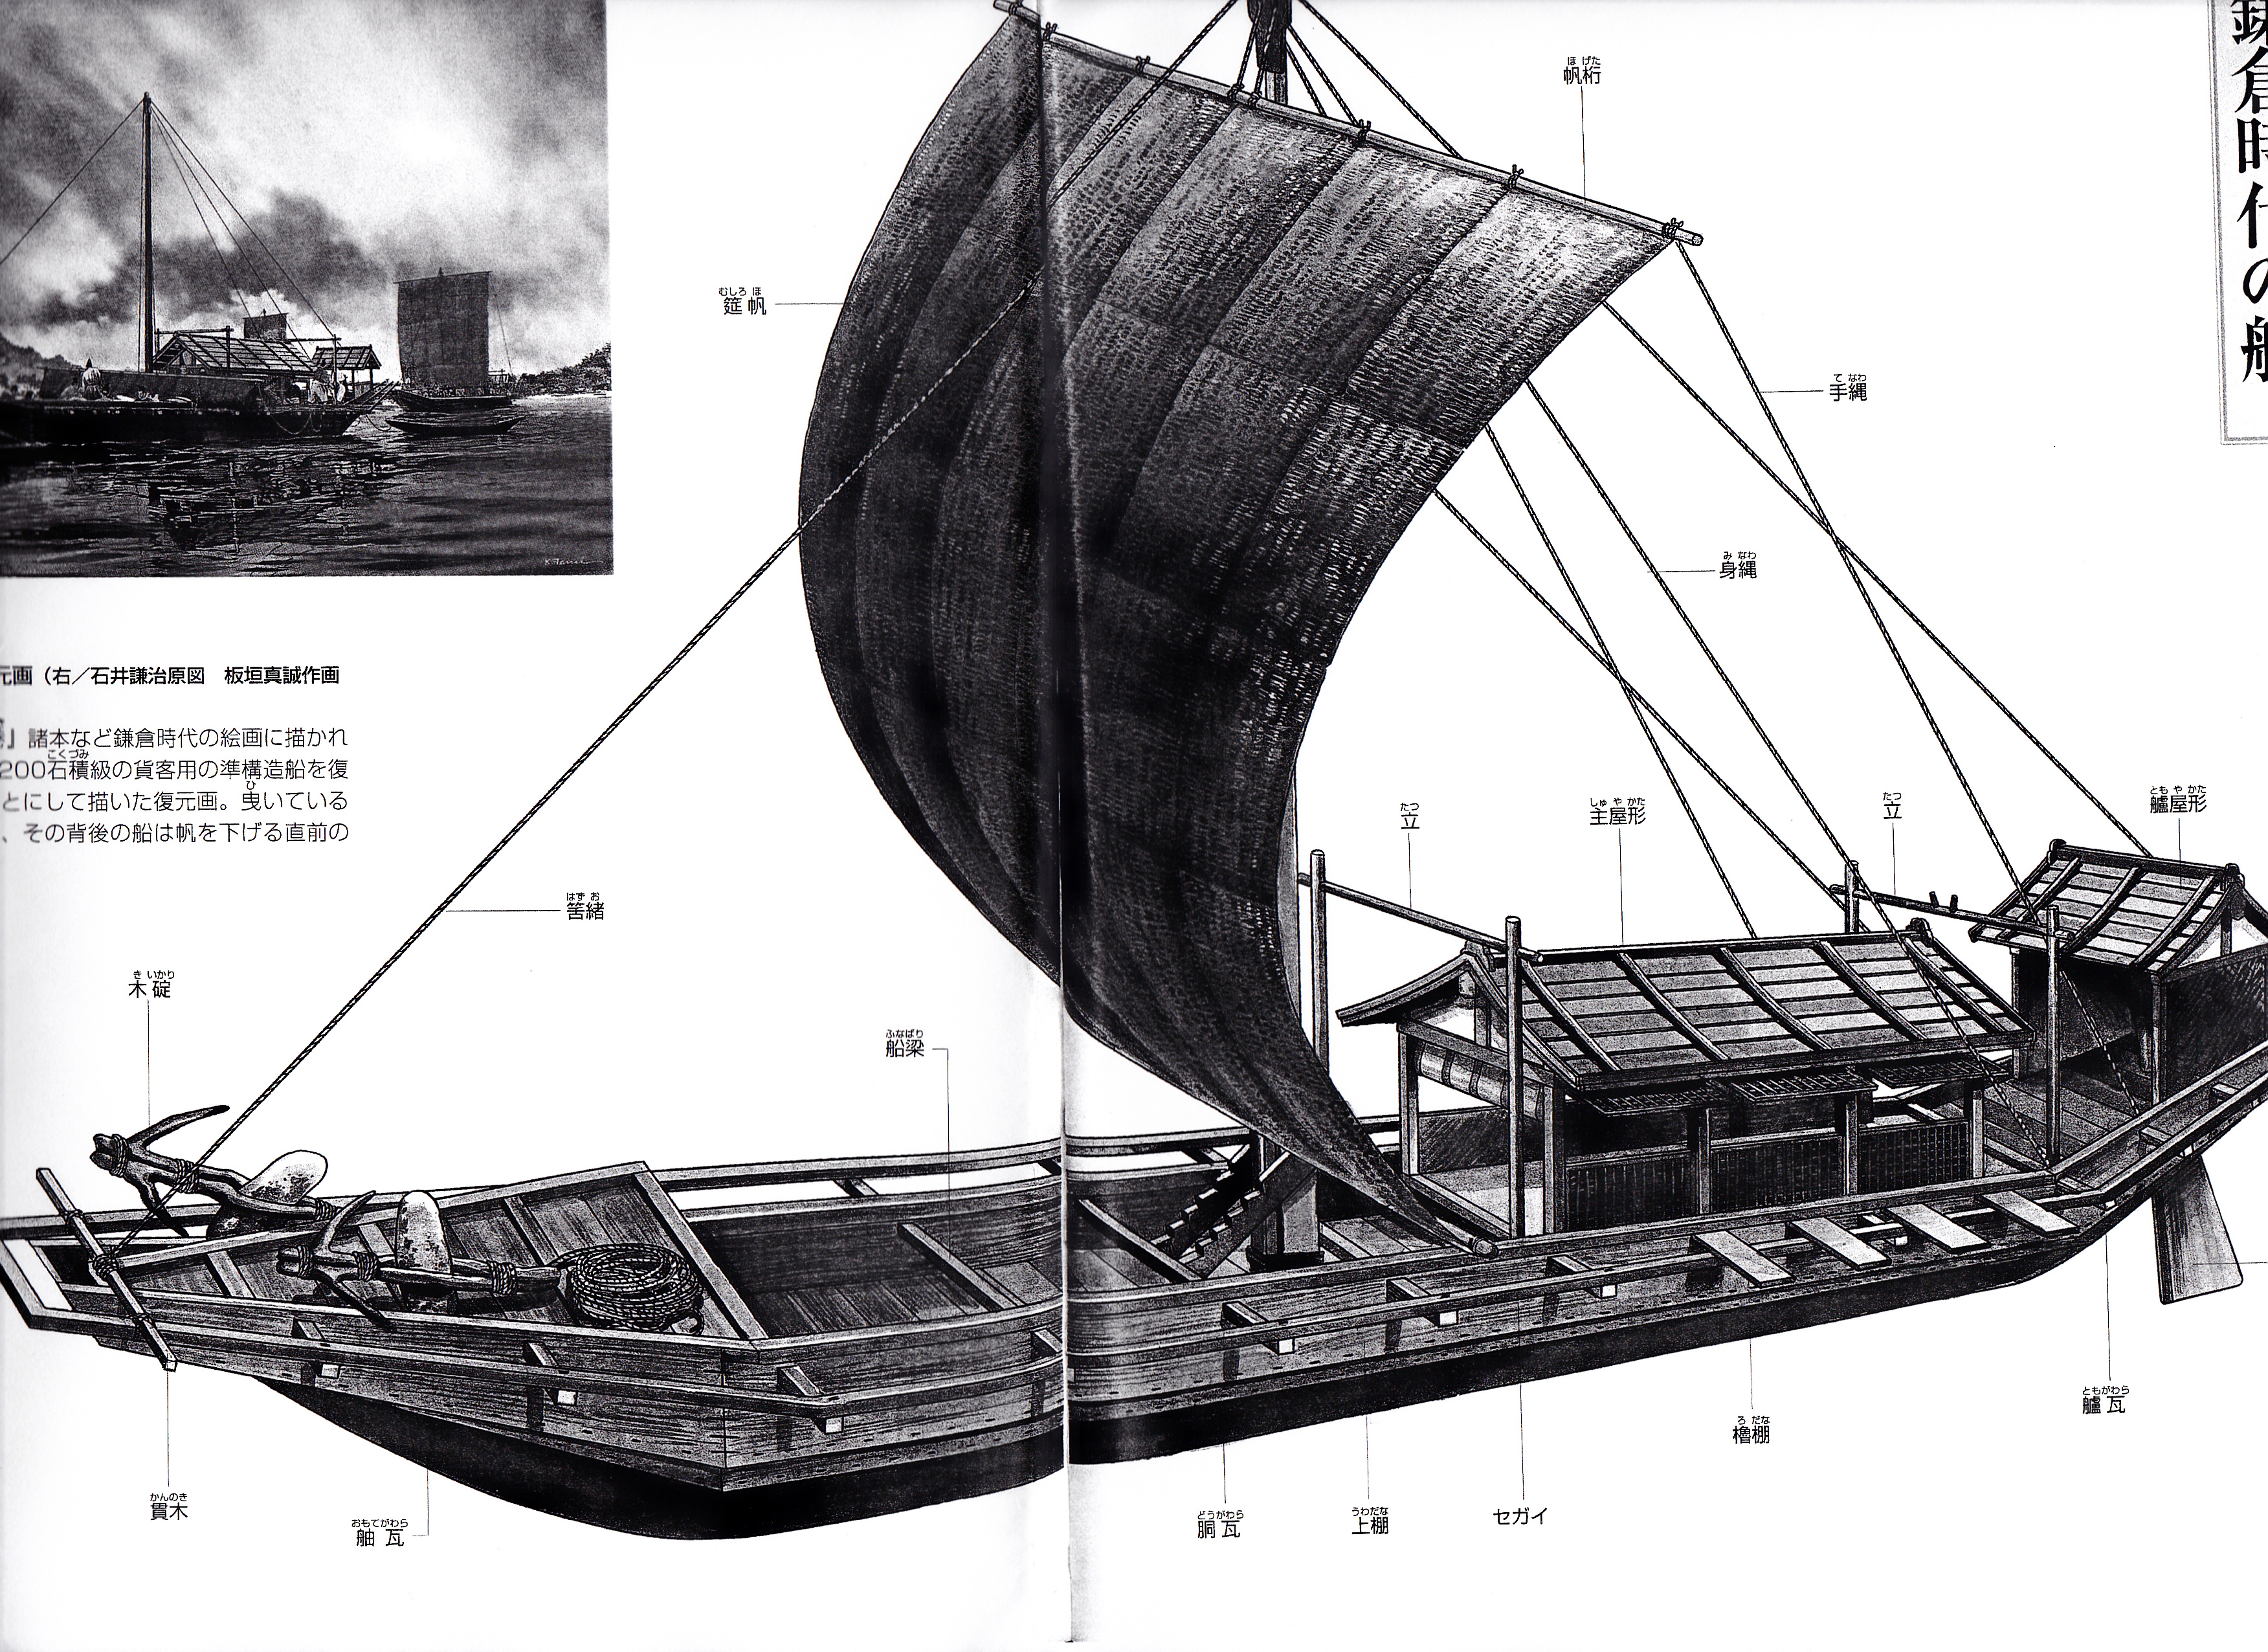
This image is very similar to a less detailed drawing I have in my books. The ship depicted here varies only slightly from my model in that this image shows a peaked roof called a kappa at the bow. It also has only a single rail outboard of the hull, but it extends all the way around the bow. It also may be a somewhat smaller ship, given there are only 4 rowing platforms on either side, where my model will have 6.
A couple things I like about this image in particular is that it shows a roof design on the main deck house that is clear and makes sense to me. Note the boards that make up the roof run along the length of the roof. The drawing I’ve been working off of, shows the boards running perpendicular to these – not that it’s wrong, but that it requires an underlying structure that’s different from what I would naturally build. Also the front of the house appears to have a simple roll-up screen, no door or solid panel.
Finally, the small structure at the stern clearly appears higher than the main deck house, with the stern seemingly rising up more sharply than the bow. This makes sense, as it would allow the boatman at the helm to be able to see forward. Not that it would matter when the ship is under sail, as the large straw mat sail would block the view anyway.
Finally, the stern deck seems to rest on top of the cross beams, perhaps also contributing to the stern structure’s height. This is one area that has been the most unclear to me in the whole project. On my own model, I will make certain assumptions and reconstruct the stern area in the most logical fashion to me. In future builds, I can make corrections if they are necessary.
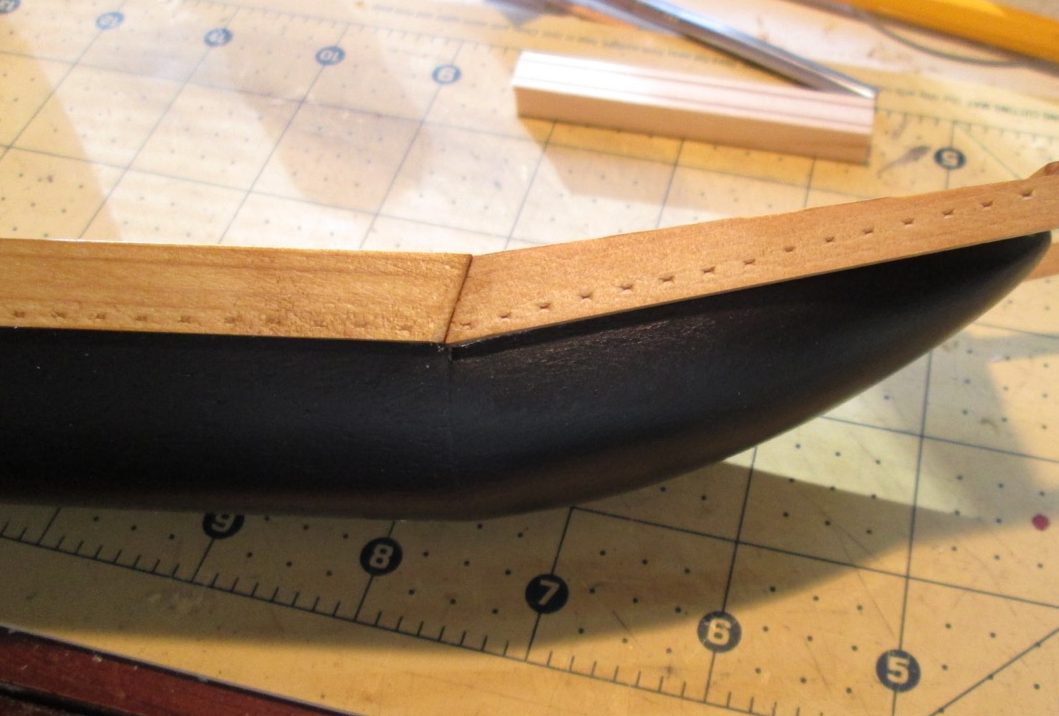
The next steps of my build went very quickly. I first painted the bottom using artist’s acrylics. I was originally thinking I’d just use a spray lacquer, but the soft layer of the acrylics helped out on working with the balsa hull cover. I had dropped the hull on the desk and, being balsa, the hull covering had a slight dent. So, I just poked a pinhole in the paint where the wood was dented, wet the wood through the pinhole, and the wood swelled back into shape. I believe the flexibility of the paint allowed it to stick well through the process and allowed the wood to easily come back to shape.
After the painting, I cut a paper pattern for the floor pieces that would fit atop the bow and stern blocks. I then glued up some planks, cut the completed sections to shape and added them to the model.
I decided to glue up the planks so that they would run longitudinally, or fore-and-aft fashioned. This might seem obvious to wester ship model builders, but I had to think about this. I’ve seen pictures that depict the planks running sideways, the way I’m planning to fit the deck planking. But, it seemed to me that such planking on the bottom of the boat would be weak, and this is a sea boat. So, I built these panels in the same fashion that the bottoms of other traditional boats are built.
FYI, I’m using a combination of some hinoki strips (Japanese cypress) and Port Orford cedar, which is often referred to as American hinoki because of its similarity to the aromatic Japanese wood. The hinoki strips are a Woody Joe product that a friend in Japan got for me. The Port Orford cedar was purchased from Bear Creek Lumber in Oregon. These are very light colored woods, so I treated them with a mixture of Transtint wood dye.
Next, I added the planks that make up the lower bulwarks. Since planking would have been edge fastened using nails into the log hull, I needed to simulate the mortises for the nails. At 1/50 scale, the simplest thing I could find was to use a stainless steel carving chisel I had on hand that I’d never used. The chisel has a wide flat blade, so I just ground off much of the edge, leaving a fine point. I purposely chose a wide chisel, as the wide blade was an easy visual guide to help me keep the point straight – a problem I encountered with another build.
[Note: I couldn’t find a photo of the tool, so I’ll have to post it later]
I tried to grind the chisel so that the new point would be centered, but I didn’t do a very good job and it ended up off-center. This turned out to be a good thing, as I used the width of the blade as a way to measure the spacing between mortises. If I went left-to-right, I had one spacing, and if I went right-to-left, I could get a different spacing.
I used a piece of tape as a guide to help me keep the mortises in a straight row, and just pressed the tip into the wood to make the impressions.
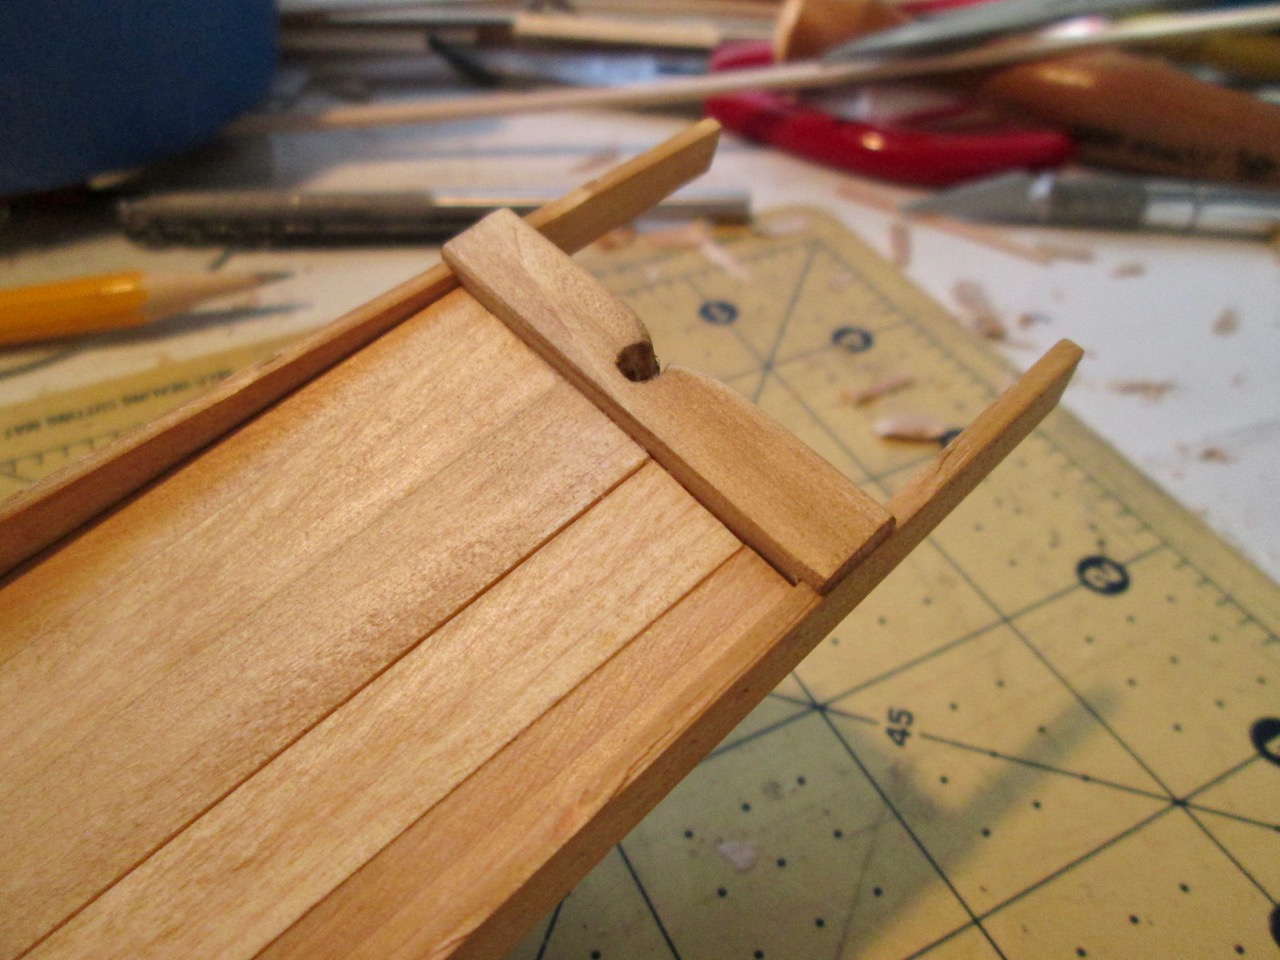
Once the lower planks were in place, I then cut beams and glued them down to the top of the hull and began laying in the deck planking between the beams. I don’t know for sure if this is how it would have been done, but based on other models and on traditional Japanese boats I’ve studied, this seemed to make sense. Also, the result pretty well matched the drawing.
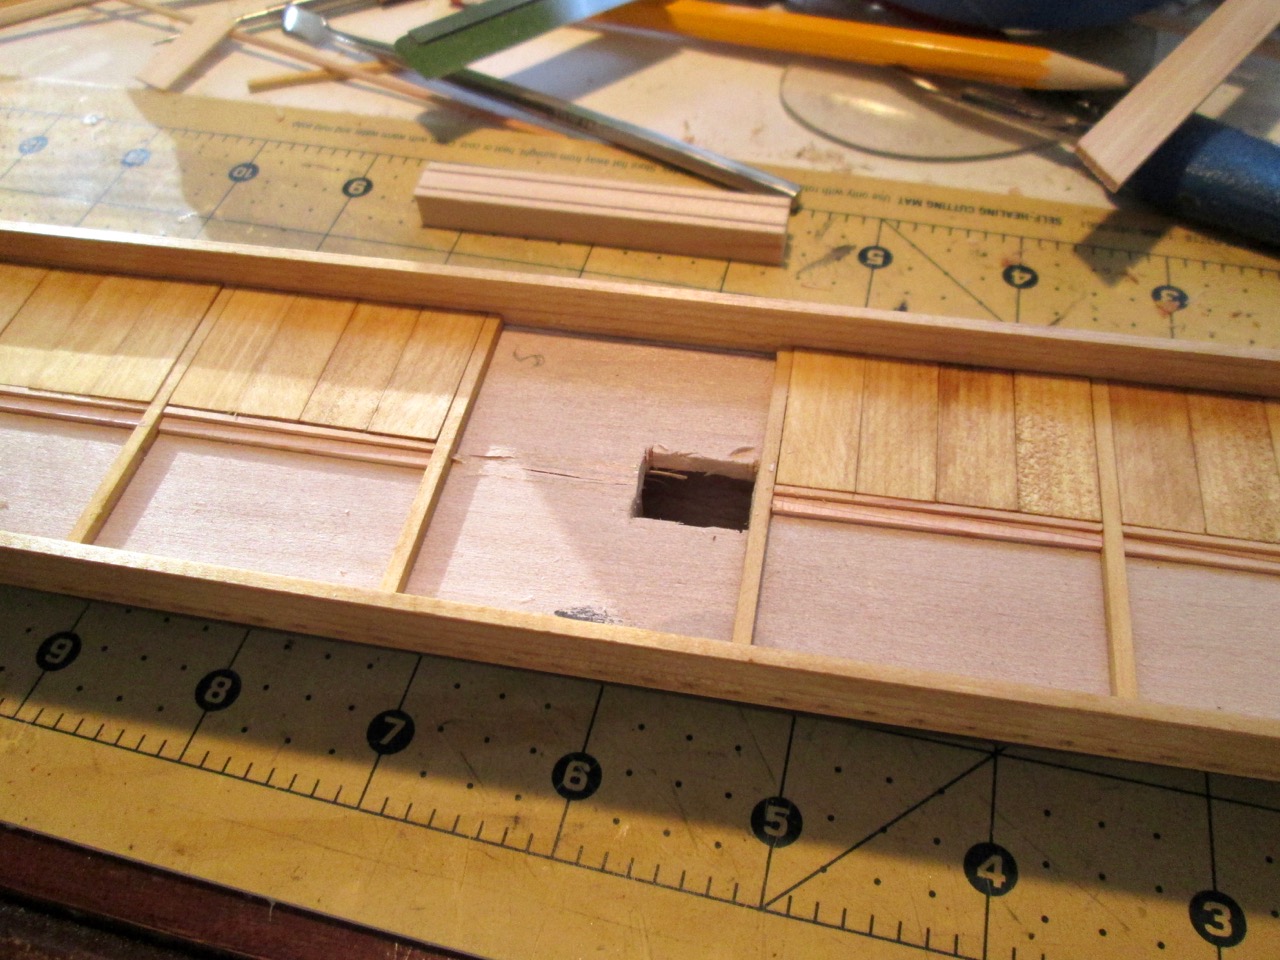
You’ll notice the hole I cut into the hull. This is for the mast step. I’d forgotten to allow for this earlier, so I had to rather crudely cut the opening. But, the edges will be well hidden by deck planking as you’ll see in later photos.
You’ll notice also that the way I supported the deck planks. Because the planks are half the thickness of the deck beams, I added ledges to the longitudinal beams. This is something I got from building Woody Joe’s Higaki Kaisen kit. These deck boards were likely removable. I assume that the longitudinal beams might have also been removable, though a ship like this might have needed them in order to stiffen the hull from flexing with the waves.
But, a log hull is very solid, and the bulwarks planking would have also been rather thick, providing a lot of support for the hull (thick planking is a common feature of traditional Japanese boats). Also, the ship was mainly for traversing the inland seas.
