
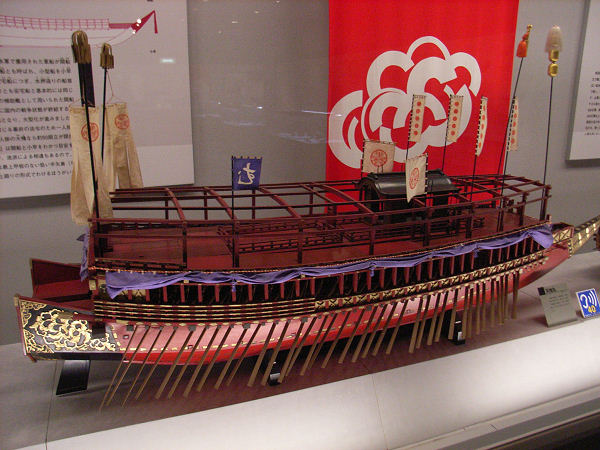
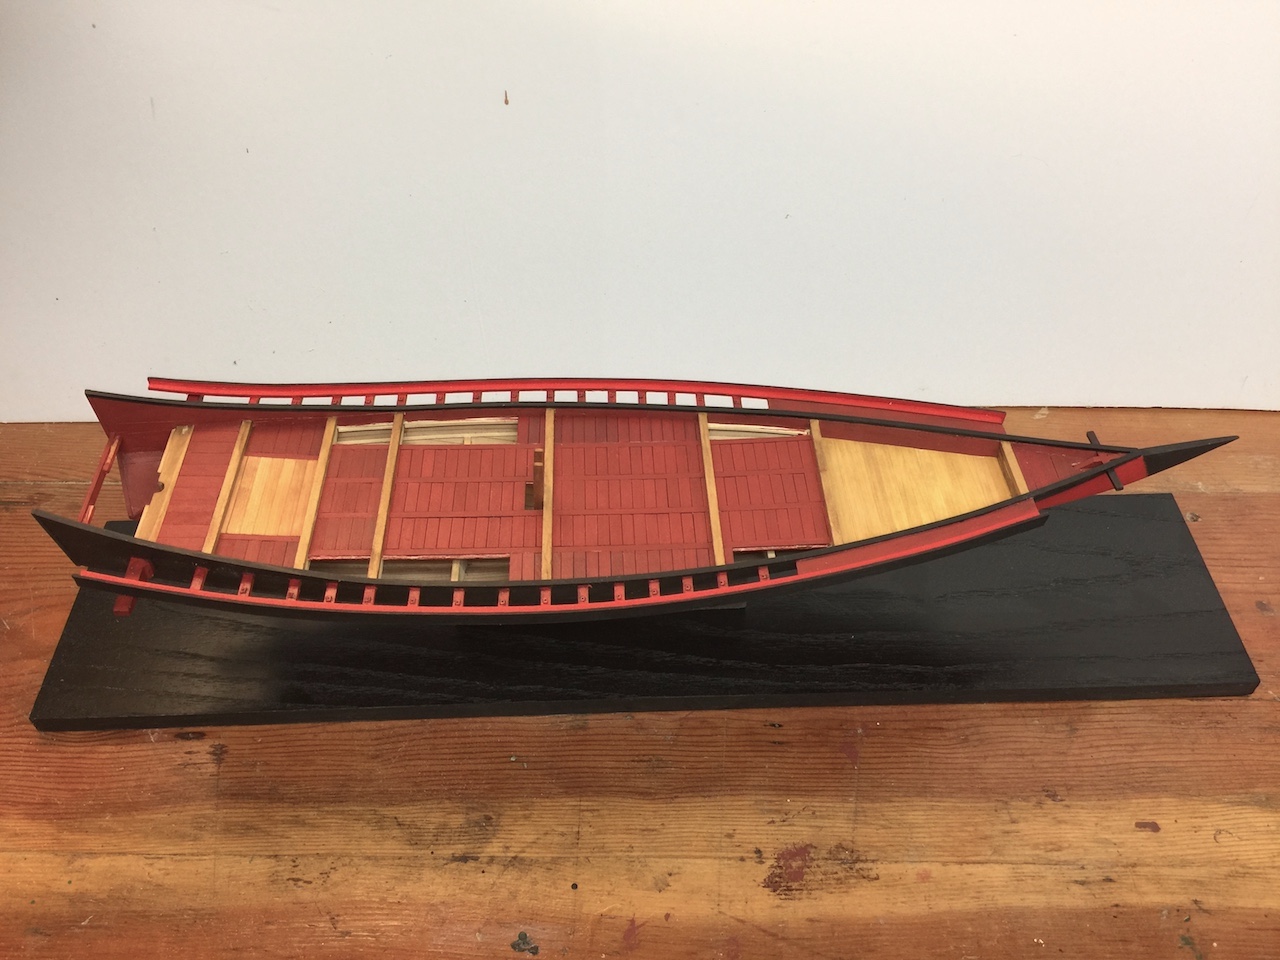
Model of the famous gozabune Tenchi-maru. Note the dark red deck areas, with the lighter red color for the hull.
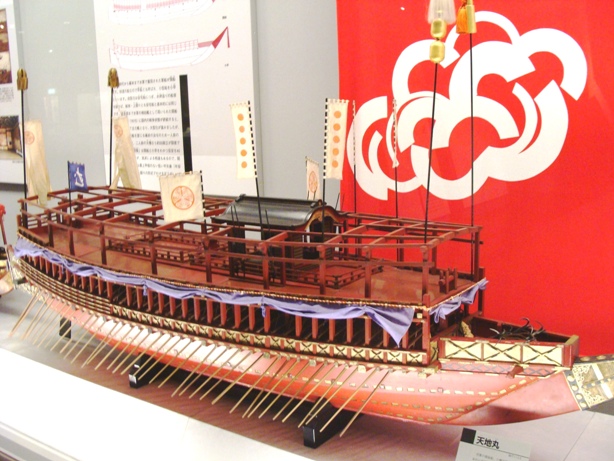
Another photo of the Tenchi-maru model. The lighting makes it harder to see, but just about everything on the upper deck is painted a dark red including the deck, fences, support pillars and cross beams.

I’m still not convinced about the color of the outboard beams and railing, which is described as red, and not specifically as “blood red”. On Tenchi-maru, basically all the red except for the lower hull is a dark shade, while the hull is a light color. I’ve never encountered a paint scheme quite as described.
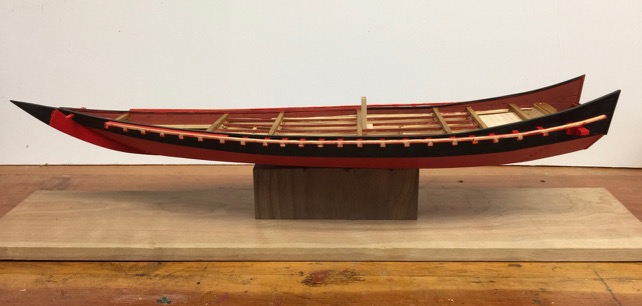
In photos of my own model, because of lighting, the red of the hull seems a little darker than it really is, but the red of those beams and railing come off as extremely bright. So, I may need to tone down the color of the beams and railing, just for that reason.
I know it’s still going to seem odd having the beams natural color, inboard, with the all the decks and bulwarks a dark red. And also showing a couple areas of the deck unpainted as well. I’ll just have to press forward and see how it all looks when it’s done.
Decks, Rails, and Paint
In any case, I’ve been painting deck planks and fitting them into place a section at a time. Two things I’m finding is that it’s very difficult to get the red color nice and consistent and even, also I have some variation in the position or thicknesses of the deck boards. As a result, I don’t think the decks look very good. But, I may feel quite differently when the decks are completed.
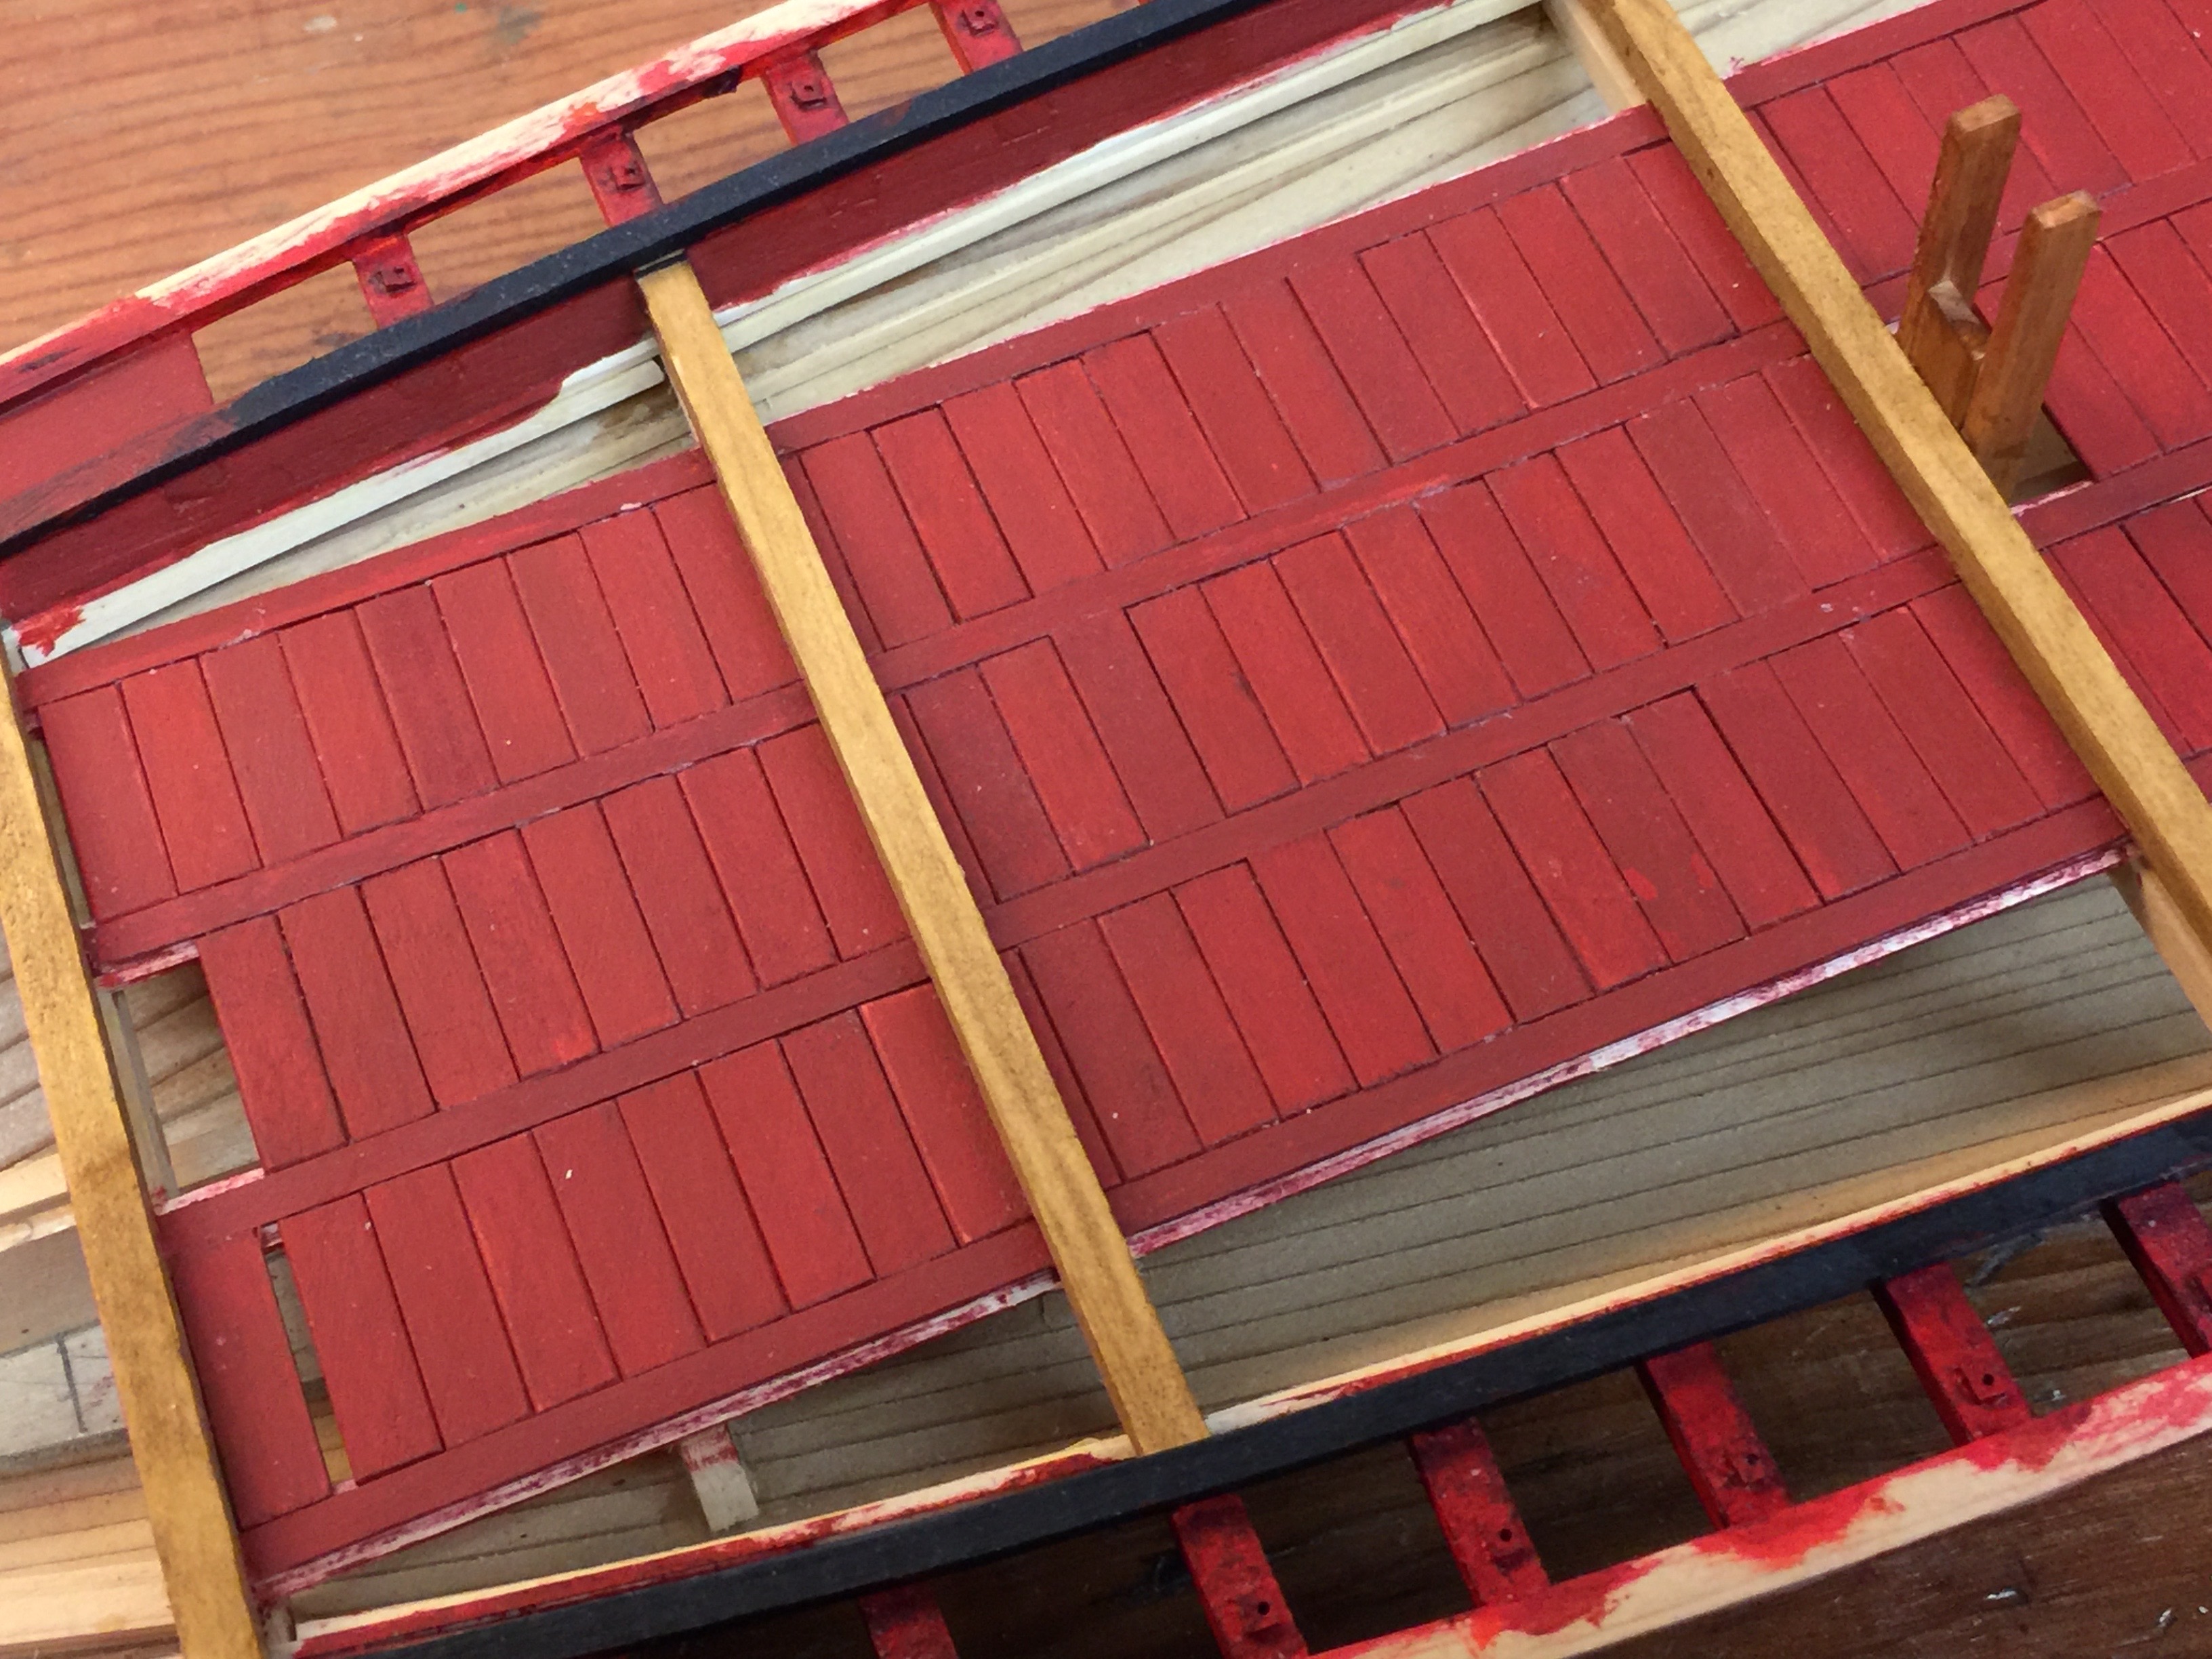
The planking is divided into sections separated by heavy crossbeams. The planks fit snugly in place under these, which is very useful for hiding the edges of the planks.
Because there are strings of separated planks, it would be difficult to get them all cut perfectly, and laid down perfectly, so that the rows of planks are as even at one end of the boat as they are on the opposite end.
I say, it would be difficult, because with the beams hiding some of the planks, I can fudge a bit, and cut some special planks a little narrow or leave gaps underneath the beams where they can’t be seen. This allows me to make sure the next set of planks start off in perfect alignment.
Before I finishing the painted deck planks, I decided to take a little break and finish a couple other things on the model. First was to plank the forward section of the deck that is supposed to be left as bare wood. Presumably, this area is reserved for the VIP passengers. The area sits lower than the main deck.

Planking this area was pretty straight forward, though I now think I could have done a better job. Not much to say about it. I used my dye mixture to color the wood, which was Hinoki.
Before going back to the remaining deck planking, I decided to install the curved pieces that will later be covered with gold decoration. I originally cut these from Sugi, or Japanese cedar, but the hard grain made shaping it very difficult. I ended up switching to Port Orford cedar, a.k.a. “American Hinoki”, which is much easier to work with.
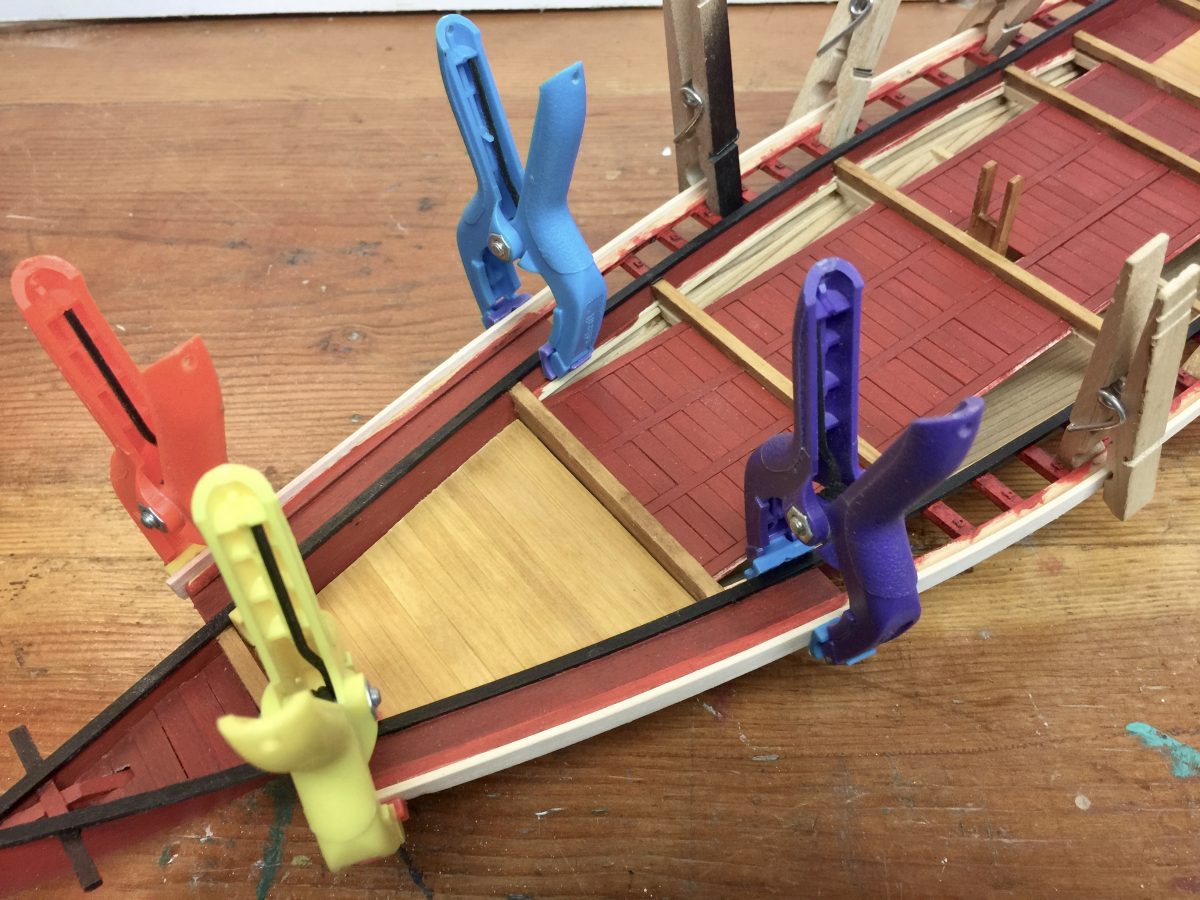
Forward deck planks in place with rail board going on.

I aligned these pieces that I’ll call the rail boards so that they covered the ends of the beams, and then I decided to move forward with the preparatory painting of the bare wood. There will be vertical posts mounted on the painted surfaces, but I expect to secure these with pins, so I’m not concerned with the fact that glue doesn’t stick well to paint.
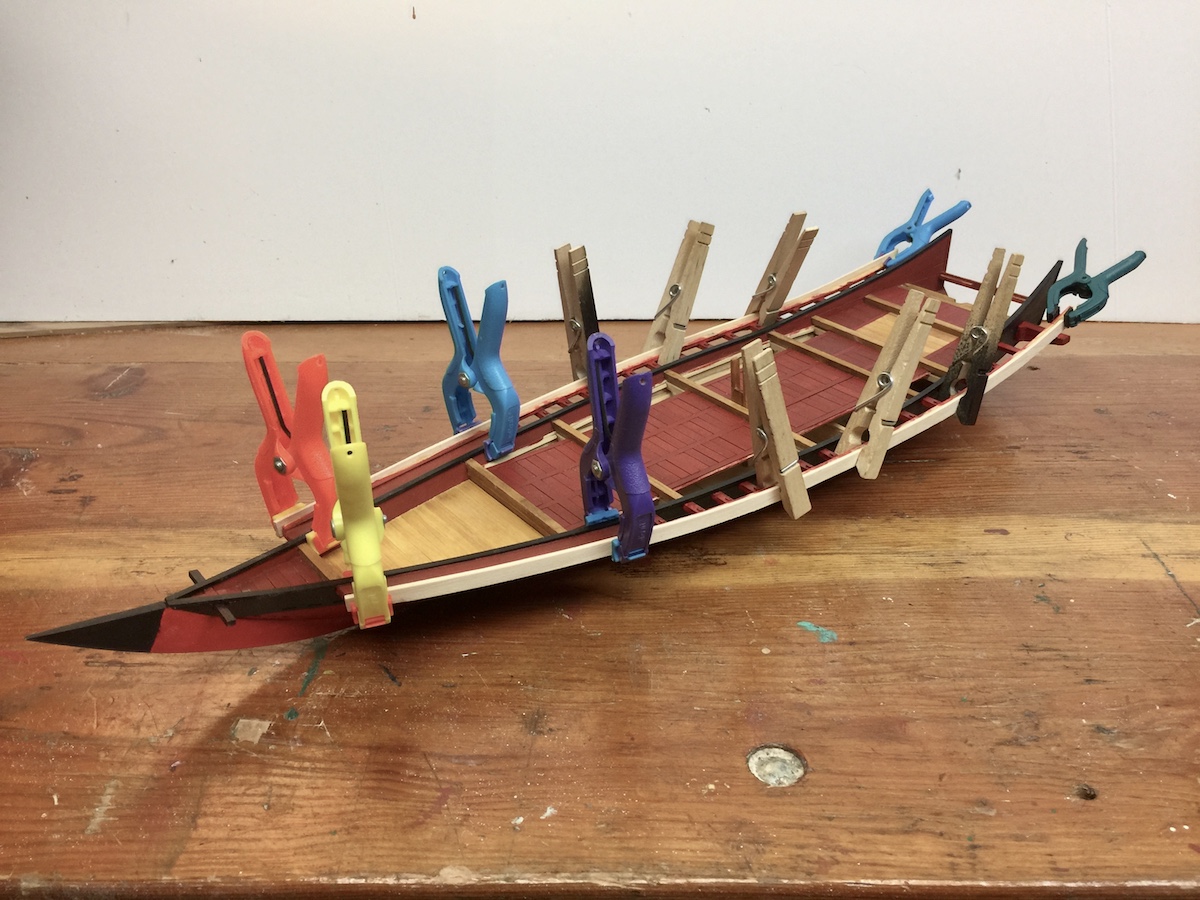
Planking nearly complete, the model sits on a temporary base that may evolve into the actual display base I’ll use for it.

Finishing the Planking
At this point, I’ve now added more deck planks and I have to say that I’m starting to feel a lot more comfortable about the colors of the model. I’ve gone over some of the deck with a wash or red paint, and this has evened out the color considerably. Once the rest of the deck planking is in place, I’ll do it again.
The deck planking itself is slow going, especially working at the edge of the deck. Every piece is a different length, and the plank ends each have a unique taper, so it takes a while to cut them all. But, it’s not a difficult task.
In my next post, I’ll be finishing up the deck planking and should also have the rails finished, at which point, I’m going to have to start giving a lot of thought to the decorations.
