
Work on the Kobaya is moving forward again. While coming up with a way to deal with the decorative patterns on the hull has held me up, I did have some ideas. But, the best I could think to do required the use of a new tool, and it took me a while to bight the bullet and buy it.

Note the pattern of the chain of hexagons and what look like little sunbursts in the Paris drawings.
The solution I came up with was to either create a mask for painting or possibly for the application of gold leaf, or to simply cut a pattern that was itself gold leafed. This probably sounds more complicated than it turned out to be. The central part of the solution turned out to be the use of a vinyl cutter, like those used in scrapbooking.
After looking at a few of the leading models, I finally made the leap and bought a Silhouette Cameo 3. I found one for about $200 online and spent another $150 or so on materials and accessories.
The closest competitor to this was the Cricket Maker, but it was more expensive and the drawing software was only usable online, requiring an internet connection to use. Having Internet is not an issue, but requiring it to use my own hardware or even to create drawings was not an idea I like supporting.
I was able to test out Silhouette’s drawing software for the Cameo, which was available as a free download from their website. That allowed me to determine that I would at least be able to create drawings of the things I needed it to cut.

My new vinyl cutter on arrival day.
It took me a couple days to set up and test out the Cameo and to start creating the artwork I’d need for the Kobaya model.
There are three groups of decorations that I wanted to take care of using this machine: The patterns on the sides of the rails, the stern decorations, and the scrollwork patterns on the sides of the hull. There are also other items that I have been considering making with the cameo, including the gold borders of the black painted area of the stem, and the bird decorations on the sides of the hull at the bow. I have been calling these birds carvings, but it is unlikely that they were carved. More likely, they were painted onto the hull (see the photo at the beginning of this post).
In any case, to find out if the cut vinyl would work out, I had to start with something, so I started with the simplest of the decorations, which was the hexagonal pattern on the stern.

My first vinyl cutting effort for the kobaya. This was an early version that I recently replaced.
This pattern was very easy to create, but the shape of my model’s hull differs from the drawing a bit, so the pattern lays out a little differently. You can see more of the steps I followed for making this pattern here: https://wasenmodeler.wordpress.com/2019/05/20/my-latest-tool-addition-cameo-3-vinyl-cutter/
Next, I worked to see if the hexagonal chain pattern on the sides were doable. My initial work came out looking much like that of the model in the French Musee de la Marine, with just the hex chain pattern and no other details. But, if you look at the Paris drawings, there appear to be some kind of sunburst patterns in all the open spaces.

My kobaya model with simple hex chain pattern.

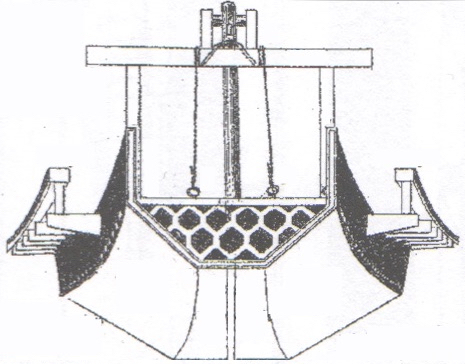
French museum model showing simplified hex chain pattern.
Now, I happen to like the simple hex chain pattern. But, if Paris’s work is to be believed, then I would need to figure out how to make that sunburst pattern.
I played around with some ideas, but these individual sunbursts would be very small and I didn’t know if the new machine would handle them. Fortunately, I made the hexese in the chain a bit too small, so I made a slightly larger sized set, which allowed for slightly larger sunbursts. These were easier to work with and apply. Also, you might note that near the top and bottom edges are half sunburst patterns – an even smaller detail.
I was pleasantly surprised to discover that the cuts worked. Some of the pieces weren’t usable, but the vast majority were fine.

one of about 200 tiny decorations that will adorn the sides of the kobaya’s rails.

Final pattern is more true to the Paris drawings.
The bird patterns near the bow are the last of the gold decorative patterns, after which I’ll do some touch-up on the paint and give the hull a final clear coat.


I’m still a ways from being finished with the model, as I have also to create a sagari, which is the hanging tassel at the tip of the miyoshi, or stem. Also, I’ll be fitting the rudder and then I have to make 28 ro or sculling oars, each about 5 inches long.
Oh, you might notice, I had removed the mast support, which I’ll be replacing soon as well. Mine was short, based on the French museum model, when I should have noted that it should be much taller.
Finally, there is the matter of the yakata and frame and awning that I discussed earlier. At this point, I’m leaning toward leaving those speculative features off until after the next big Japanese boat models display, which should be at the Port Townsend Wooden Boat Festival this Fall. I’ll post more about that later.

Pingback: Building Woody Joe’s 1/72-scale Kitamaebune Kit – Part 6 | Wasen Mokei 和船模型
Pingback: Building Woody Joe’s 1/72-scale Kitamaebune Kit – Part 6 | Wasen Mokei 和船模型