
More and More Copper Details…
This project stalled a bit while I was adding the copper coverings detail, which I’ve actually been making using brown permanent adhesive vinyl that I laid out and cut using my Silhouette Cameo 3 machine. The slow down is simply due to the amount of small details I’ve been feeling I need to make.
As I’ve written earlier, I reproduced the kit-provided shiny copper pieces with vinyl ones using the Cameo’s feature called PixScan, which allows me to use a specially marked mat on which the parts are placed and to take a photo of the them. This gets imported into the Silhouette Studio software and I am able to recreate the parts from the photo.
Part of the process is automated, but it works much better for larger objects. The small parts in this kit require that I do a lot of editing to sharpen up and straighten up the cut lines.
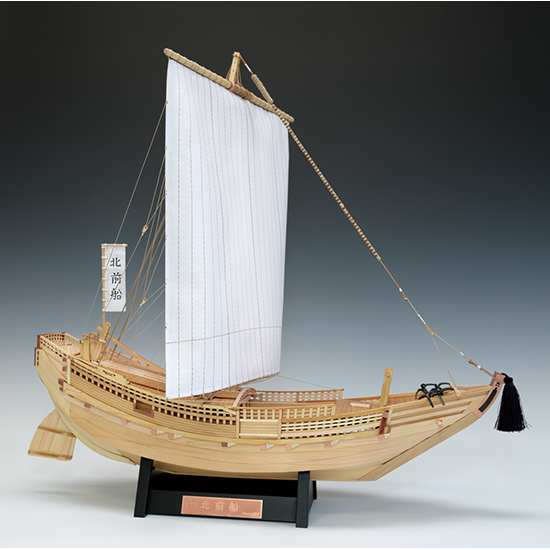
Woody Joe product image of the completed Kitamaebune kit.
In addition to those parts, I’ve been studying my photos of the Hakusan Maru, the kitamaebune on Sado Island, to figure out what other copper plates I need to make. There are a LOT of copper coverings on these ships, so the project seemed a bit overwhelming. Each part had to be measured on the model, which does not correspond exactly to this particular ship, and drawn in the Silhouette Studio software. Then, the Cameo cutter was set up with a piece of the same brown colored vinyl on a light adhesive cutting mat, loaded up, cut, unloaded, vinyl removed from the mat, mat put away to keep it clean (more like keeping it from getting too dirty). Finally, the pieces are carefully applied to the model.

Stern of the Hakusan Maru on Sado Island showing all the copper plates and the iron work on the rudder.
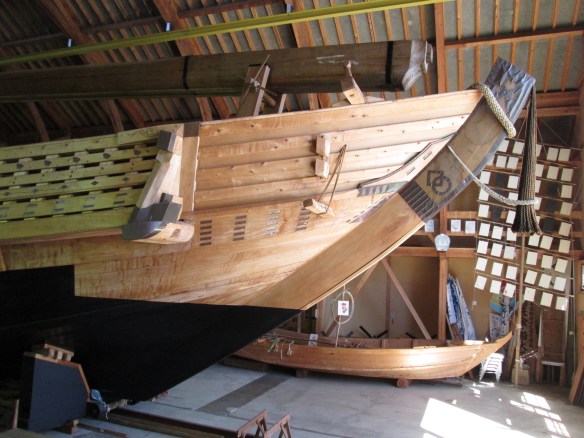
Bow of the Hakusan Maru on Sado Island showing lots of small copper plates on the real ship.
The problem is primarily that every time I think I’m done, I look at the model closely and the replica ship photos and find something else to add. Then, the whole above process repeats. And, when those parts are applied, I realize there is more I could do. Rinse and repeat, over and over again.

Photo of the model with initial vinyl details added many months ago. Looked pretty good, but a long way from being done.
But, I think I’m finally done with that part of the model details. I applied the last of the vinyl detail I’m going to do and, overall, the detail is looking pretty good. Most importantly, I’m happy with it.

Red arrows show holes that need to be filled and covered with “copper” vinyl. Green arrows show parts that need to be remade. These are too wide and not sticking well, as they were folded over the corners. They need to be separate cut pieces.

Red arrows show new plates added. Blue arrows show new post detail.

Green arrows show reproduced parts from the kit. The plates at the stern seem too big, but they cover interlocking tabs in the wooden parts. Red arrows show new vinyl copper plates.

I finally added some vinyl copper plates over a couple seams between parts, marked here with red arrows. The added detail looks right. Blue circle highlights the posts added at end of tiller.
Besides the vinyl detail, I’ve added some small wooden details, like the posts at the ends of the beam at the bow. I don’t recall, or possibly never knew, the Japanese term for these. Mine don’t show any detail. These seem to be usually tapered in a very Japanese fashion, with a sort of ball at the end. Mine are just straight posts.
I also added similar posts near the end of the large tiller. I don’t know what purpose these serve, perhaps as handgrips or tie points for ropes. But, I see these in a lot of the bezaisen drawings, paintings, and model photos.
And, with that, I think the vinyl work is done, though I might later discover that I need to add something I missed. Next, I’ll need to deal with creating additional wooden details to the model. There is still the possibility of adding one or both of the light masts often set up at the bow of the ship. Also, I need some kind of chocks for the tenmasen to sit on, plus tie-downs for it. I’m also looking at adding handles to the various windlasses that I’ve added to the model.


Finally, there are some various small wooden tenons at various locations on the ship that I want to simulate. I made some of these earlier, but had to remove them, as they got in the way of the copper work I needed to add.
After these few details are added, I believe it will be time to work on the mainsail. More on that later.
