
An update on this model is long overdue. While I hadn’t really been working much on the Kobaya model, it is a model that I’ve been very happy with. With the release of the new Shōgun TV series (more on that in another post), I’ve found something of a renewed interest in working on my wasen models, particularly in my kobaya model, as I knew the next steps I wanted to deal with. So, I brought the model down from the shelf, cleaned it up, and immediately started working on it again.

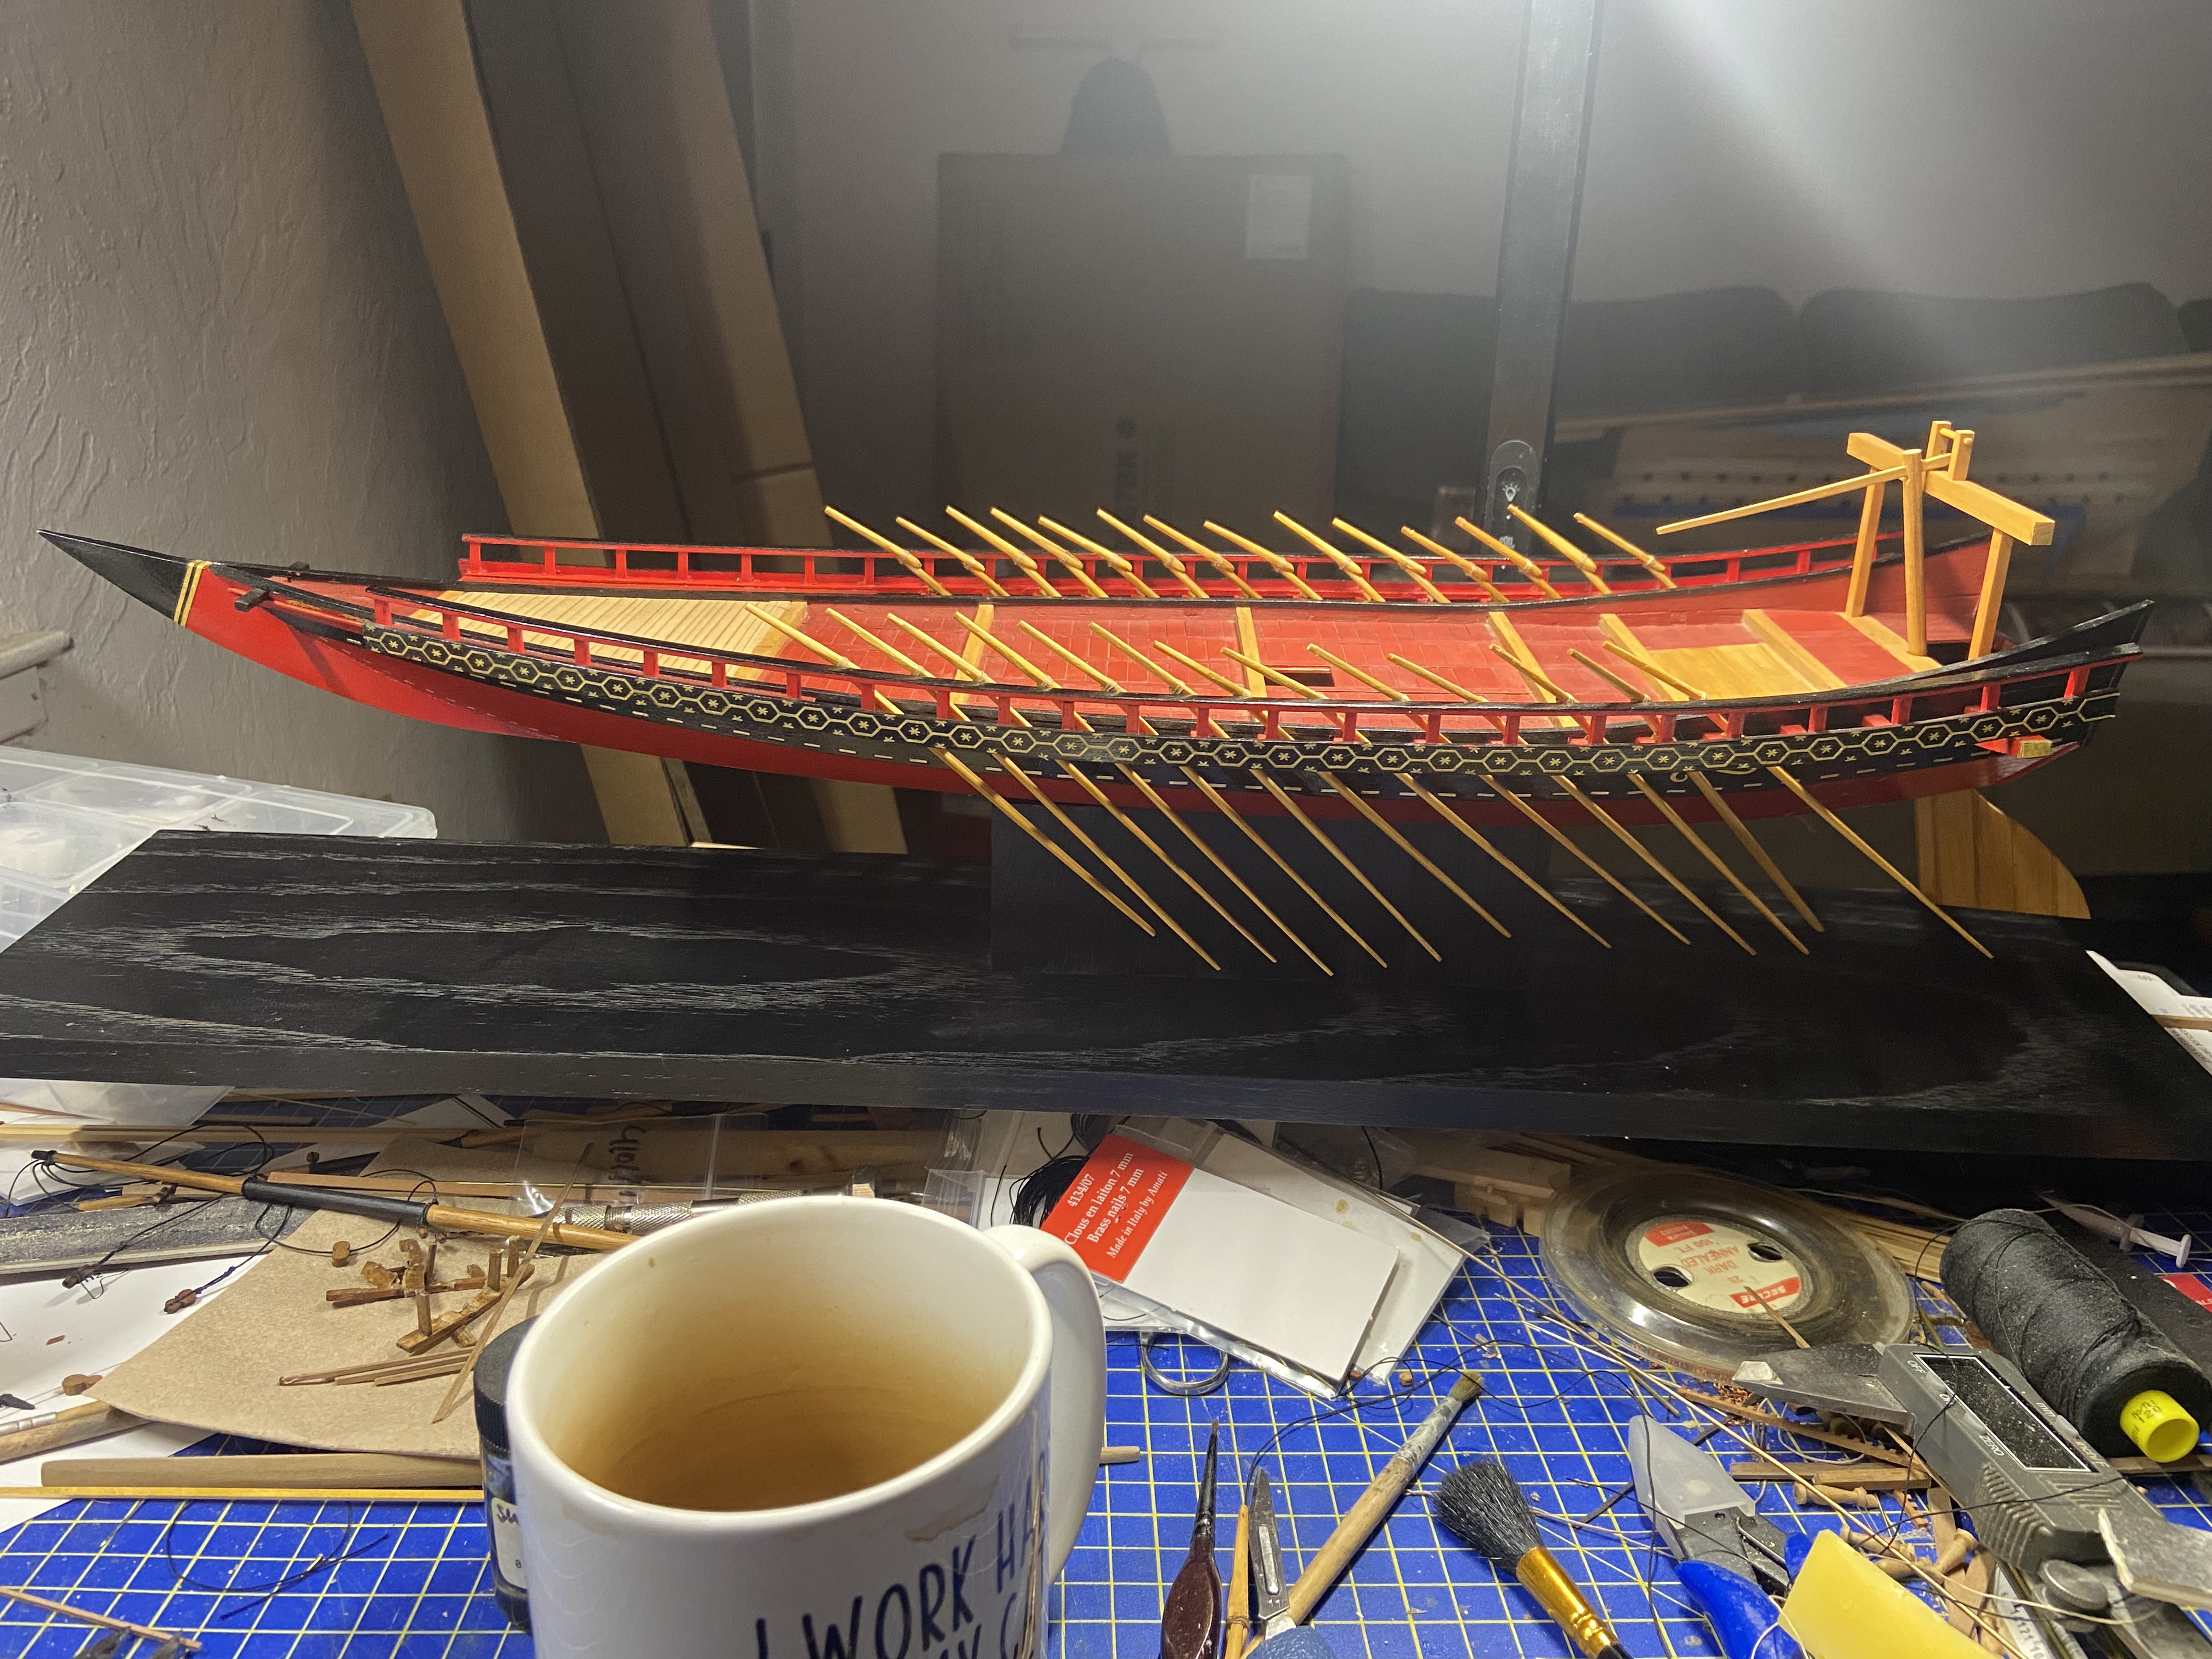
The model is inching closer to completion now, with the biggest hold-up being the making and mounting of the ship’s 28 sculling oars. Given the size of a person on the model, the deck would have been crowded with oarsmen. With such a sharp hull and relatively small size (17m) in comparison with the largest of ships at the time (30m, give or take), those 28 oars must have made her very fast.
Below is an one of the sculling oars, which in Japanese is called a “ro”. It’s not complete as it need a rope wrapping where the head and the body overlap. It also needs a small handle that should stick up near the end of the oar’s head.
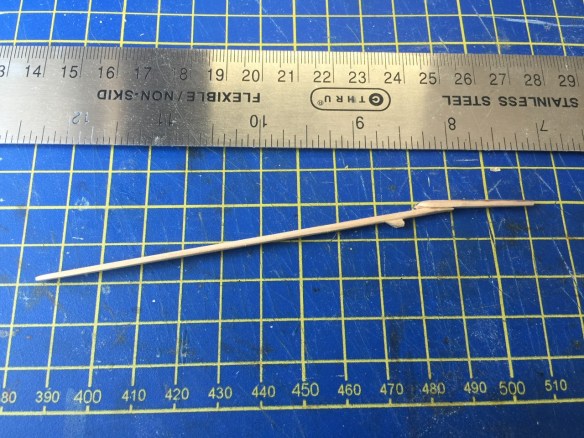
Japanese sculling oars are more complicated in shape than most western-style oars, so I’ve had my work cut-out for me, especially given the need for 28 of them. I’m sure any builder of a row galley model can relate.

The Birds
In the meantime, I managed to solve one of my long-standing detail issues, one of many things on the model that I’ve been contemplating and staring at for many months, and that is the bird decorations at the bow.
Paris shows what are probably a pair of phoenixes along the top edge of the rail, just behind the stem. I looked at photos of the model in the French naval history museum, Musée National de la Marine. That model shows the bird decorations drawn the way a westerner might expect, with the wing tips high up.
But, in Japanese art, birds are generally drawn with the wings sweeping downward, which is illustrated in the Paris drawings. I tried to recreate the bird decorations as I saw them, but they didn’t quite turn out the way I wanted. I don’t think it was a problem with my design, as much as it was a problem with my application of the vinyl onto the hull. However, I think I’ll leave them alone, as they are very small and I don’t want to risk messing them up, and they do look pretty nice.


As with the other gold decorations on this model, I drew up the phoenix using the Silhouette Studio software for my Cameo 3 vinyl cutter. It took me a few attempts to come up with something that looked like it had some detail, and you’ll notice the feathering of the wings. Initially, the wings were solid and looked very two-dimensional, so I’m happy how these turned out, especially as each bird is only about 1cm across (13/32″). As with other decorations, the vinyl was treated with sizing and then gold leafed before applying to the model.

Kobaya model from the French national maritime museum. Note the bird decorations near the bow and their upswept wings.
You might notice in my photos above that I added a strip of molding at the bow, just under the phoenix, to match the drawings. Also, there is still a matter of a small decoration between that forward beam and the stem. In the drawing, it’s very hard to decipher. It kind of looks like a cursive letter P. Clearly, there’s no reason the Japanese would put the non-Japanese letter P on the boat. On the French museum model, the builder put what looks like a sideways letter S, though I’m sure it was just meant to be some squiggly decoration.
I haven’t deal with this and may just leave it off entirely. It’s not something difficult to add on at a later time, so I’m not going to worry about it for now. Anyway, I have a lot of oars to make.
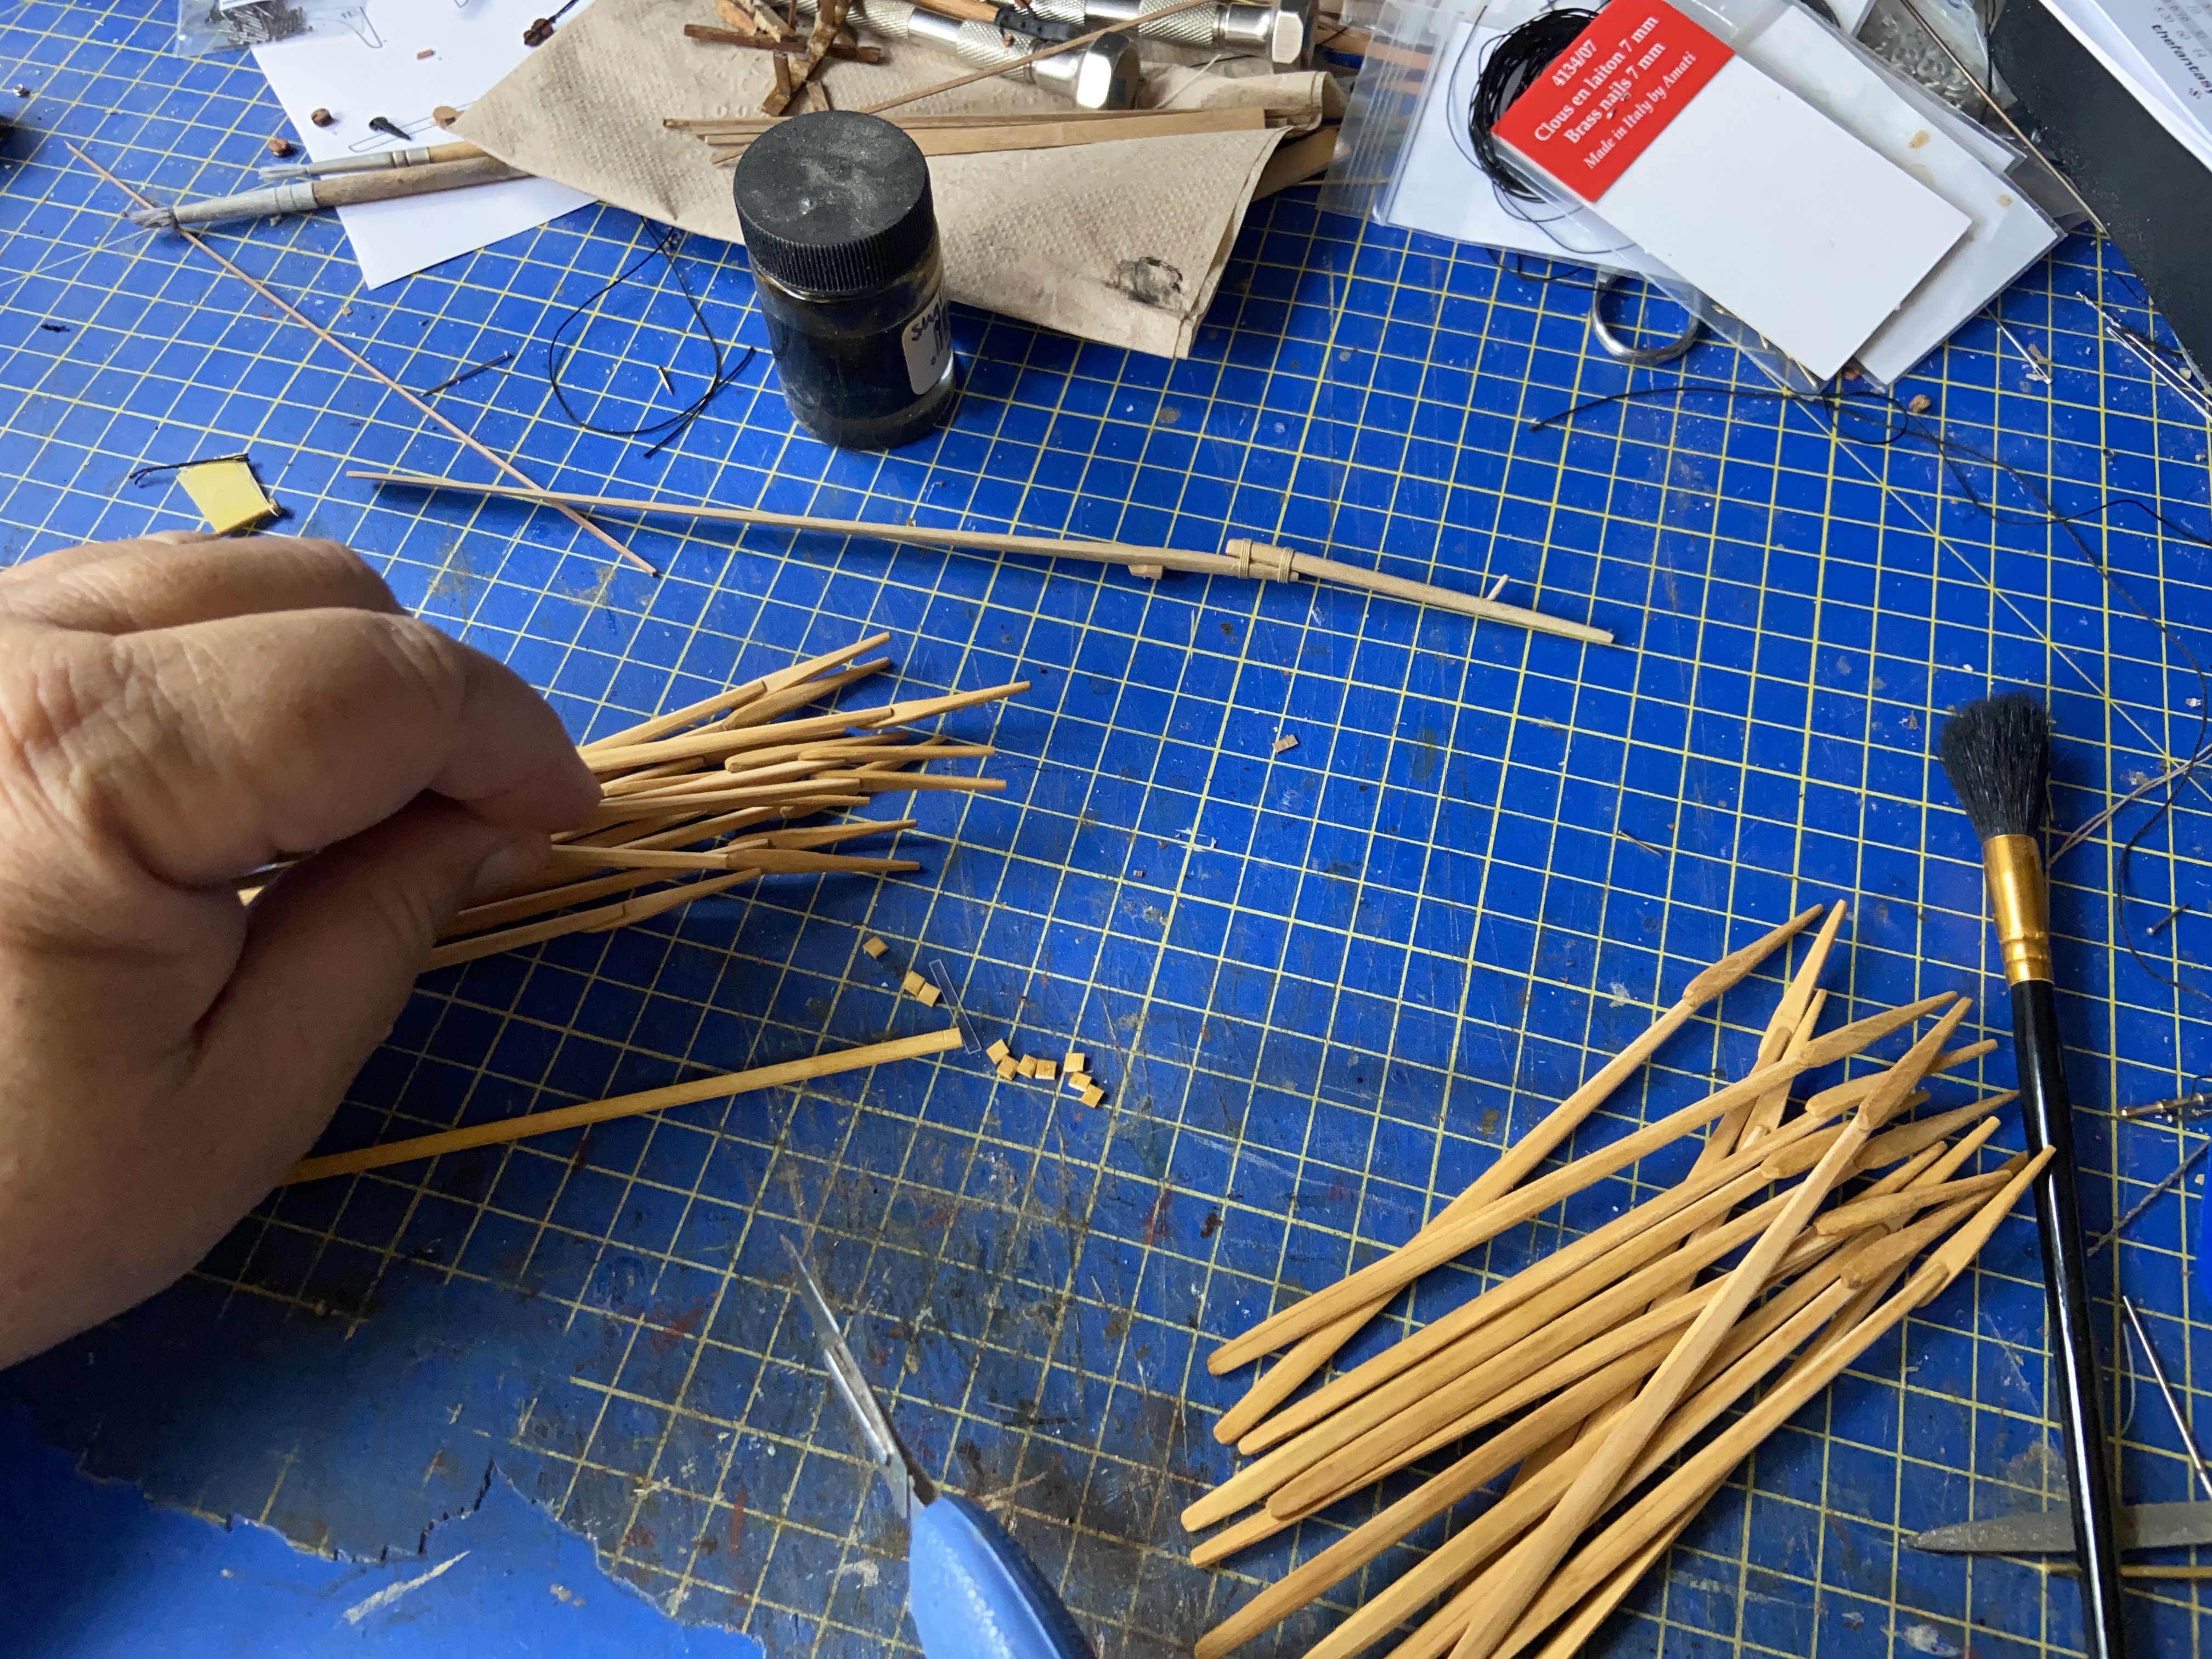
While I had some inspiration from the new Shōgun TV series, I decided to deal with the sculling oars. At minimum, I was determined to find a way to mount them nicely. I added the small piece on the underside of each oar. On the real oars, these are sockets called “ireko” that fit over a pin that forms the pivot for the oar. On this model, I found it would be easier to make the pins in reverse. That is, instead of having the oar sit on a pin on the beam, I would drill a hole in the beam and glue a wire into the oar that would fit down into the hole. This would make it less likely for the oar to get knocked off the model, and I could adjust the angle of the oar on the model, and the wire would hold it in place.
 I still have to add handles to the ends of the oars yet, but the real challenge is that each oar was held in place with a small rope that loops over that handle. I’m not yet sure how I will secure the rope to the model. I saw where one modeler in Japan had the rope wrapped around a beam. Another had a small fitting attached to the inside of the hull for each rope. The latter would certainly require the most work, but it’s also what I had in mind.
Coming up, I will need to finish the oars, but I also need to make some decisions on the rigging and final mounting of the rudder, adding back a mast step, and creating the yakata, the structure near the bow. I will leave these for the next post.

As usual you have done a beautiful job and a beautiful subject! Thanks so much for sharing – I wish you could persuade the good folks at Zootoyz to make a kit of this beautiful craft
LikeLike