
The last time I wrote about my experiences with Woody Joe’s Higaki Kaisen kit, I described the issue of interpreting the Japanese instructions. The main issue there being that some steps in the instructions tell you not to glue certain parts together, and if you’re not aware of them, you’ll run into a few problems.
Well, I can tell you now that there is much more challenge beyond just watching for those key steps. I’m over 80% complete with this model and it’s been weeks since I’ve had to worry about not gluing certain pieces together. Instead, the main challenge of the ship model is cutting and aligning strip woods and laser-cut parts in the construction of the upper works of the ship.
Things slowed down quite a bit as the main effort has been with the final alignment of parts. All those earlier steps where parts were put into place now come to the test – How good a job was done on alignment of the parts in those early steps? Now parts are put into place and the you find out if they fit correctly.
Alignment Issues
In my case, there are some places where I found that parts were not quite where they should have been. In most of those cases, there was nothing terrible that stood out. However, I did end up with a gap when fitting a particular laser-cut piece into place in step 60 (out of 90). This step involved the completion of the upper works at the stern or what might be termed the poop.
Because I didn’t have everything in perfect alignment in an earlier step, I ended up with a slight gap later. This might not have been that noticeable, but I thought it best to fix the issue. There’s nothing that says you have to use the laser cut parts in the kit, so I simply took some of the scrap wood and fashioned a replacement.

An unsightly gap.

Alignment of the replacement piece.

The completed stern.

The completed stern and deck.
Not Quite According to Instructions
Another place where alignment issues came up was with the inner and outer upper walls, or bulwarks. In many ways the walls are somewhat “free floating” and don’t depend on each other too much, particularly around the main cabin. However in a later step, step 69, your supposed to fit 3mm wide stripwood pieces between them.
In my case, the separation between the walls was close enough to 3mm to work in one spot, but the other spot where a stripwood piece was to fit, the separation was closer to 4mm. Fortunately, this didn’t affect anything significant, and I was able to use a 4mm wide strip instead.
 Different width stripwoods to make up for alignment issue.
Overall, I’d say that Just about two-thirds of the way through this kit, it kind of changes from being an assemblage of pre-cut parts, like a plastic kit, to the kinds of work you might normally expect in a wooden ship model kit. There’s a lot of cutting of stripwoods and a lot of time is spent doing a final fitting of railings, trim, etc.
Cabin Roof Configuration
Steps 64 through 67 involve the construction of the main cabin roof or quarter deck. While I cut and fit the beams into place, I decided to hold off on gluing them in or planking until I figure out how I want to display the model. The instructions show an example of how to show off the interior detail, but I’m still thinking about it.

Cabin roof beams fitted, but not glued in yet.
Painting the Hull
Before continuing, I decided it was time to paint the lower hull. This is not a step described in the kit, but bezaisen seem to have been painted black in a very particular way that doesn’t exactly follow a waterline. I used available drawings and photos of replica ships as my guide.
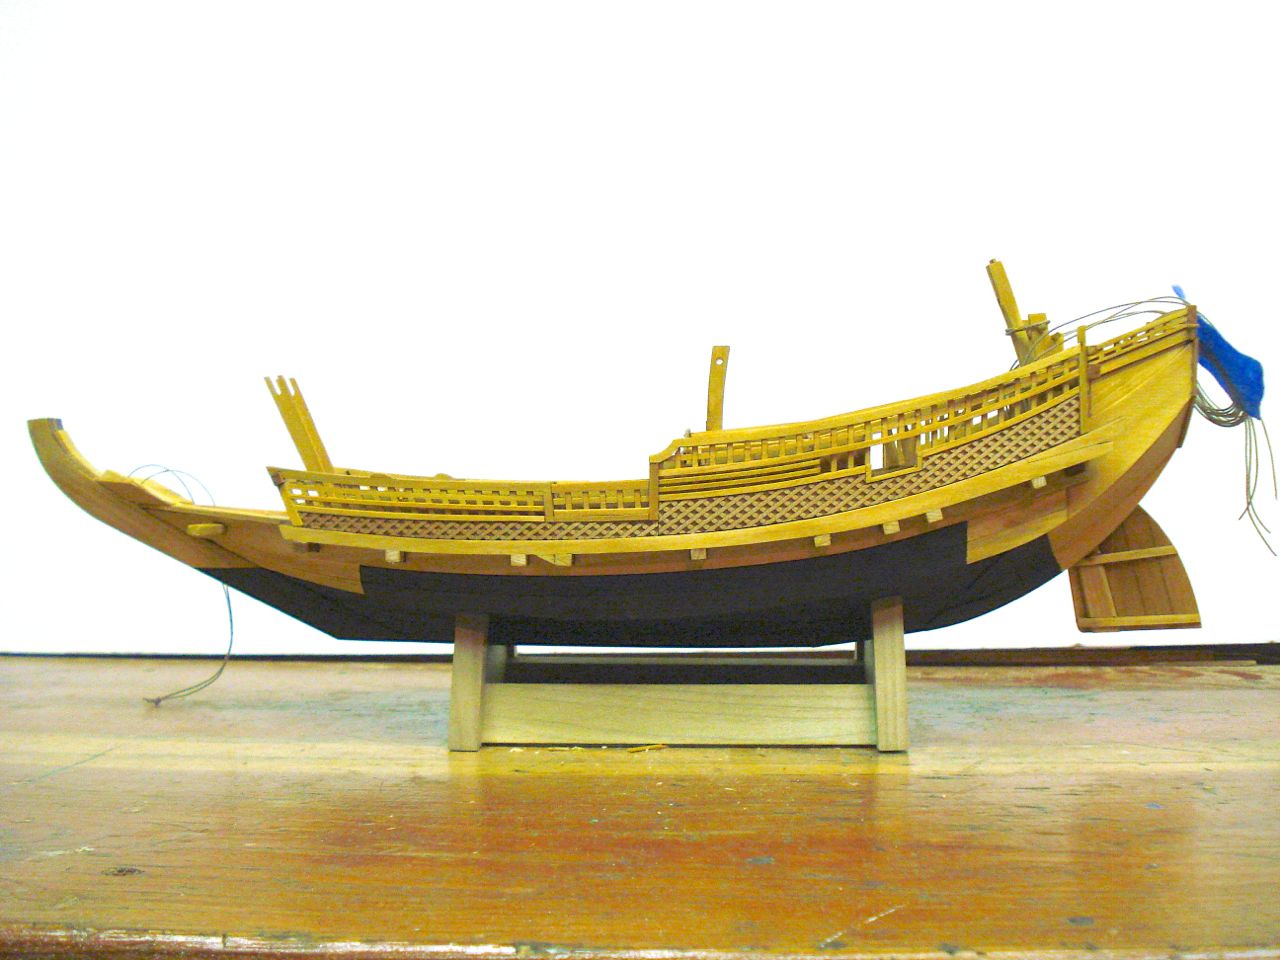 This photo was taken after I completed the outer hull wall and details.
The last thing I’ll mention here is that adding the outer hull walls or bulwarks was extremely satisfying as this is when the ship pretty much looks like a bezaisen. The lattice work of the Higaki Kaisen is very thin and delicate because of the laser etching on the surface. It had to be trimmed very slightly to fit, and took a lot of care to keep from ruining it, requiring a very sharp blade. I used just a light touch of wood glue on the back to make it just tacky enough to hold it.
I’m just about 80% done with the model – getting close! Ω
