
Mortises
While I’m waiting for the urushi, there is still more work to do on the hull, as well as more design problem solving as well. The main feature needed next are all the mortises. Mostly these are along the bottom edge of the upper hull plank. In addition, for the lower planks, there are mortises at the bow and stern edges. Technically, there would also be mortises at the bow edge of the upper plank and ones all along the bottom edge of the lower plank. But, these apparently do not have metal plates covering them. Most likely, these are plugged and painted over, so you wouldn’t see them anyway.
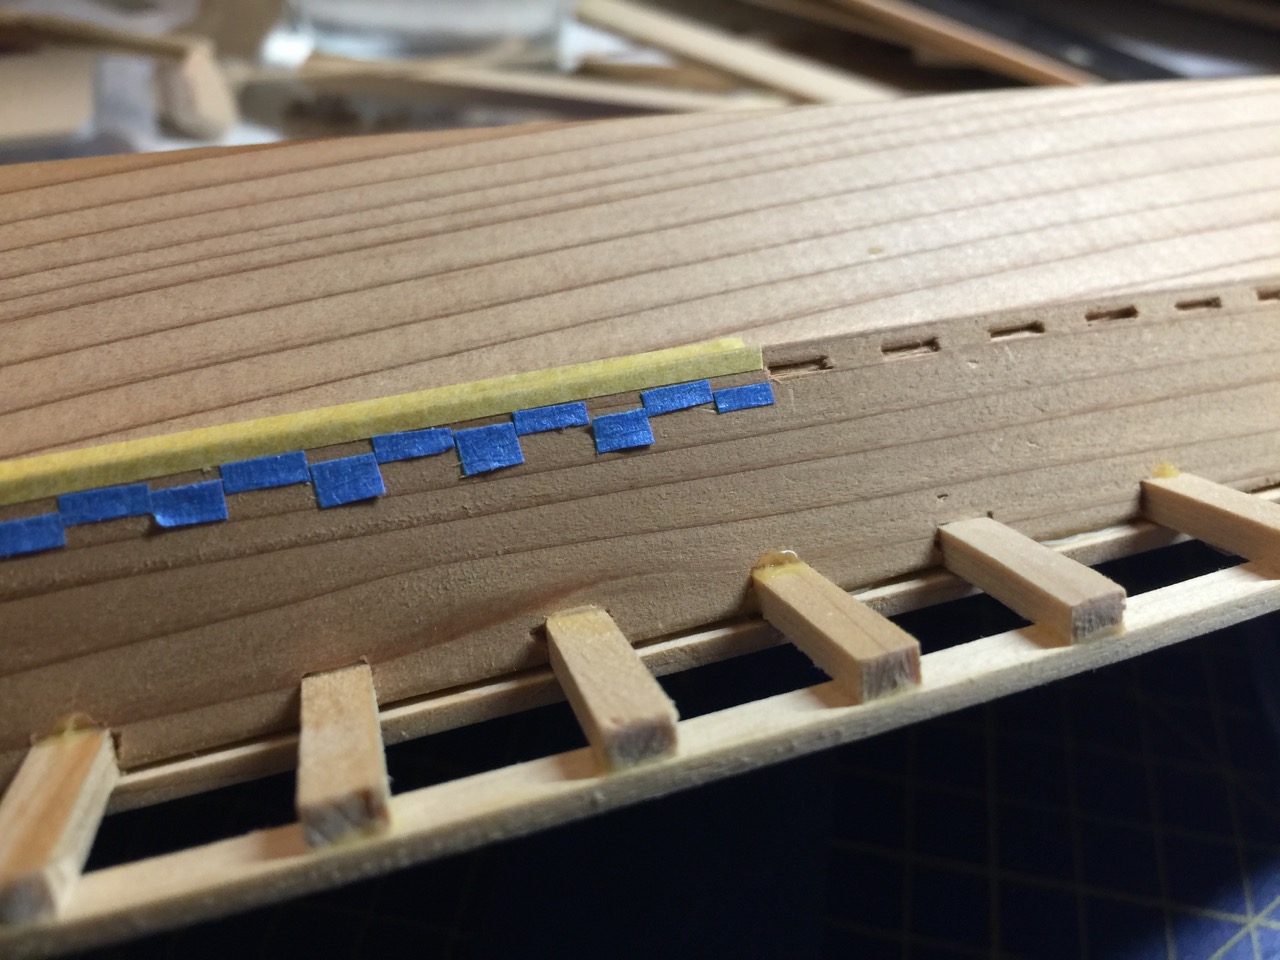
These mortises measure out to be approximately 5mm long at this scale, with a 4mm separation between them. To help position these evenly, I first lined the edge of the plank with tape, tryng to keep and even alignment about 2mm from the edge of the plank.
I then took some more tape and cut two long strips, one 5mm wide and another 4mm wide. From this I cut short strips crosswise and laid them into place, alternately, to create a pattern for the positions of the mortises. To cut the mortises, I used a 5mm wide Japanese carving chisel and a second chisel that I ground down to a width to 1mm.
Below, you can see some of the mortises I cut and the pattern of tape I used to create the proper spacing. the section on the right has been completed and the tape removed. On the left, I have yet to start cutting.
This method, while a little time consuming, worked out very well. Below is what the process looks like in progress. The 5mm tape strip is removed one-at-a-time and the mortises is cut. Then, the next 5mm strip is remove, that mortise is cut, and so on.
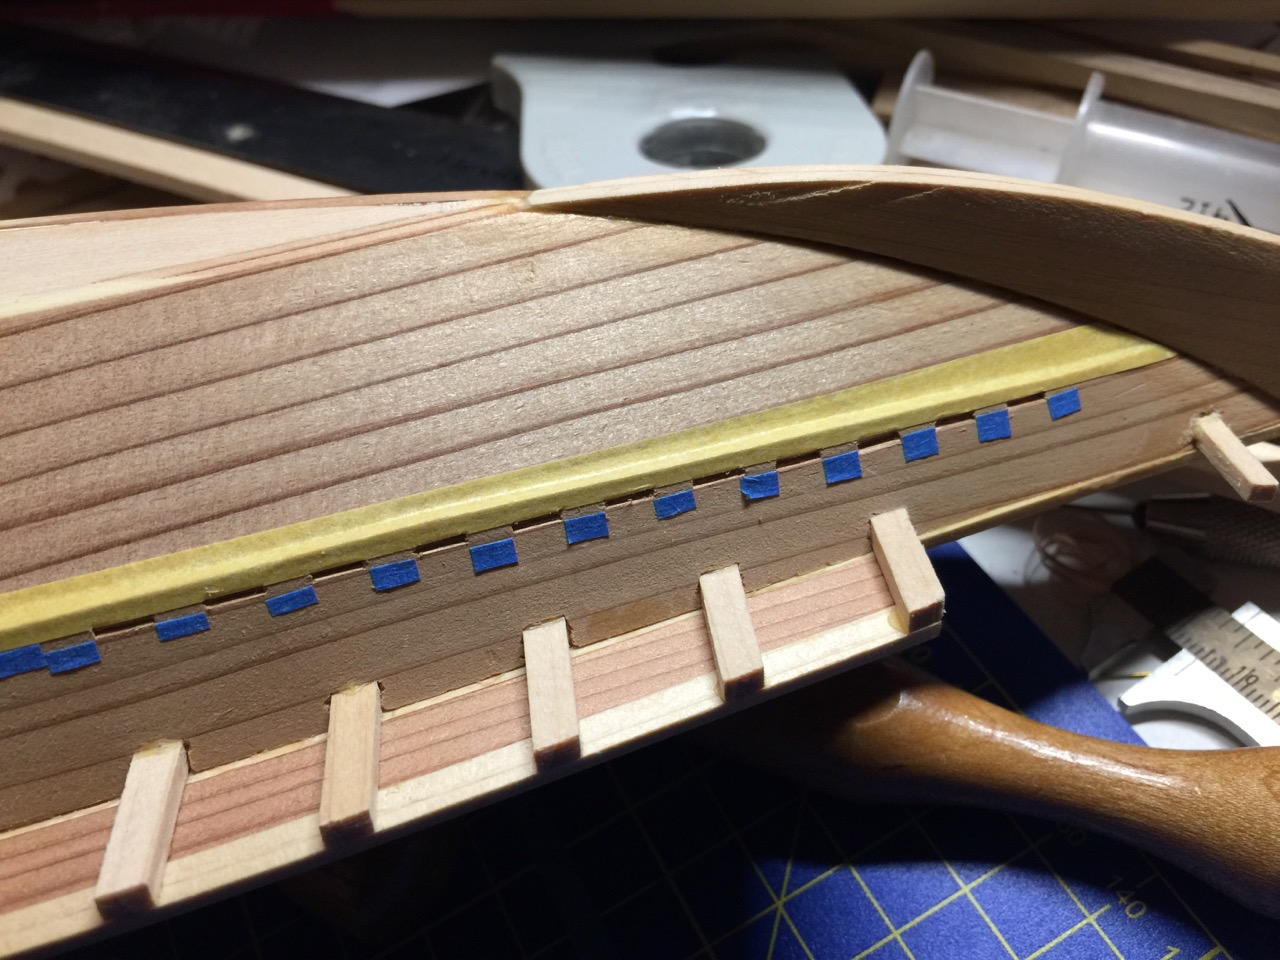
And then, finally, all the tape is removed, revealing the completed line of mortises.

Now, using sugi, or Japanese cedar, is a bit challenging with small scales due to the hardness of the grain patterns and softness of the wood. It’s hard to cut those dark lines and very easy to over-cut the lighter areas. So, it’s really important to cut with great care. I have a couple mortises that are a bit over-sized because of trouble I had with the grain. In the end, it may not be all that noticeable.
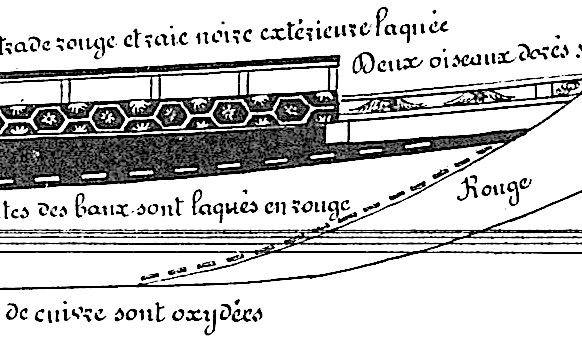
In any case, I don’t know if this is the final size of these mortises. On the real kobaya, these mortises were covered with metal plates. On most vessels, these would be copper. But for a gozabune, they appear a bright golden color – at least on models.
Copper plates serve a purpose, as copper has anti-bacterial and anti-fungal qualities. And, I believe that the electrolytic properties of the copper plate, covering the iron nails, will cause the copper to gradually degrade instead of the iron.
I think it most likely that the copper plates, after installation, were simply painted over with gold lacquer, since the rest of the vessels is painted over with black or red lacquer. Unfortunately, I have no way of verifying this, but it seems likely. In any case, I need gold plates in those mortises, however I can make them.
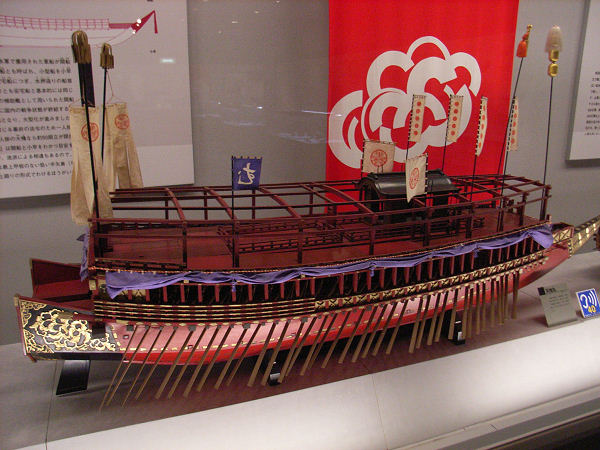
Another view of the same model from my last posting. Notice the upflaring shape at the stern, which is similar to my model. Also, note the red-painted decks, which is what Paris describes for the kobaya. The decorative golden design at the stern is making me think I’m going to need to do some hand painting on my model.
Rogui
The rogui (roh-goo-ee) are the pivot bases for the ro, or sculling oars. On this vessel, there are 14 on each side, for a total of 28.
Rogui on a boat I saw in Toba, Japan, called a Satsumagata. In this case, it’s just an iron post.
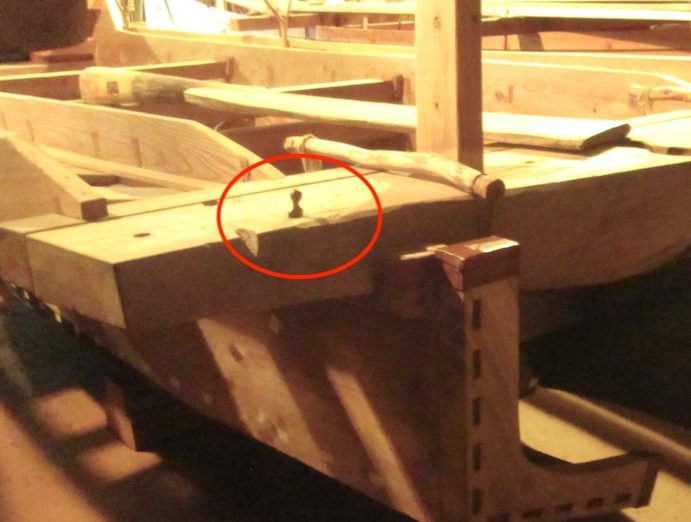
A rogui is commonly an iron pin, but the Paris drawing show this to be mounted on a rectangular base. I suspect that this is a wooden block that raises the pivot enough to be able to clear the edge of the beam on which it’s mounted. Woody Joe’s Hacchoro kit, which I built, has a similar arrangement.
Cutting the wooden blocks was a bit of a challenge, as they are only about 3/32″ wide and 5/64″ long by about 1/32″ thick. I cut these from hinoki, but I had to cut a lot of extra to make sure I had enough of them that were properly rectangular. Not to mention the fact that they disappear very easily as you’re trying to clear up any rough edges.
I wanted to taper the tops slightly, which is nearly impossible to do without gluing them down first. So, that’s exactly what I did. Once the glue was set, I could carefully file the tops down with a flat needle file.

I need to drill these out to add the pins, but may wait until some of the painting is done, as that may help reduce the chances of splitting the blocks.
Next up, I have some more mortises to cut at the stem and transom, but the next big issue will be the making of the balusters and railing and the fence that will fit on the outboard edge of the lower rail and beams. That’s going to take a bit of thought.
