
I have seen the coastal transport replica on Sado Island, the bezaisen Hakusan Maru, up close, inside and out. The construction seemed much different from the smaller hacchoro, the bonito fishing boat replica that I visited in Yaizu. This gozabune is about 17 meters long, the hacchoro of yaizu was about 13 meters long, and the Hakusan Maru, about
Lower Planks
From building the Hozugawa-bune and the Bekabune, I learned that a card stock pattern is the best way to get the shape of the lower edge of the lower plank. Taping the cardboard into place, I used a pencil to mark the outer line where the bottom and the lower plank came in contact. Then, measuring the width of the station lines in the Paris drawings, I marked out the points on the cardboard template and drew in the curve of the upper edge of the plank.
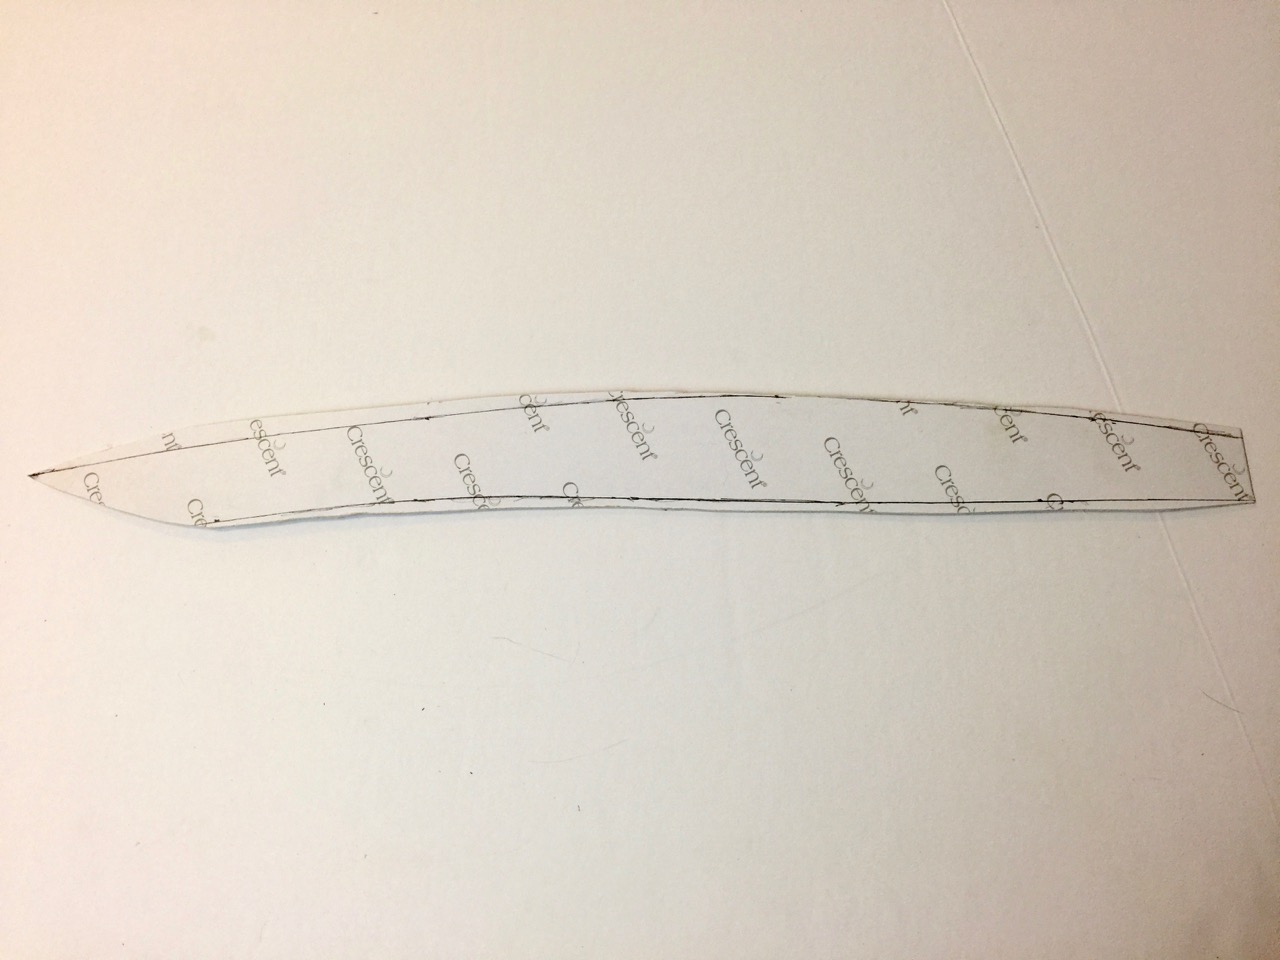
I transferred the shape of the pattern to the sheet of wood I’m using for the hull planking, for which I chose 2mm Japanese cedar, or sugi. I started with basswood for the bottom of the hull, but it just didn’t feel, or smell right. Working with sugi brought back the Japanese flavor of this model. I oversized the plank slightly, to allow for the sanding down of edges.
The plank bends easily when wet, so I dampened the planks and held them in place on the hull bottom assembly. This was left to dry.
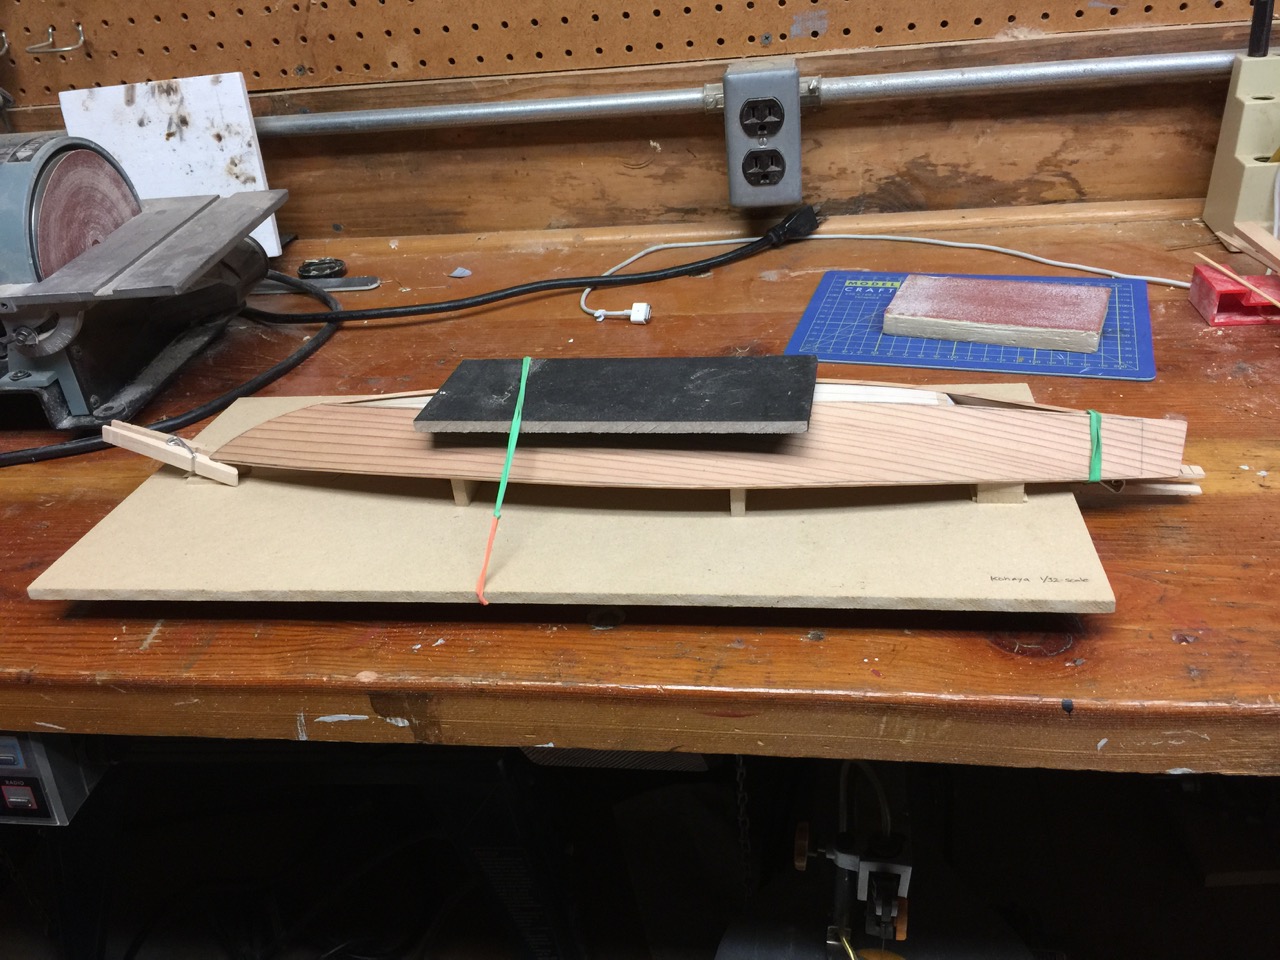 Once dry, the plank was nicely bent.

The dry, bent plank was easy to glue into place with the internal “cheater frame” I made.

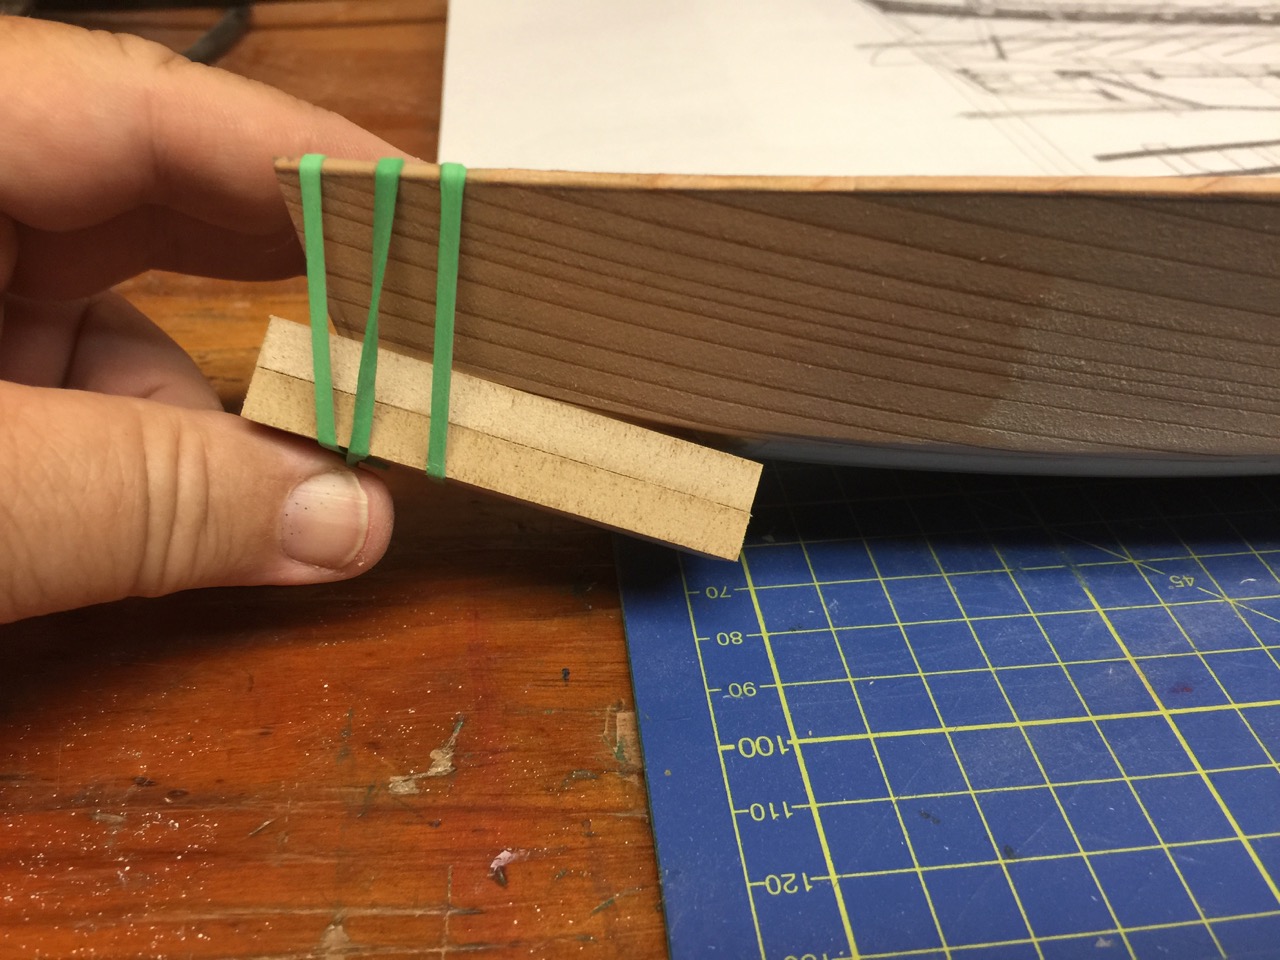
The only problem I found was that aft end of the planks needed more bend. I had left the planks long, so at this point, I cut off the excess, then worked to bend them properly. It took a little clamping using rubber bands and a block to tweak the plank shape.
Upper Planks
For the upper planks, what I needed was a temporary former that would fit to the existing hull assembly, but easily removed after the upper planks were glued into place. I had an idea about how to do this that benefited from the fact that the lower hull interior would be hidden by the deck planking.
I cut four thick blocks and drilled them out. I then glued them into place at the existing formers. These would receive temporary wood screws that would be used to hold a set of upper formers into place. I then went about creating the upper formers to fit into place on top of the lower formers.
With the formers in place, the upper planks could be shaped, cut, and glued into place.


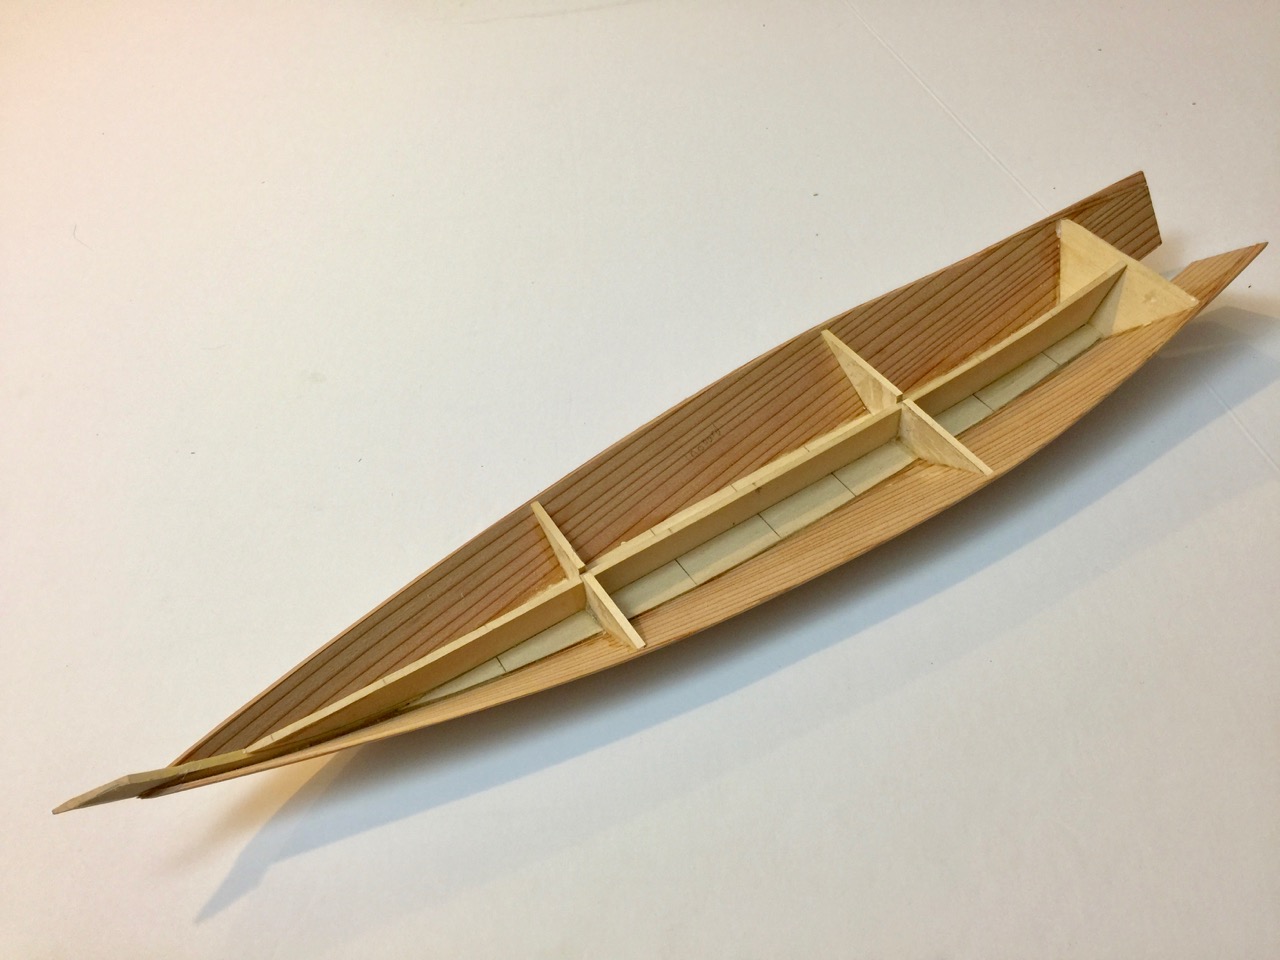
Upper formers removed reveal the blocks I glued into the bottom of the hull. At the stern, I decided to see if I could do without the blocks and screws, and that seemed fine.
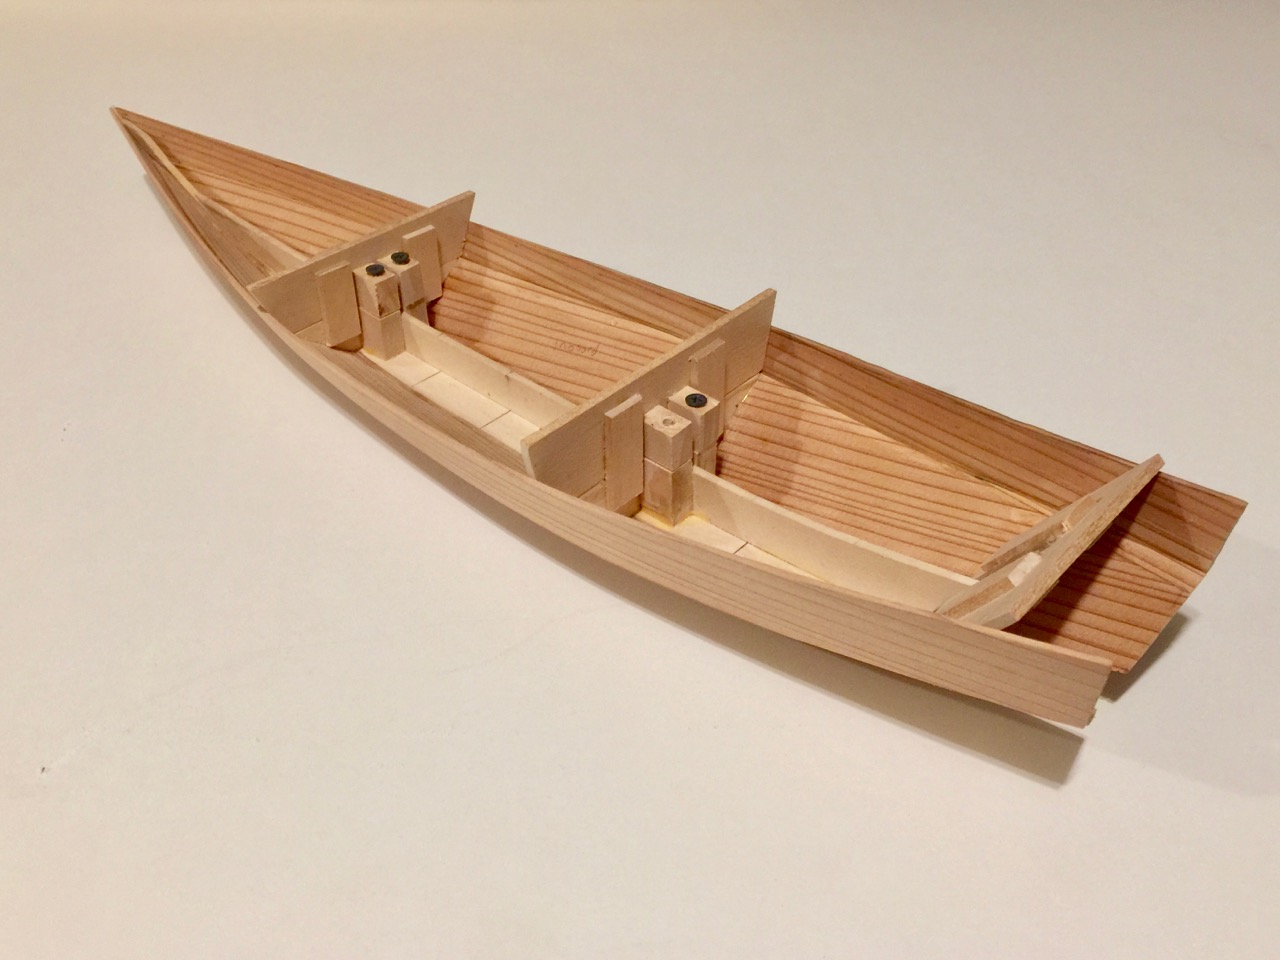
Finally, before getting stuck again, I added the stem, which really enhanced the sleek shape of the vessel.
As the joint between the lower and upper planks are all that holds the upper planks in place, I felt it best to add a thin strip of wood along the joint on the hull interior to strengthen it slightly until the beams could be added.
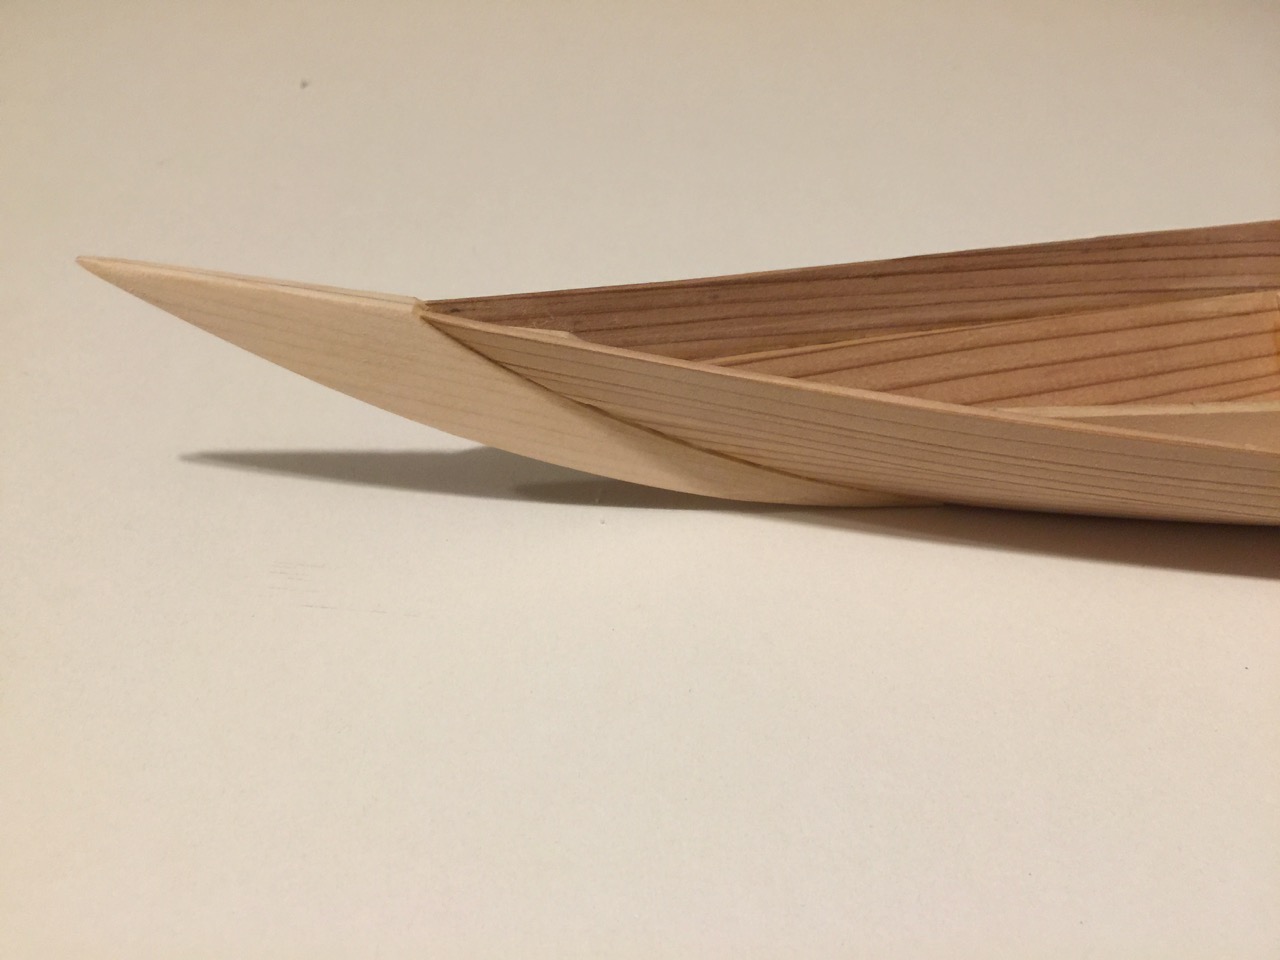
Stem carved from hinoki, Japanese cypress.

A sleek looking hull
Next time, beams? Deck? More research?
