Building a Gozabune (Kobaya) from Paris Plans – Part 8

So, I drilled out the rogui on which the ro, or sculling oars, pivot. I used a sharp point to start the hole and finished up using a small drill in a Dremel rotary tool. Because I’m starting to consider painting the model, I’m going to hold off on adding the pins to the rogui until some later time.

Also, I found more structural work to complete before I have to deal with the rails, so I’m putting that assembly off for the moment.

Finishing Mortises

Today, I finished the remaining mortises. I did these the same way as the ones done earlier, laying out strips of tape to maintain even spacing, but the mortises at the todate (transom) and the miyoshi (stem), were a little smaller and slightly closer together. 

Continue reading

Shimizu Port Terminal Museum (Verkehr Hakubutsukan フェルケール博物館) – Another Museum of Interest

This last week, I just learned of another museum in Japan that might be of interest. It’s not a large museum, and for most people, it probably wouldn’t make for an important destination. But, for a ship modeler interested in traditional Japanese watercraft, particularly ones of the larger variety, this one has something of special interest.

The museum apparently consists of a lobby entrance with some exhibition areas that surround a large courtyard. There is one main level and a smaller exhibition space upstairs. But, it is on the main level that there is a collection of what I believe are eight 1/10-scale models of sailing ships from Japanese history.

Among these are a few bezaisen, or coastal transports, a later period ship that, from photos I’ve seen, appears to be a schooner, a pair of Edo period warships and a pair of gozabune.

Continue reading

Kumanogawa Hayabune (熊野川の早舟)- Model by Kouichi Ohata

1/10-scale Kumanogawa Hayabune model by Kouichi Ohata

Kouichi Ohata is a Japanese model builder who lives in the southern end of Mie prefecture, near the Pacific Coast. He runs the family orange orchards, and in his spare time, creates some magnificent works including a large 1/35-scale RC model of the Flower-class corvette H.M.S. Compass Rose, from the film and the book The Cruel Sea.

Continue reading

Building the Kamakura Period Umi-Bune, Part 7

One of the detail features of this vessel is that the railings are fastened to the beams by rope ties. There may have been more to it than that on the real boat. I have seen where a wooden key is used to keep two parts in alignment, while a rope binding holds them together. That may be the case here. But, all that really matters is what can be seen, so it’s important that the bindings make sense and they are all the same.

Continue reading

Building a Gozabune (Kobaya) from Paris Plans – Part 7

Mortises

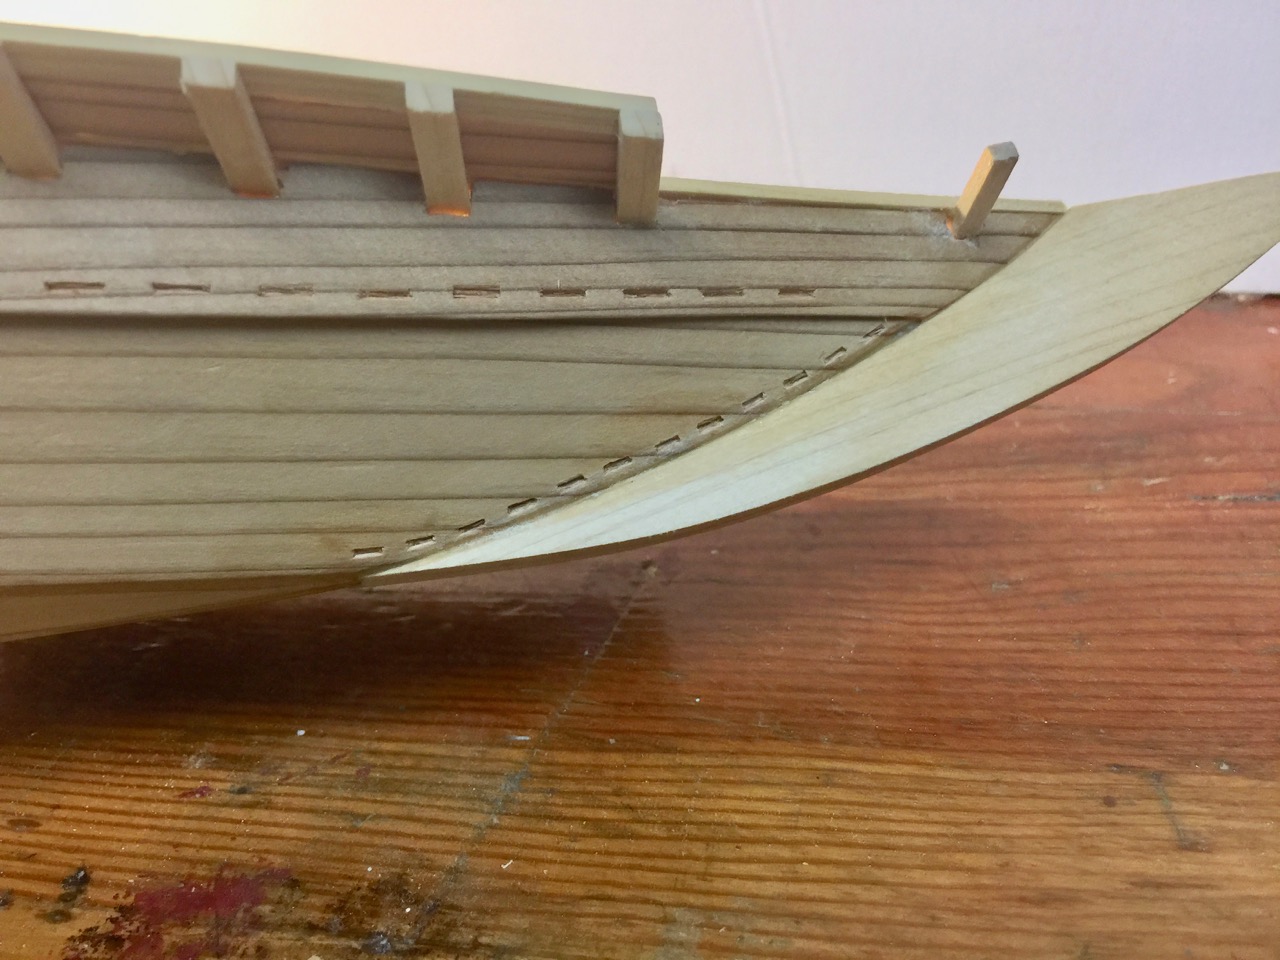
While I’m waiting for the urushi, there is still more work to do on the hull, as well as more design problem solving as well. The main feature needed next are all the mortises. Mostly these are along the bottom edge of the upper hull plank. In addition, for the lower planks, there are mortises at the bow and stern edges. Technically, there would also be mortises at the bow edge of the upper plank and ones all along the bottom edge of the lower plank. But, these apparently do not have metal plates covering them. Most likely, these are plugged and painted over, so you wouldn’t see them anyway.

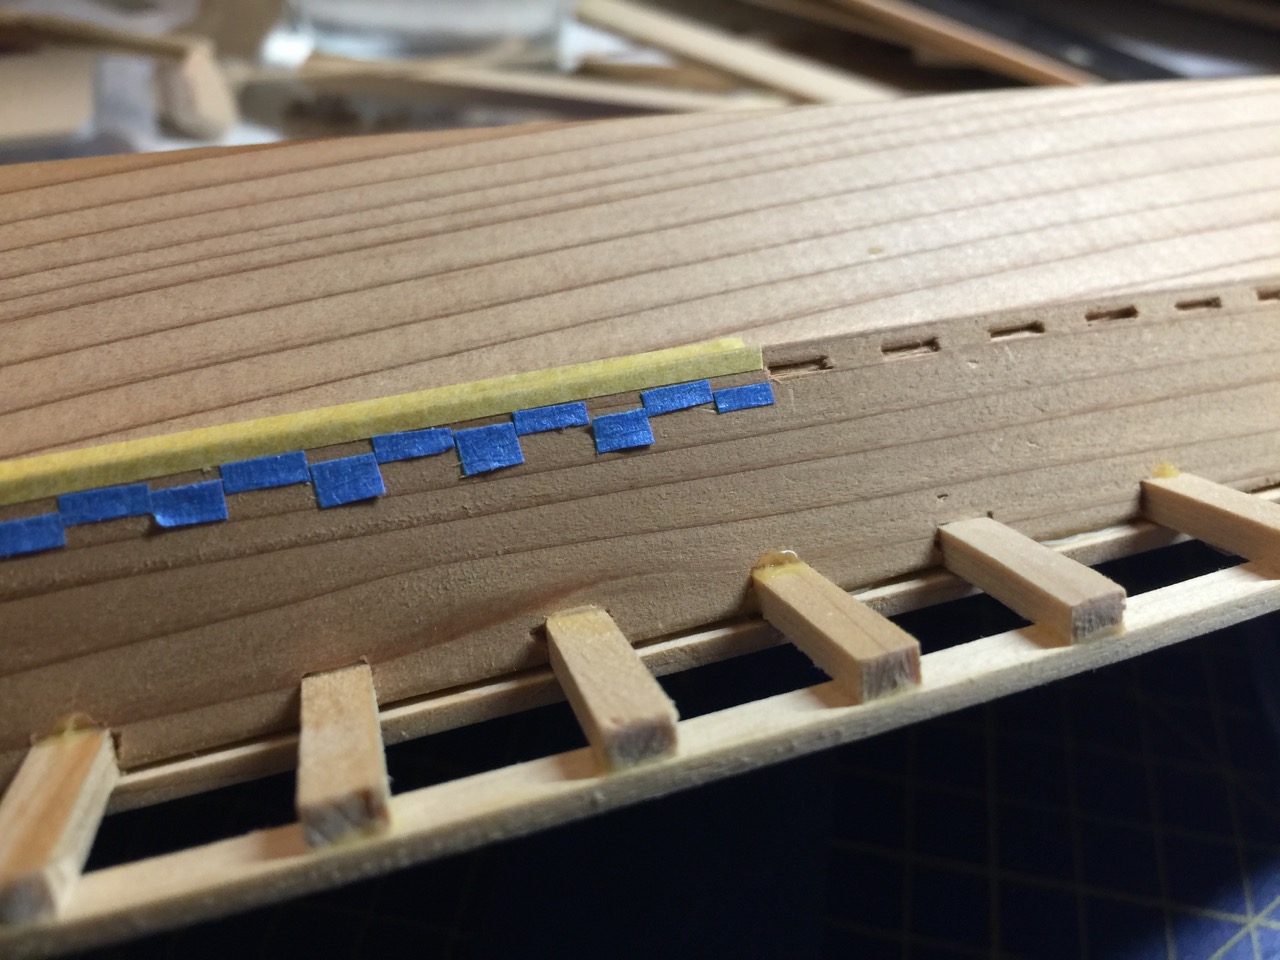
These mortises measure out to be approximately 5mm long at this scale, with a 4mm separation between them. To help position these evenly, I first lined the edge of the plank with tape, tryng to keep and even alignment about 2mm from the edge of the plank.

I then took some more tape and cut two long strips, one 5mm wide and another 4mm wide. From this I cut short strips crosswise and laid them into place, alternately, to create a pattern for the positions of the mortises. To cut the mortises, I used a 5mm wide Japanese carving chisel and a second chisel that I ground down to a width to 1mm.

Below, you can see some of the mortises I cut and the pattern of tape I used to create the proper spacing. the section on the right has been completed and the tape removed. On the left, I have yet to start cutting.

Continue reading

Building a Gozabune (Kobaya) from Paris Plans – Part 6

The Paint Scheme from Paris

Having made some great progress on the model, it’s time to begin consideration of the paint scheme. From the very start, as a gozabune, it’s been very clear that this is a highly ornate ship, painted in black and vivid red lacquers, and decorated with gold trim.

Model of a large gozabune I found on the Internet.

I’ve noted that modeler Yukio Nakayama’s gozabune models, as well as those made by other Japanese ship modelers, are painted inside and out. Pretty much everything except the decks. This left me wondering how I would end up finishing this model.

I’ve been in a quandary because I do like the look of the interior painted bulwarks and beams with the bare wood deck. But, I recently looked more closely at the notes on the Paris drawings and discovered that interior painting information is actually there in addition to the exterior info.

Another gozabune model found on the Internet.

Continue reading