Building a Gozabune (Kobaya) from Paris Plans – Part 5

The Rudder

One of the sub-assemblies that can easily be worked on at any time is the large rudder. The detail in the drawings is very simple, but I felt that it should be very similar to other large rudders used on larger vessels. With the

I made mine from three planks glued edge to edge and cut to the shape of the plans. I then attached a rudder post that I cut round and then tapered toward the bottom. To hold the planks of the rudder together, I took example from the Woody Joe Higaki Kaisen kit I built a few years ago, and added three cross-pieces as shown in the following photo.

I don’t know what amount of detail to add yet, so I just left the rudder assembly as is. Continue reading

Building a Gozabune (Kobaya) from Paris Plans – Part 4

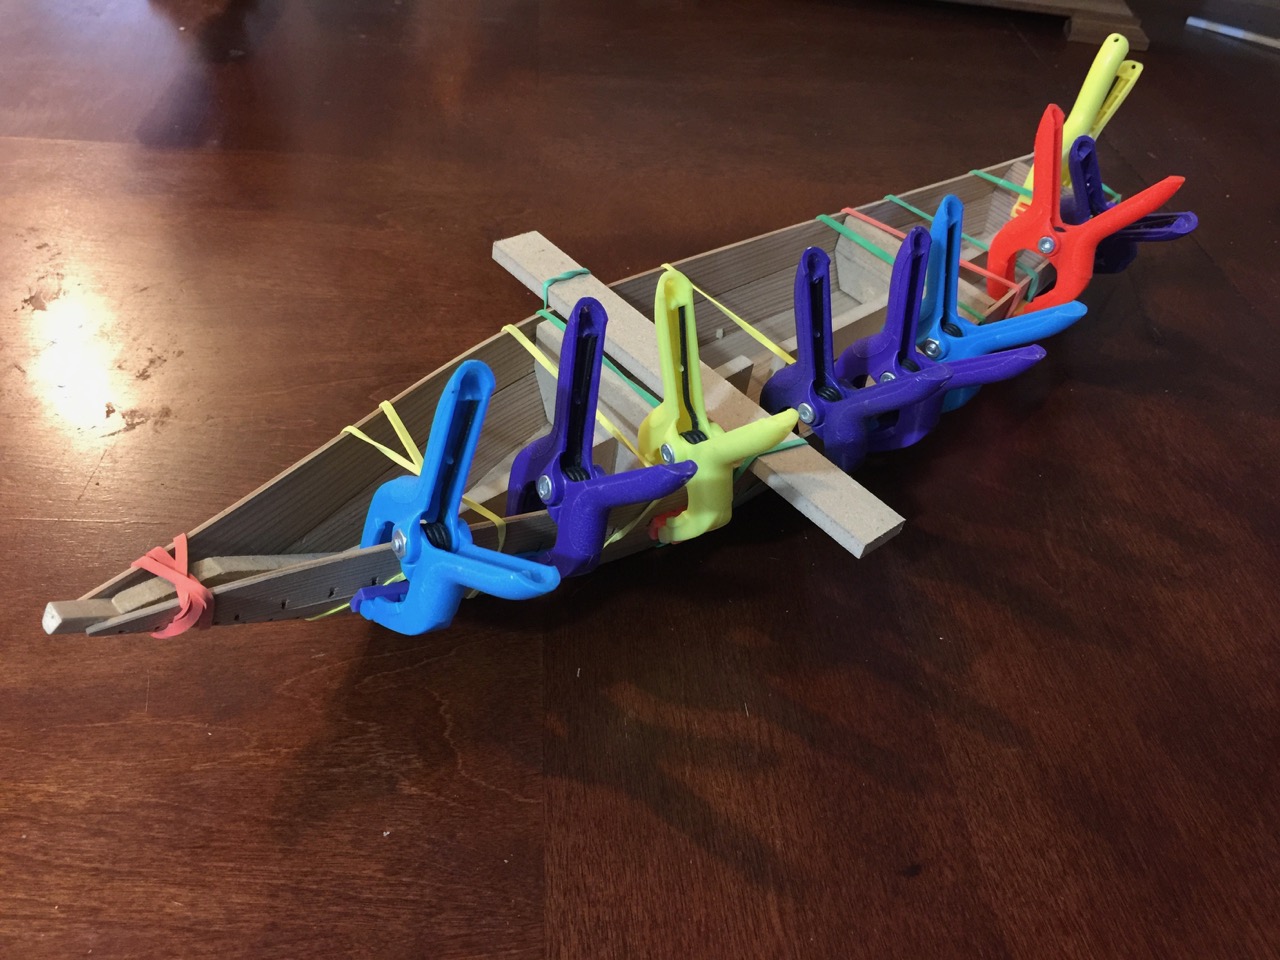
More progress on the model and I’m on something of a roll now, as the trickiest questions I had I’ve now managed to pretty well answer. Let me begin by posting a translation of the French text that accompanied the drawings in Le Souvenirs de Marine. This is something of my own interpretation based on direct translation of the text using Google Translate and my own knowledge of French, and of a Japanese translation of the text that I found on the Internet, which I then translated into English, again using Google Translate. Correlating the translation, and the translation of a translation, I then went and rewrote the description based on the drawings and on my knowledge of Japanese watercraft. The notes in square brackets are my own clarifications.

From Paris:

No.15-1

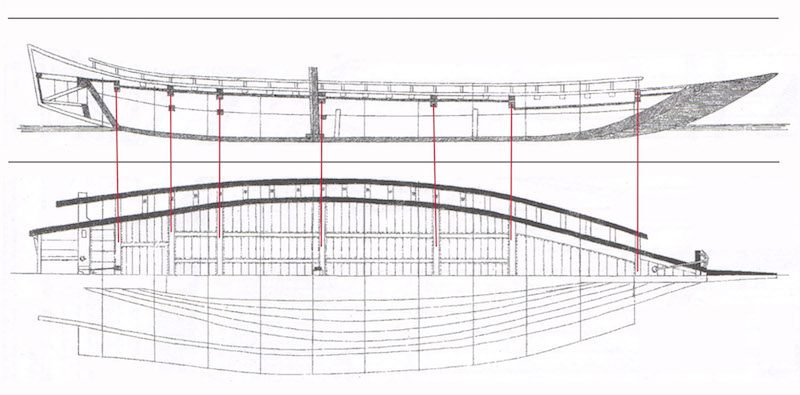
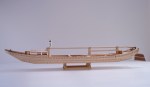
Japan, Small Galley Measured in Yokohama in 1868 by Mr. Armand Paris, Ship’s Lieutenant.(Drawing No. 15-1)

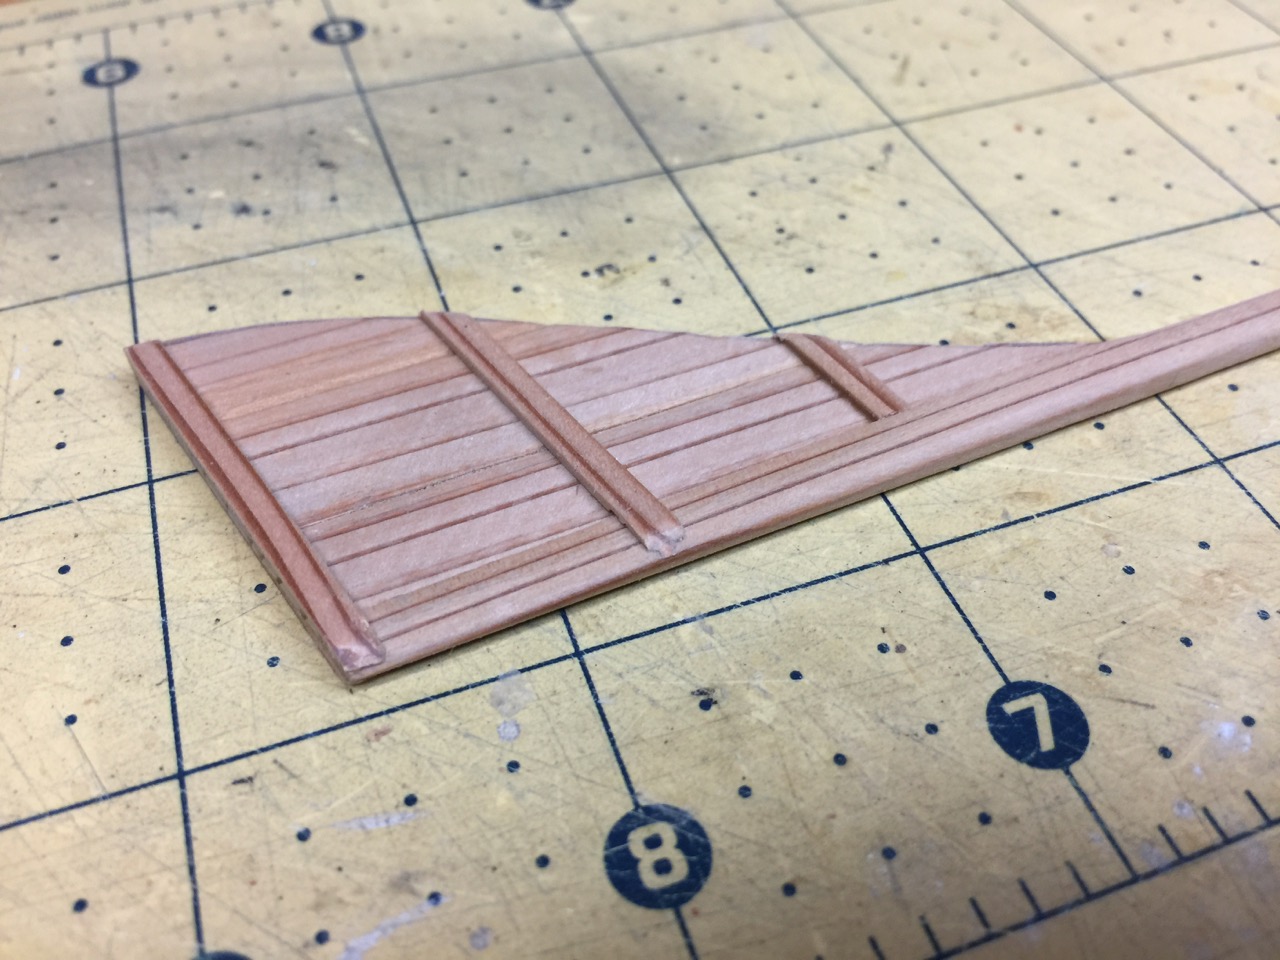
This kind of small galley belonged to the Taikun [ “Great Prince,” the Shōgun Tokugawa]. The construction of extreme lightness is very careful and the method of assembly of parts is the same as that of other boats with a single layer of planks. The stern differs in that it is closed by a panel [false transom], and it has bulwarks raised at the back. The beams are in pairs and placed one on top of the other the lowest one carries the joists, on which rest the deck planks.

The upper beam protrudes and carries the galleries, which are supported by the beams. Between these are short hanging beams mounting the oars like aboard the great galleys [sailing ship], but at their short length, only one rower is on each oar.

On the deck near the bow is a lowered section, above which is placed a flying hut [a framework covered over by an awning]. In the galleries on the side there are no oars here. Instead, boards for walking are placed.

The mast is square and set up as on other boats. Sails are not known, but they must be of little use for a boat so well made for rowing.

In Yokohama there were three such ships, but the dimensions of the largest ship are shown in the layout diagram.

 The dimensions of the two smaller:

    Maximum length             12 m 81             12 m 62

    Ship width                        2 m 96              2 m 52

    Maximum width               3 m 80                3 m 30

    Mold depth                     0 m 93                0 m 79

These ships were abandoned and in poor condition, like other Japanese ships, the days of these ship have passed. Continue reading

Building a Gozabune (Kobaya) from Paris Plans – Part 3

If you look at the Paris drawings, you will see that there are seven pairs of main beams across the hull, not including the otoko, or great beam, at the stern. In each pair, there is one beam above and one below. The lower beam runs between hull planks. The upper beam goes through the hull planks and supports the rail assembly, which supports the yokes for the sculling oars.

Below, you can see a general cross-section of the hull. There are actually three beams running the width of the hull. Since I already have the internal framework, I don’t need the lowest most beam, so I’m calling the one just under the deck the Lower Beam.

There are also several short longitudinal beams show in cross-section below, but I’ll be dealing with these later when I begin dealing with the deck.

Continue reading

Building a Gozabune (Kobaya) from Paris Plans – Part 2

I have seen the coastal transport replica on Sado Island, the bezaisen Hakusan Maru, up close, inside and out. The construction seemed much different from the smaller hacchoro, the bonito fishing boat replica that I visited in Yaizu. This gozabune is about 17 meters long, the hacchoro of yaizu was about 13 meters long, and the Hakusan Maru, about

Lower Planks

From building the Hozugawa-bune and the Bekabune, I learned that a card stock pattern is the best way to get the shape of the lower edge of the lower plank. Taping the cardboard into place, I used a pencil to mark the outer line where the bottom and the lower plank came in contact. Then, measuring the width of the station lines in the Paris drawings, I marked out the points on the cardboard template and drew in the curve of the upper edge of the plank.

Continue reading

Building the Urayasu Bekabune Model – Final

At the bow was the first challenge of cutting a small square hole for the small beam at the bow. I made sure my chisel was good and sharp and lightly cut the shape, little by little. Too much pressure can chip or split the wood, particularly on the back side of the cut, so this took a lot of care.

With the first hole cut to size, the alignment of the opposite hole was aided by running the beam into place to see where it lined up. It was then cut in the same manner.

Continue reading

Building the Urayasu Bekabune Model – Part 4

With the uwadana (ウワダナ) cut to shape, there was still the process of giving them a perfect fit, so there’d be no gaps between the planking. In real Japanese boatbuilding, according to Douglas Brooks, this would involve sawing in the seam in a process called suri-awase. In my case, it’s mostly sanding where the planks touch, until the planks touch all along the length of the seam.

To make sure I was consistent on aligning the planks, I drew a small pencil mark to register the proper positions.


Once I was satisfied that the fit was good, I glued and clamped the planks into place. I used yellow carpenters glue. I know instant CA glue would be easier, but it will soak into the Japanese cedar too easily. And, since I’m not going to be applying any wood finish, the glued wood would stand out like a sore thumb.

Continue reading