Building a Gozabune (Kobaya) from Paris Plans – Part 2

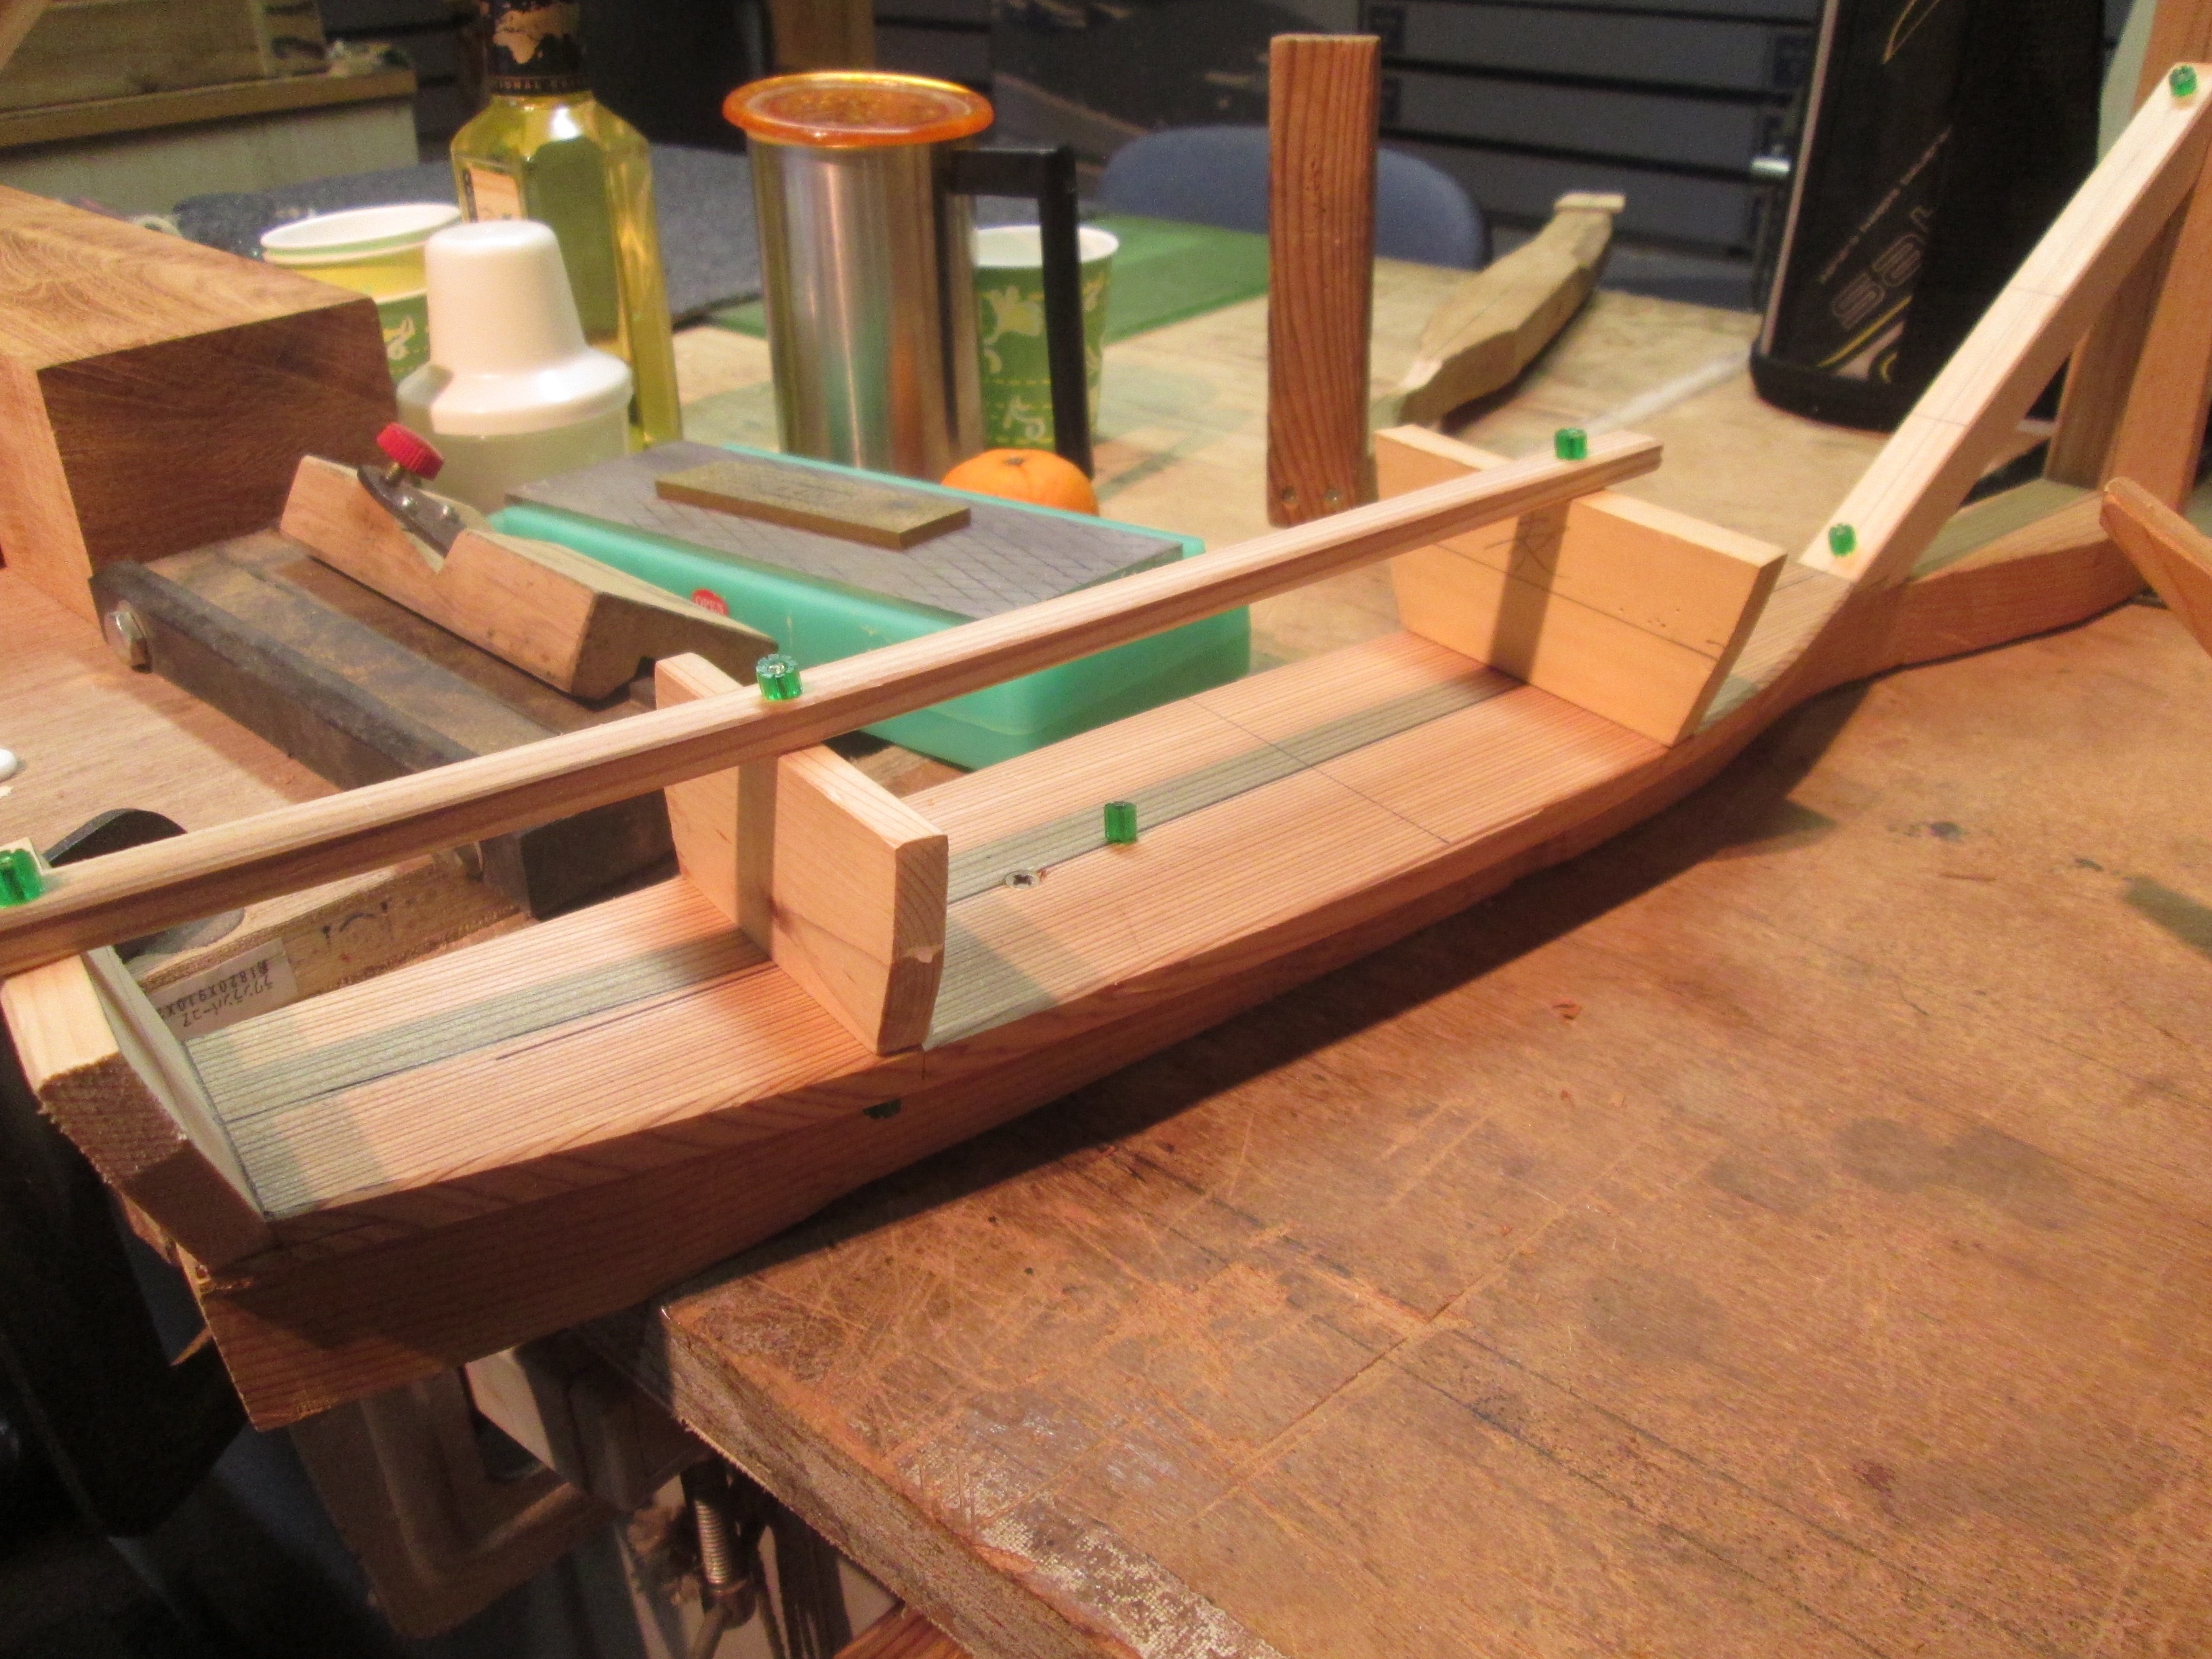
I have seen the coastal transport replica on Sado Island, the bezaisen Hakusan Maru, up close, inside and out. The construction seemed much different from the smaller hacchoro, the bonito fishing boat replica that I visited in Yaizu. This gozabune is about 17 meters long, the hacchoro of yaizu was about 13 meters long, and the Hakusan Maru, about
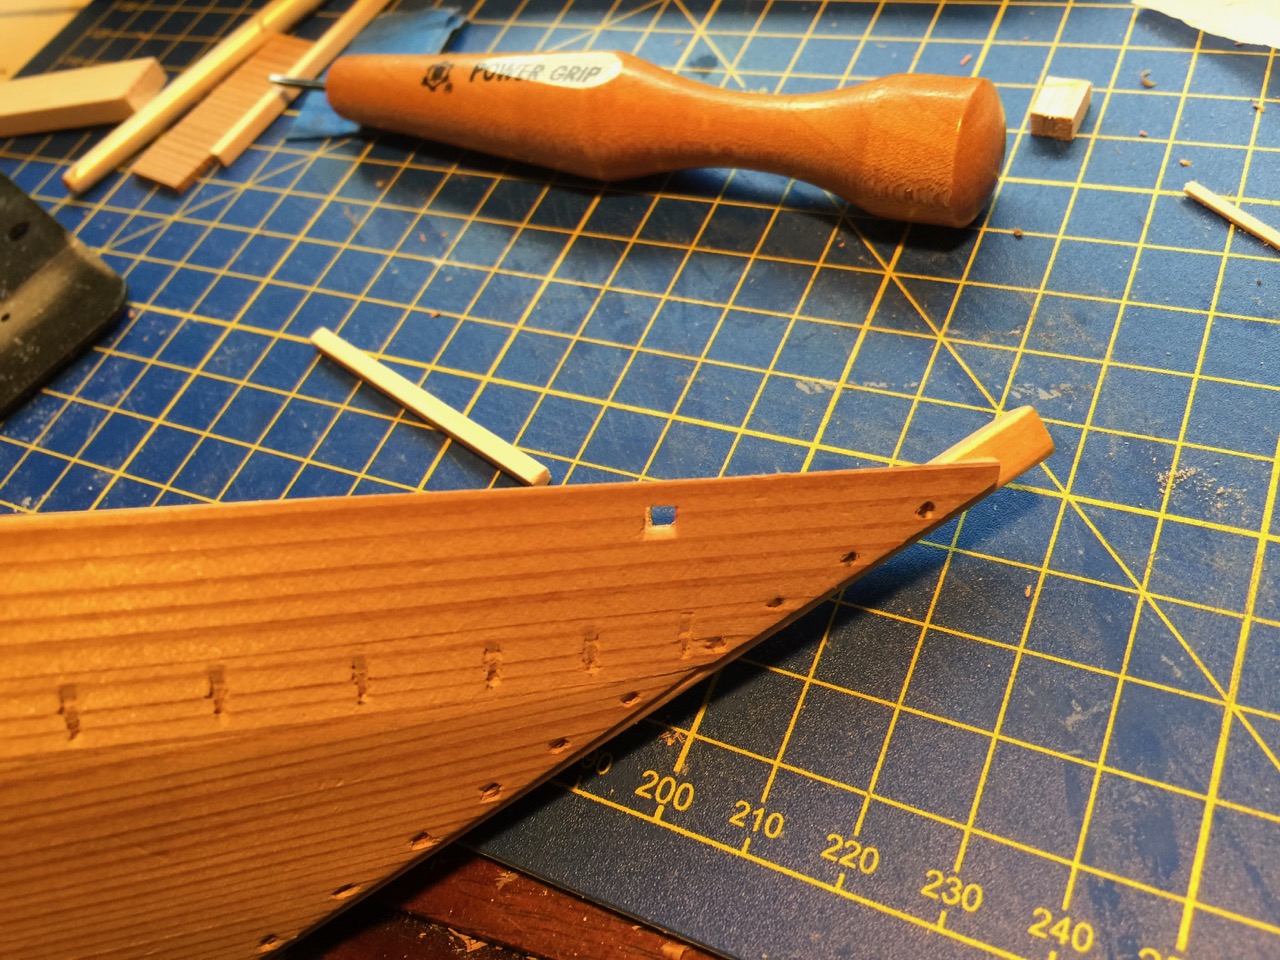
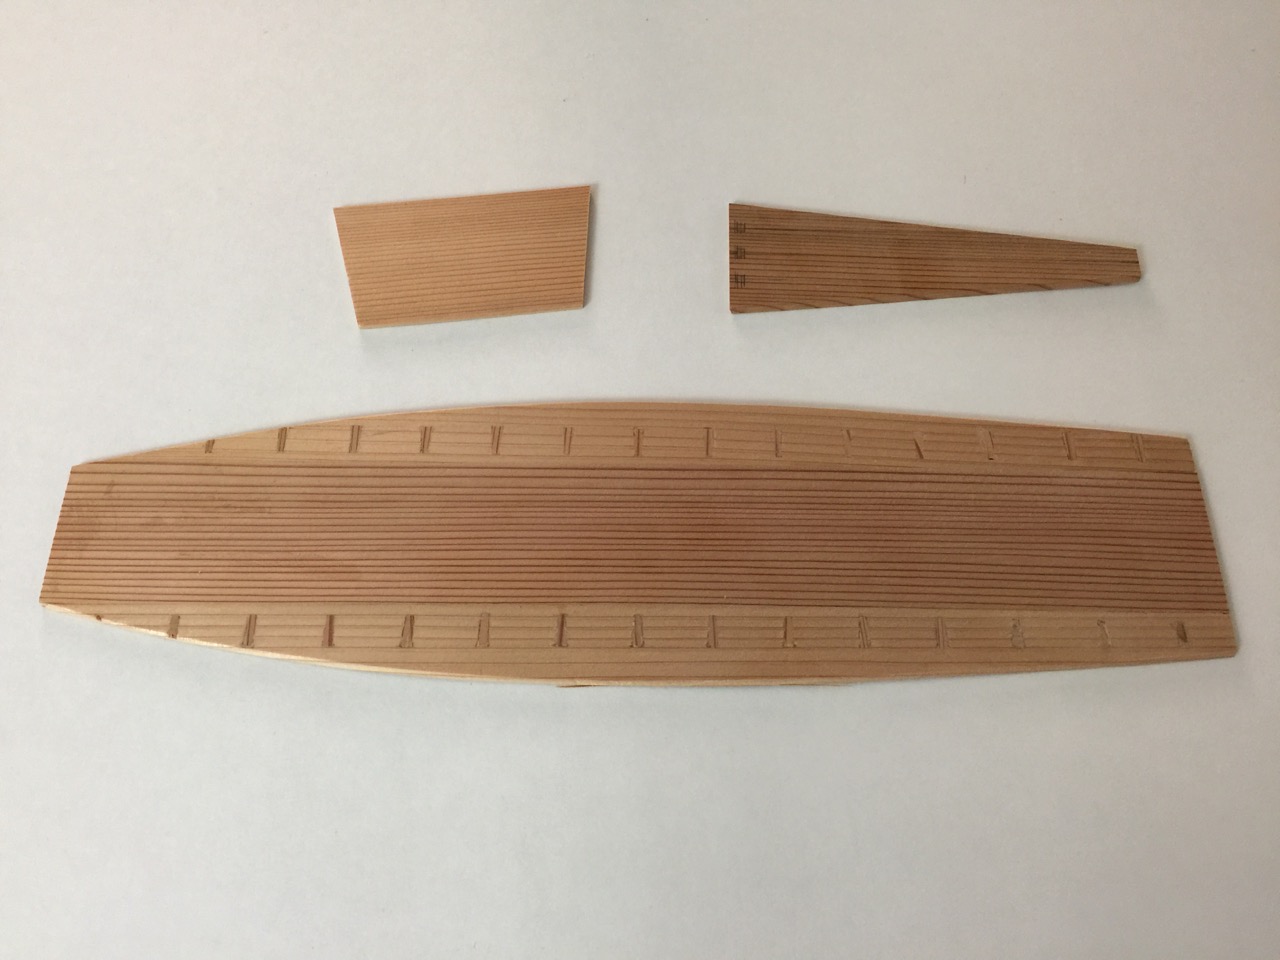
Lower Planks

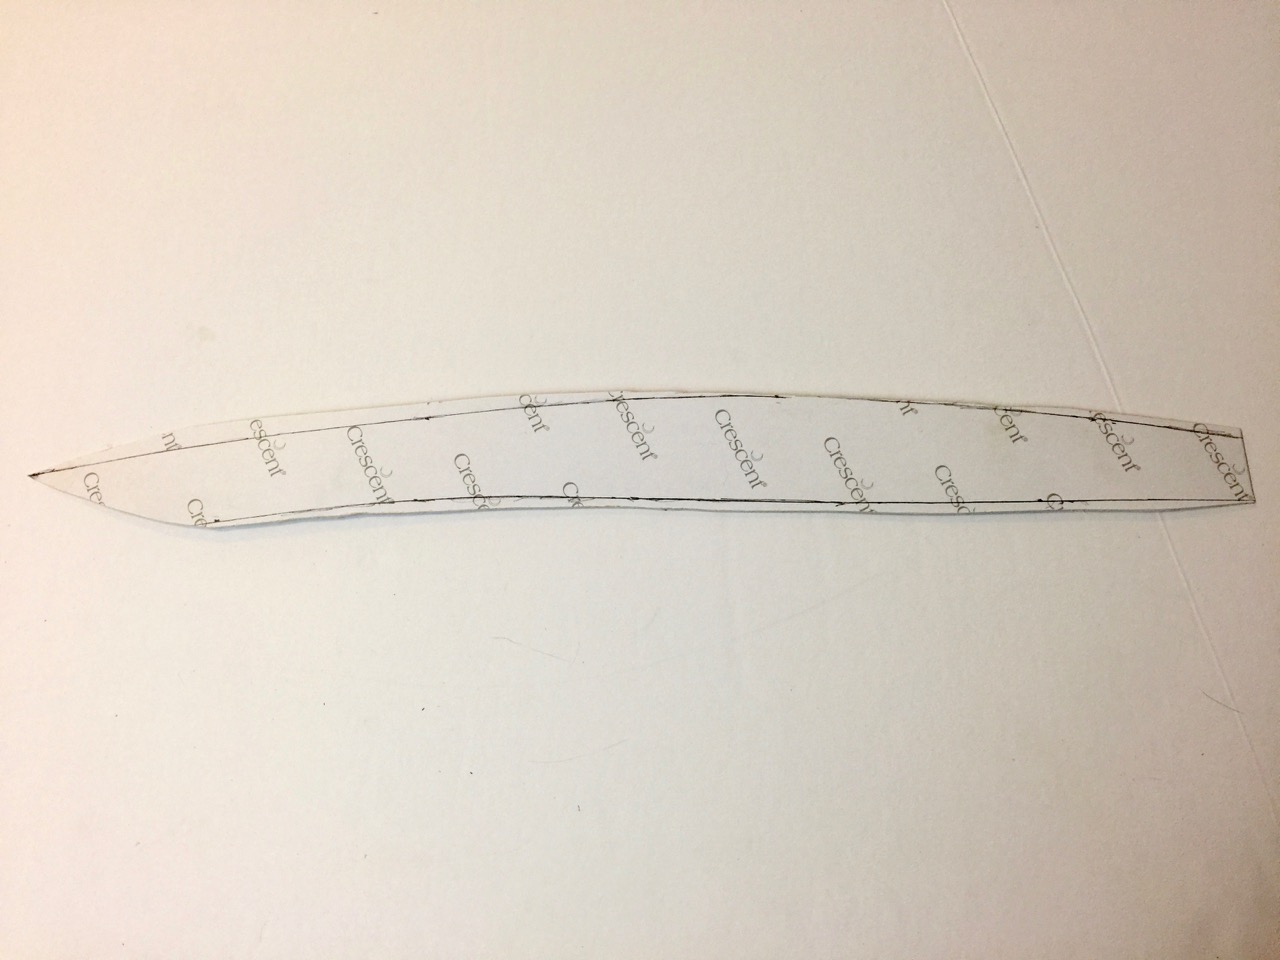
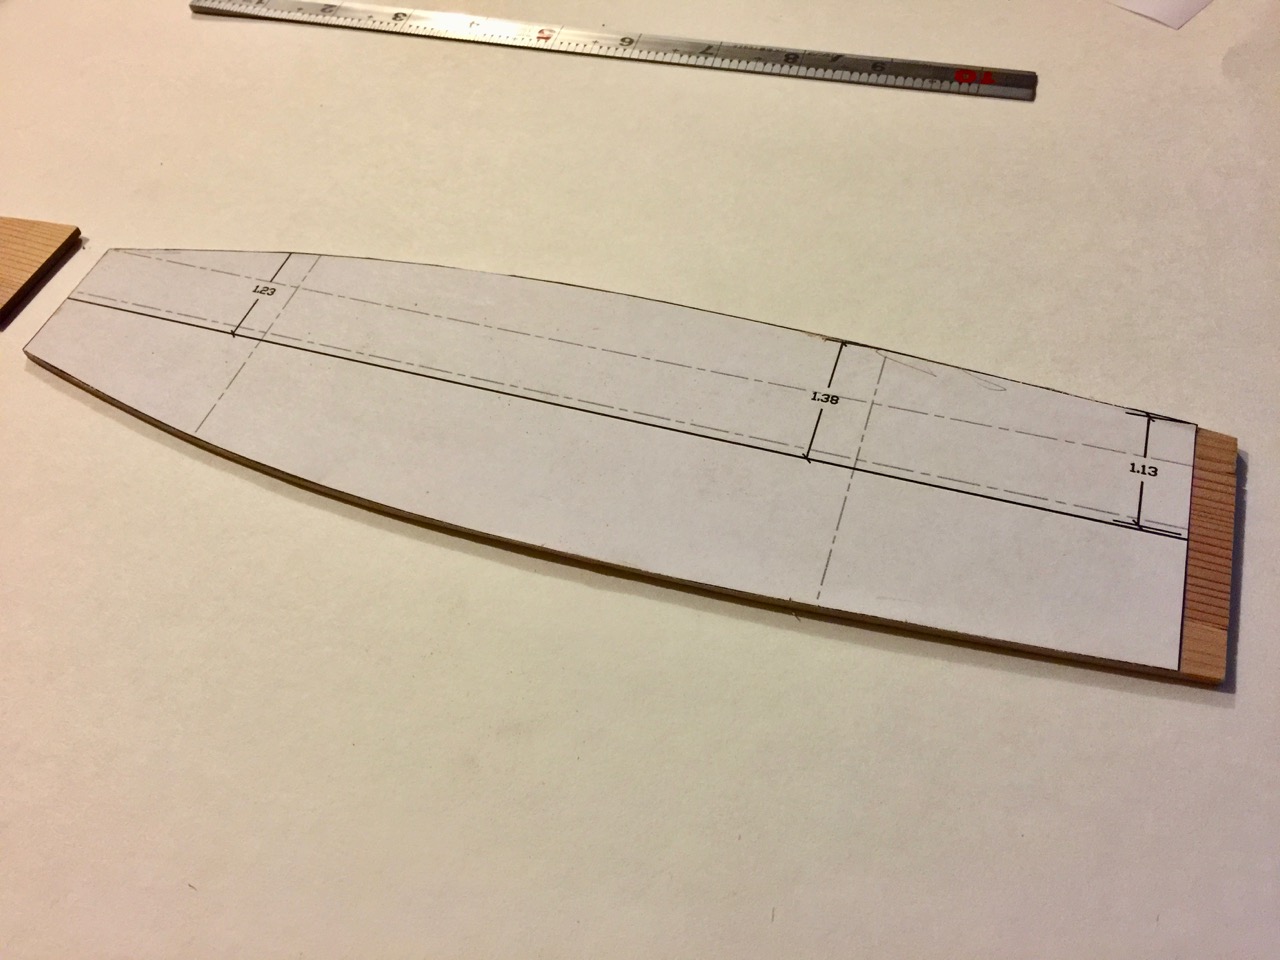
From building the Hozugawa-bune and the Bekabune, I learned that a card stock pattern is the best way to get the shape of the lower edge of the lower plank. Taping the cardboard into place, I used a pencil to mark the outer line where the bottom and the lower plank came in contact. Then, measuring the width of the station lines in the Paris drawings, I marked out the points on the cardboard template and drew in the curve of the upper edge of the plank.

Continue reading

Building the Urayasu Bekabune Model – Final

At the bow was the first challenge of cutting a small square hole for the small beam at the bow. I made sure my chisel was good and sharp and lightly cut the shape, little by little. Too much pressure can chip or split the wood, particularly on the back side of the cut, so this took a lot of care.

With the first hole cut to size, the alignment of the opposite hole was aided by running the beam into place to see where it lined up. It was then cut in the same manner.

Continue reading

Building the Urayasu Bekabune Model – Part 4

With the uwadana (ウワダナ) cut to shape, there was still the process of giving them a perfect fit, so there’d be no gaps between the planking. In real Japanese boatbuilding, according to Douglas Brooks, this would involve sawing in the seam in a process called suri-awase. In my case, it’s mostly sanding where the planks touch, until the planks touch all along the length of the seam.

To make sure I was consistent on aligning the planks, I drew a small pencil mark to register the proper positions.


Once I was satisfied that the fit was good, I glued and clamped the planks into place. I used yellow carpenters glue. I know instant CA glue would be easier, but it will soak into the Japanese cedar too easily. And, since I’m not going to be applying any wood finish, the glued wood would stand out like a sore thumb.

Continue reading

Building the Urayasu Bekabune Model – Part 3

After shaping the transom, or todate, and completing the test fitting, I glued the lower planks, or kajiki into place, using Original Titebond wood glue for gluing everything together. I prefer this glue, as it sets up quickly, and is easily cleaned up with water. Also, Japanese cedar shows CA glue stains very easily, where yellow carpenter’s glue does not. Everything was held in place with clamps and rubber bands, as I described in my previous post.

It was critical at this stage too make sure that the stem was perfectly straight, as the pressure from the clamping can impart a twist. The stem extension of the framework mold helped out a lot here, giving something to which I could clamp the stem, or miyoshi.

Continue reading

Building the Urayasu Bekabune Model – Part 2

It took me a long while before I had any hull planking in place, as I considered ways to work on the model with no frames. I also wanted try to figure out a way to build the model as closely as I could to the way the Japanese boatbuilders did it, which is upright, and not on a mold. So, my model actually sat for quite a while.

When I went to Japan, in September of 2016, and visited the museum in Urayasu, I saw that the model builders there had made a special L-shaped fixture that the model rested on with the stem supported by the leg of the “L”.

Continue reading

Building the Urayasu Bekabune Model – Part 1

The Urayasu bekabune was my first foray into scratch building a model of a traditional Japanese boat or wasen. I chose the subject because of my contact with American boatbuilder Douglas Brooks, who has been studying Japanese boatbuilding methods from Japanese master boat builders for more than a 15 years. This particular boat was the subject of Brooks’s second apprenticeship. He had made some preliminary drawings and made available to me in exchange for some help I provided in getting him signed on as a guest speaker at the Nautical Research Guild conference in Mystic, Connecticut, in 2015.

Bekabune appears to be a term used in multiple regions, generally referring to a small structured-hull boat built with thin planks. The origin and exact meaning of the term is unknown, though there are some ideas that the term refers to the sound of water hitting against the relatively thin planking of this boat.

Those interested in getting more information on this boat should check out the section on it on Douglas Brooks’s website. And, I highly recommend purchasing his book Traditional Japanese Boatbuilding, which provides a tremendous amount of background on the subject, and it details Brooks’s five apprenticeships with Japanese master boatbuilders, including his work on the Urayasu bekabune. The book is also written in a style that makes it a joy to read.

book_cover Continue reading

Building a Gozabune (Kobaya) from Paris Plans – Part 1

Kobaya-bune (小早船), or simply, kobaya , is a term for a type of military-style traditional Japanese vessel that was fast and maneuverable. The size of the boats labeled kobaya, which translates literally to “small, fast,” seem to vary widely. I have seen boats called kobaya that had as few as 6 oars, and larger ones that had 24 or more oars, but my access to details on these warcraft is limited.

The largest warships were called atakebune. They were big, slow, lumbering craft with a castle-like structure atop. The mid-sized warships were called sekibune, and sometimes called hayabune, or fast boats, ostensibly because they were faster than atakebune. War boats smaller than this seem to have all been classed as kobaya.

During the Tokugawa period (A.K.A. Edo period), which began in 1603, daimyo were forbidden to have atakebune. During the time of relative peace, the smaller warships, most commonly sekibune, were turned into gozabune (御座船), highly ornate and brightly painted vessels used by daimyo and their clans for ceremonial and other official purposes.

A gozabune of the Hachisuka clan of Tokushima prefecture.

Continue reading

Building a Hozugawa Ayubune Model in 1/10 Scale – Final

This is the completion of my 1/10-scale model of the 15-shaku ayubune. This began with the cutting of the beams. I made the smallest beam at the bow, called the tsunatsuke, 1.5-sun square. The other two main beams I made 3-sun wide and 2.5-sun thick. I didn’t have any sugi of the necessary thickness, so I had to use two pieces glued together. I put the seam on the side of the beam in hopes that would make it less visible.

I used the beams as a guide to help me size the cutouts in the hull, which I cut with my Japanese Hishika, Super Fine Cut Saw, that I got from Zootoyz. It worked really well for this.

I found a supplier with the exact same saw in the U.S., but the cost for the saw was more than what Zootoyz charges, even when you add the international shipping. The one thing with this saw is that it cuts so easily, you have to be careful not to cut too much. For the final trimming of the notches, I used a scalpel.

First, I notched out the hull for the bow platform, called the omoteamaose, and the stern platform, called the tomoamaose. These were the easiest to deal with, since they are at the ends of the boat. So, I dealt with these first.

It was simple enough to add the omoteamase using a 3mm wood. I pre-cut the piece to roughly the correct size by inserting the piece into place and tracing out the extents in pencil. I could then glue the piece into place and sand away any excess using a large sanding block. Continue reading

Building a Hozugawa Ayubune Model in 1/10 Scale – Part 5

Progress continues with my 1/10-scale model of the 15-shaku boat used on the Hozu river, northwest of Kyoto. I’m 6 months into the build, but I have certainly not spent a great deal of time in actual construction. Mostly, I’ve been contemplating how I was going to accomplish each task of the build. Things are progressing quickly now.

Ayubune model with former clamped to the baseboard fixture

With the new fixture holding things in place, I taped a piece of cardstock into place to trace the shape of the hull planking. I rough marked the outlines of the bottom, bow plank, and transom on it. The planking will be cut oversized, so getting the exact shape isn’t really necessary, except to make sure that the wood I cut is large enough, but not too wasteful of my limited wood supply.

Next, I cut four straight strips of 3mm sugi on my table saw about 1 shaku wide and 16.5 shaku long. There are two hull planks on each side of the boat, but unlike many other wasen designs, the planks fit flush together, so the sides of the boat are perfectly flat. So I glued up the planks into two side-by-side pairs.

Continue reading

Building a Hozugawa Ayubune Model in 1/10 Scale – Part 4

Something I didn’t mention last time was that I had cut a paper pattern for the shiki and rubber-cemented it to the assembled . I then cut the wood to the pattern. Since the plans I have show the lines to the inside of the planking, I left the pice a little long at the aft end, as the bottom extends slightly beyond the transom.

Shiki with pattern, and cut to shape, with extension at the aft end

The final pieces are ready for assembly. As on the real boat, the hull planks will be shaped in place. Note that I also cut mortises for the bow plank, which I’m told is called the omote no tate ita. I’m going to have to find the kanji to make sure I know what this really means. The same goes for the transom, or tomo no tate ita, but in other regions is called the todate.

Continue reading